Building The Kinetics Harrier GR.1/GR.3 : 1/48 Scale : Intermediate Step By Step Video Build

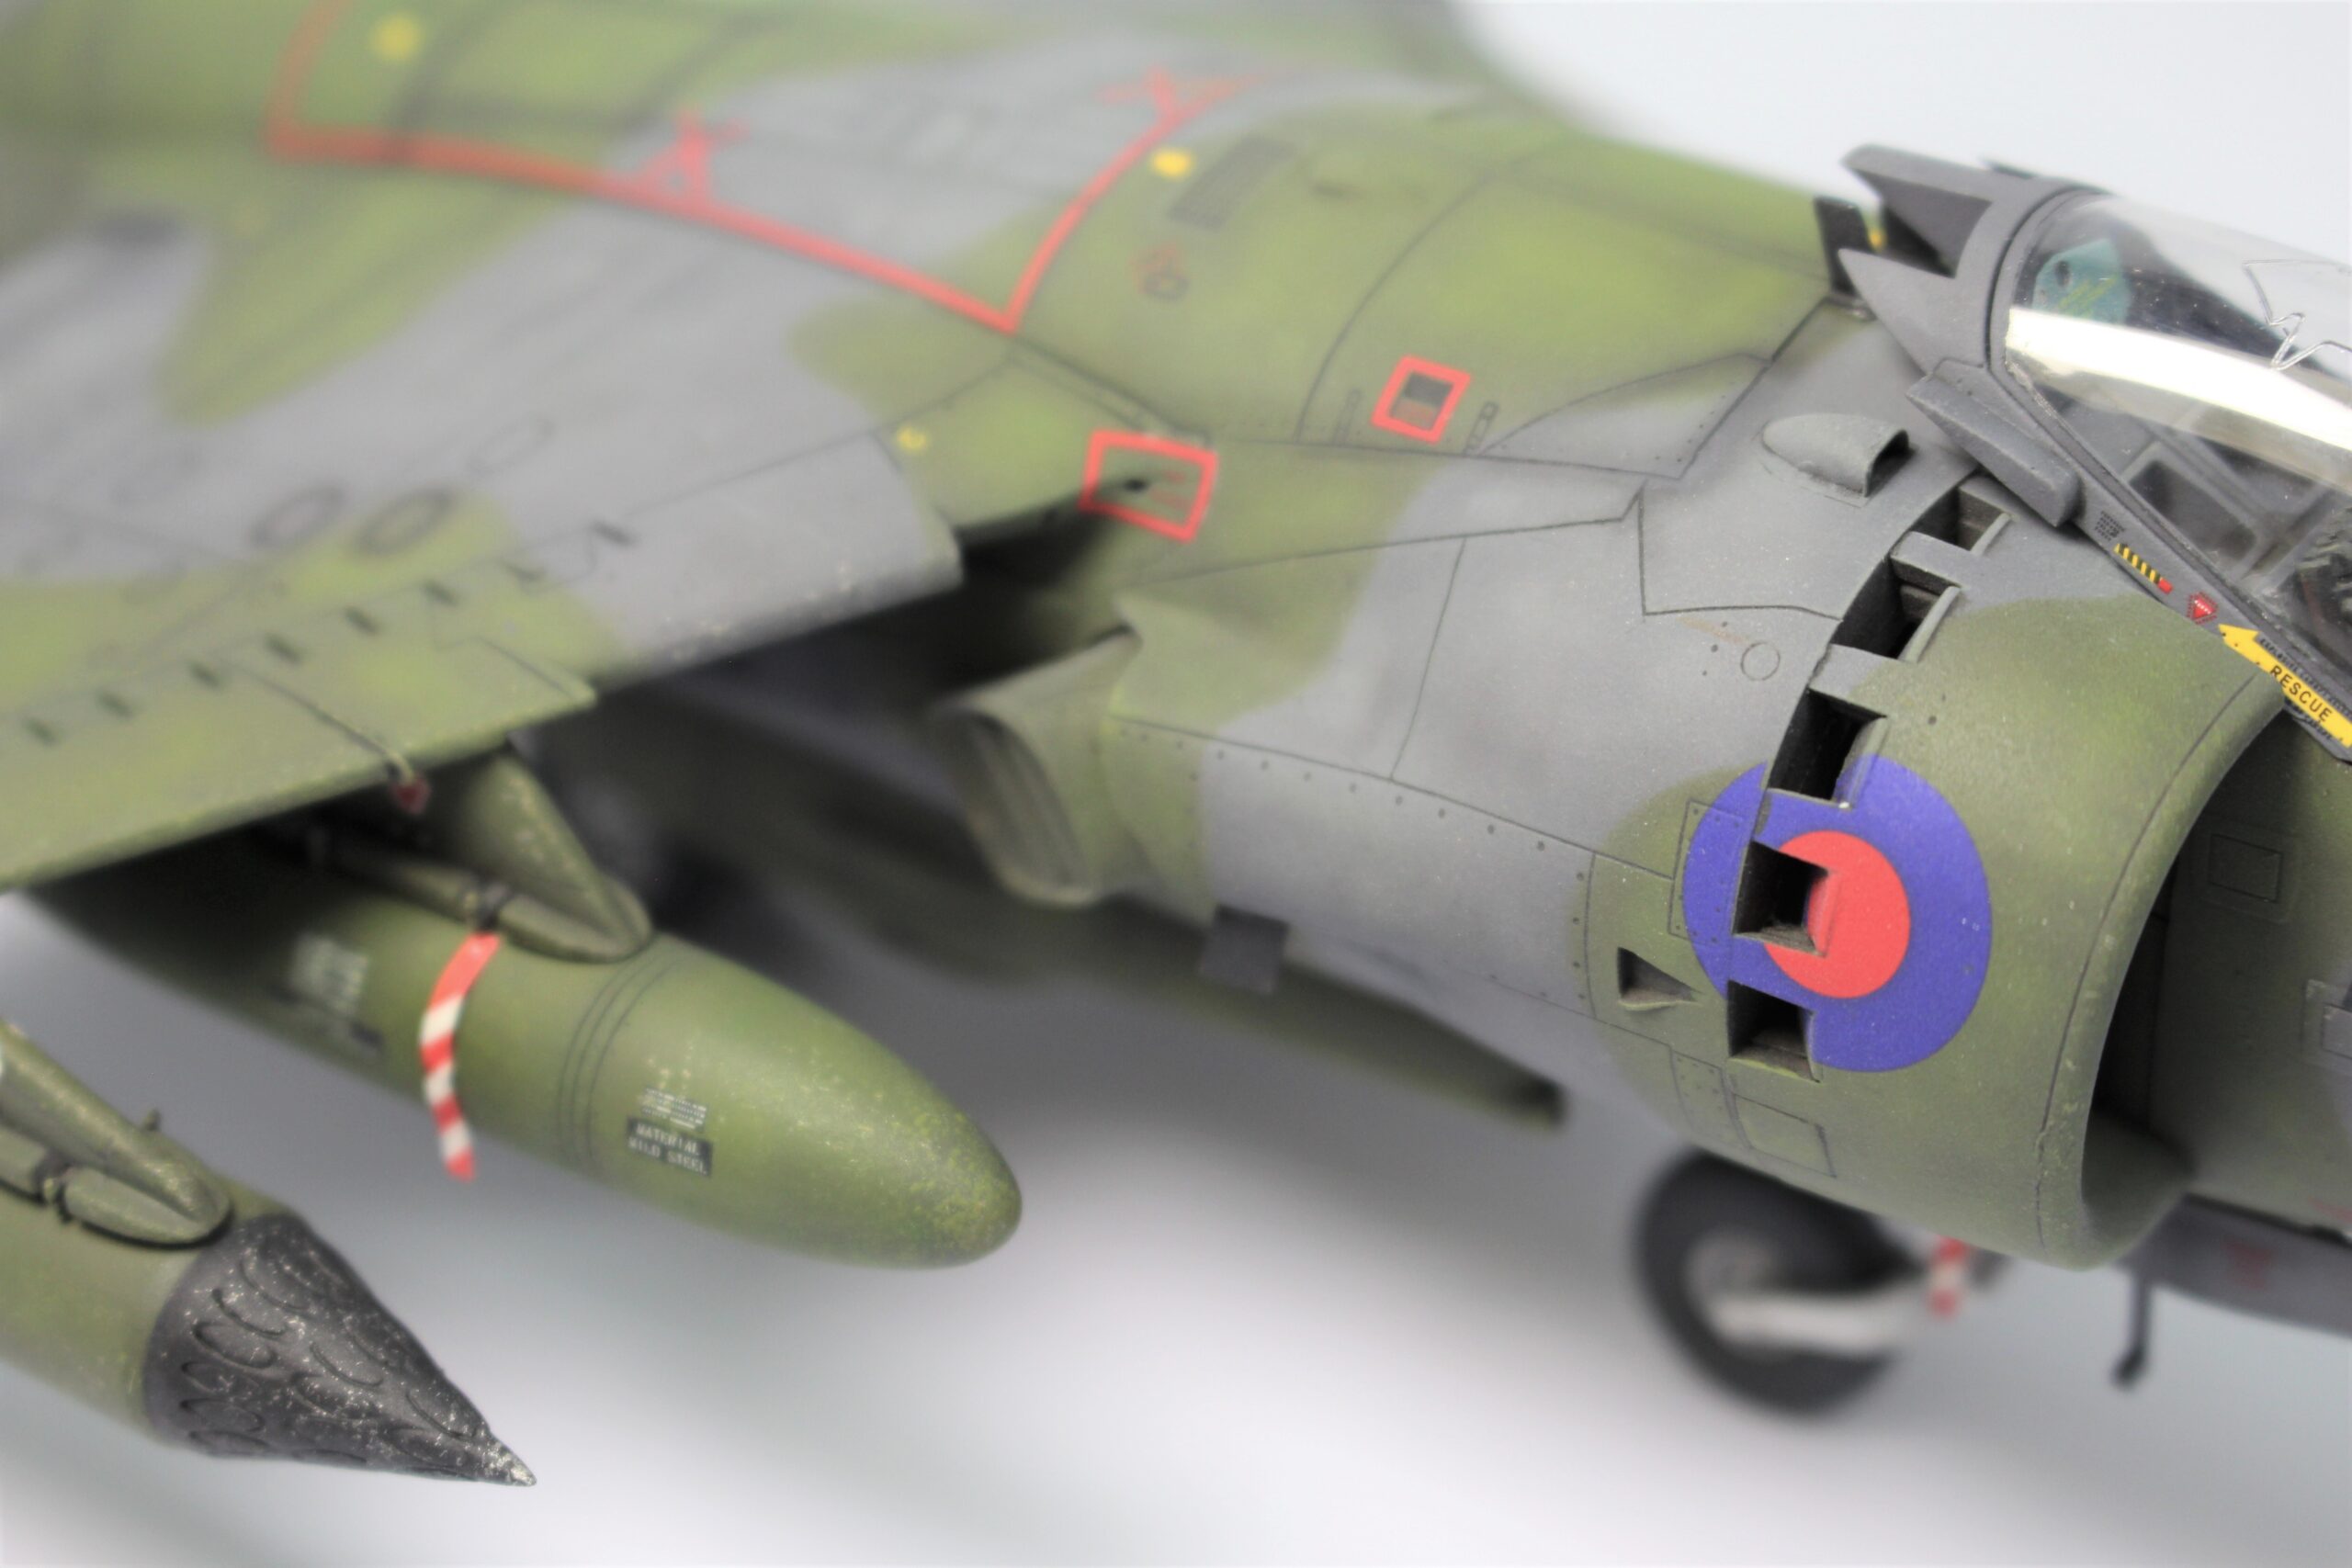
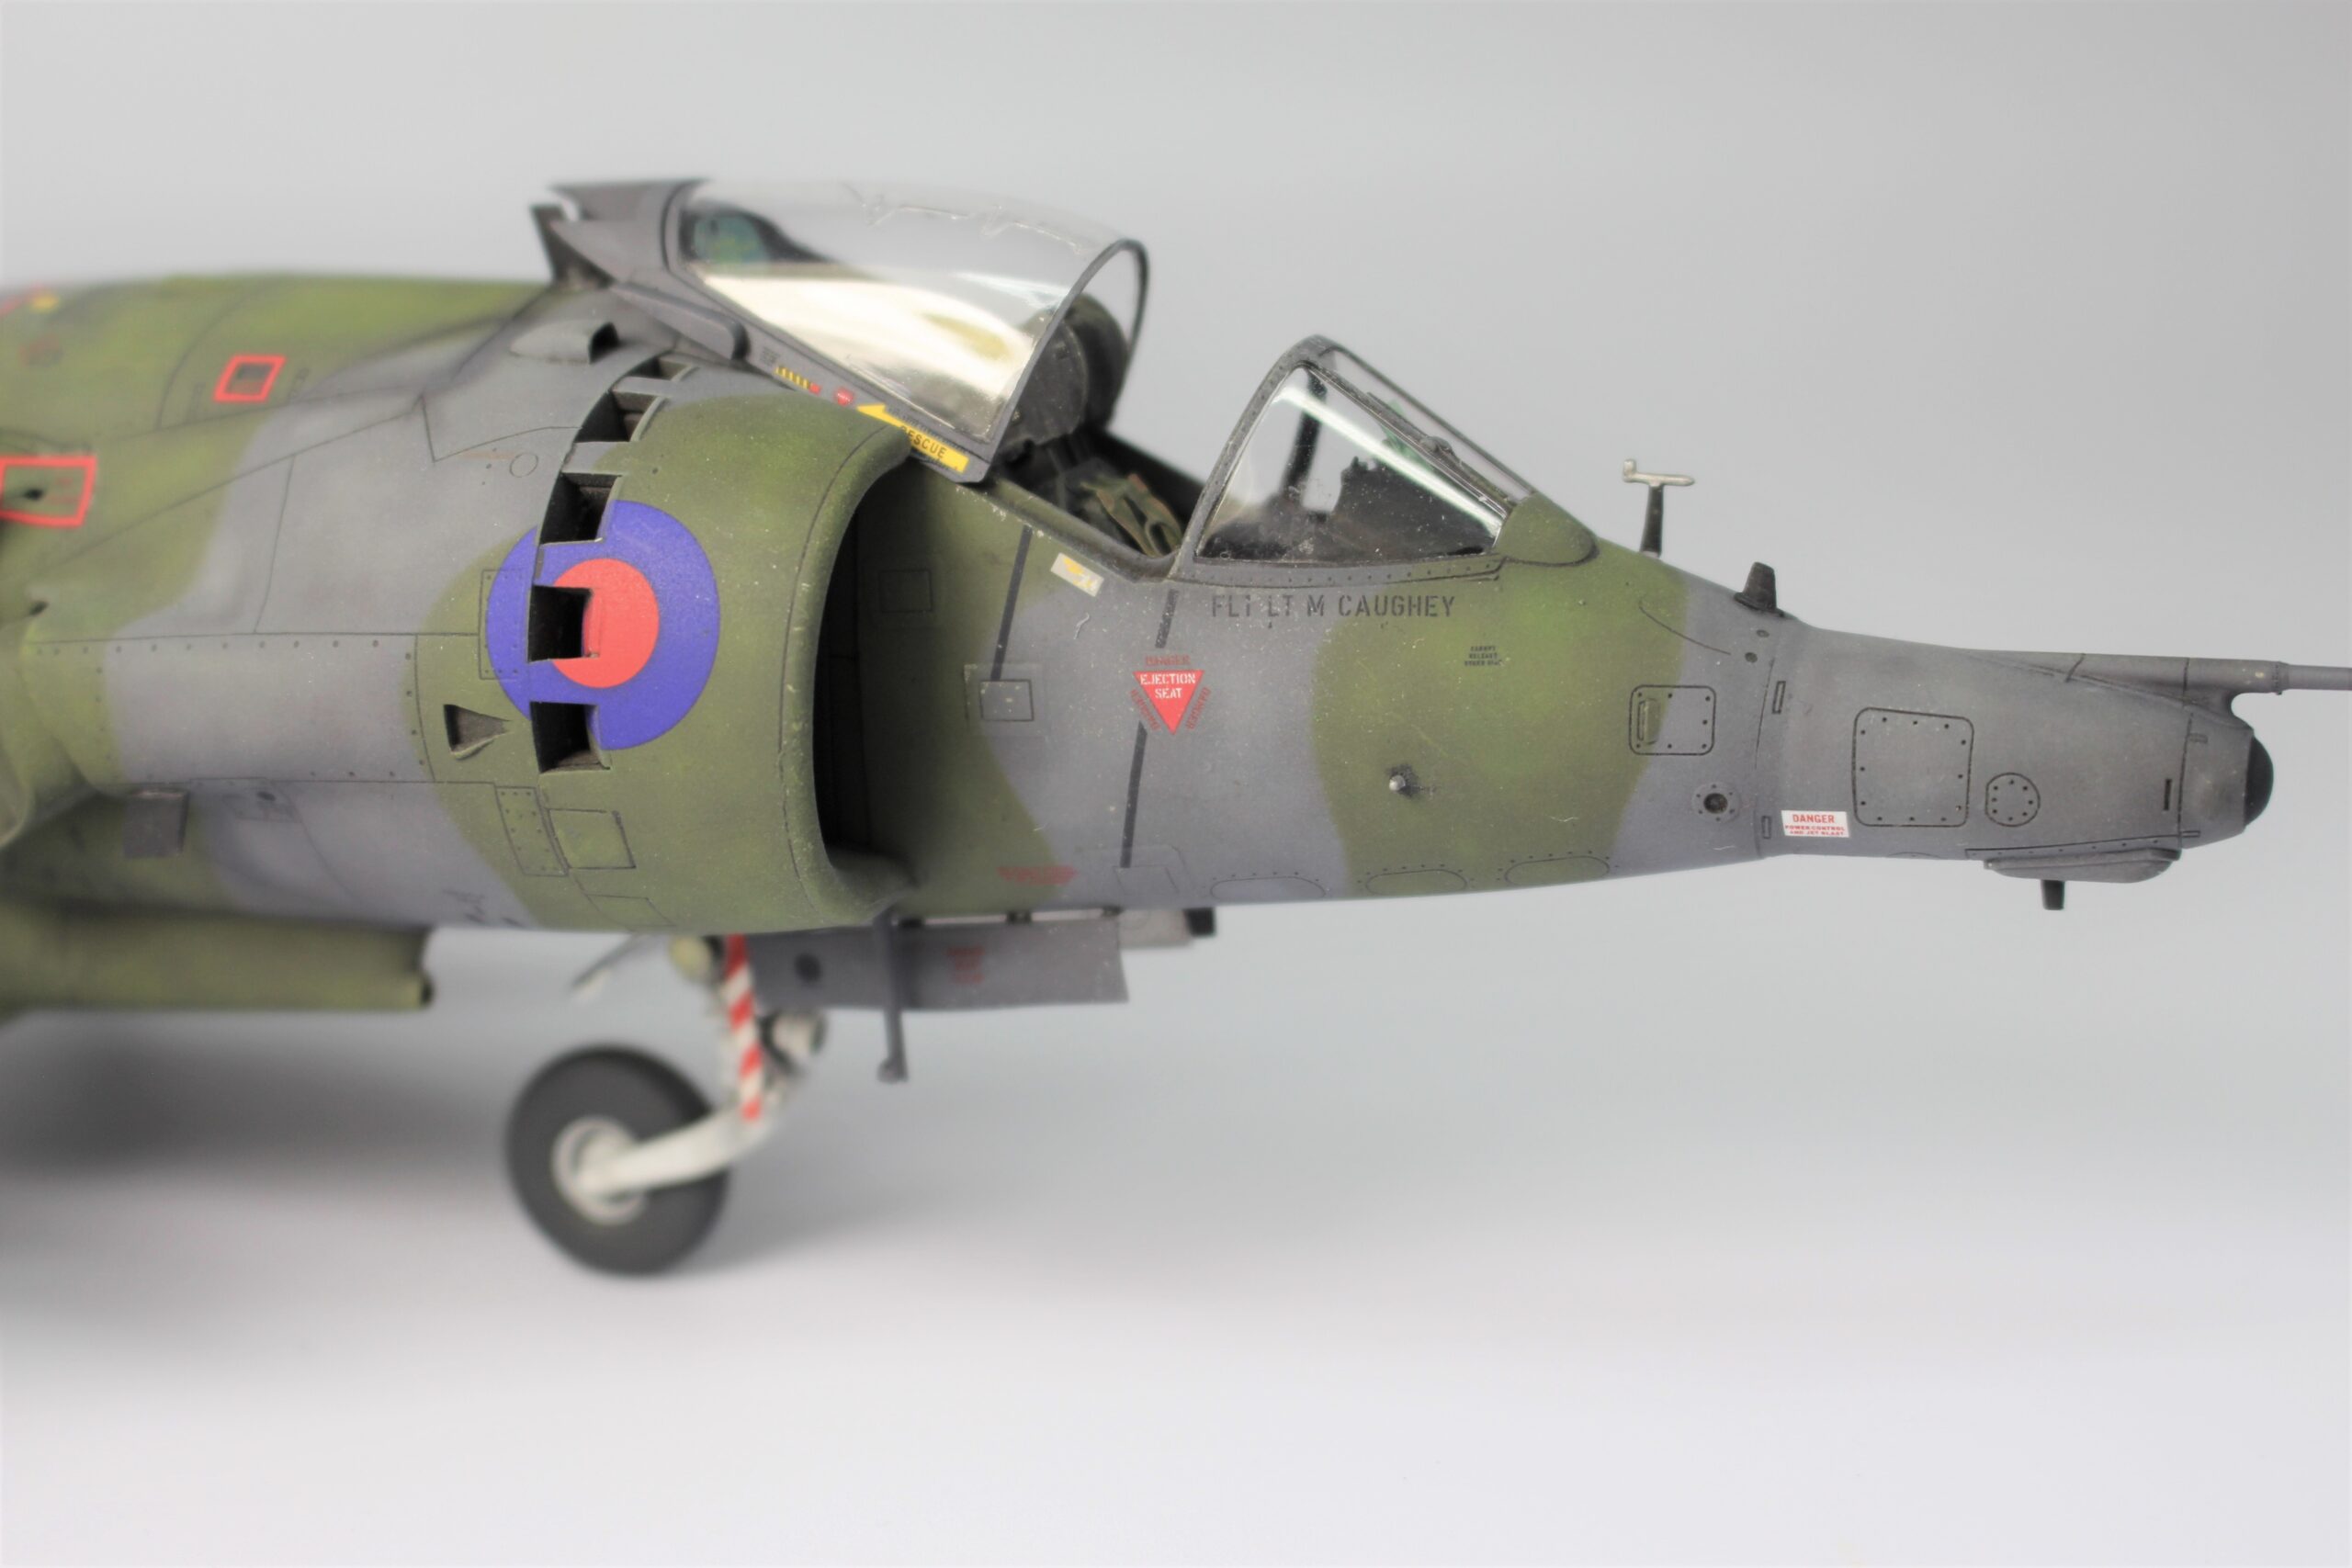
Harrier GR.1/GR.3
- Manufacturer: Kinetics
- Scale: 1/48
- Step By Step Level: Intermediate
- Presented By: Bobby waldron
- Number of Episodes: 24
- Camera Angels: 4
- Camera Definition: Full HD + 4K
- PE Parts Used: Yes
- Painting Mask Used: Yes
- Resin Parts Used: No
- 3D Decals: Yes
- Kit Used No: K48060
The Hawker Siddeley Harrier is a British military aircraft. It was the first of the Harrier Jump Jet series of aircraft and was developed in the 1960s as the first operational ground attack and reconnaissance aircraft with vertical/short takeoff and landing (V/STOL) capabilities and the only truly successful V/STOL design of that era. The Harrier was developed directly from the Hawker Siddeley Kestrel prototype aircraft, following the cancellation of a more advanced supersonic aircraft, the Hawker Siddeley P.1154. The British Royal Air Force (RAF) ordered the Harrier GR.1 and GR.3 variants in the late 1960s. It was exported to the United States as the AV-8A, for use by the US Marine Corps (USMC), in the 1970s.
During the Harrier’s service the RAF positioned the bulk of the aircraft in West Germany to defend against a potential invasion of Western Europe by the Warsaw Pact forces; the unique abilities of the Harrier allowed the RAF to disperse their forces away from vulnerable airbases. The USMC used their Harriers primarily for close air support, operating from amphibious assault ships, and, if needed, forward operating bases. Harrier squadrons saw several deployments overseas. The Harrier’s ability to operate with minimal ground facilities and very short runways allowed it to be used at locations unavailable to other fixed-wing aircraft. The Harrier received criticism for having a high accident rate and for a time-consuming maintenance process.
In the 1970s the British Aerospace Sea Harrier was developed from the Harrier for use by the Royal Navy (RN) on Invincible-class aircraft carriers. The Sea Harrier and the Harrier fought in the 1982 Falklands War, in which the aircraft proved to be crucial and versatile. The RN Sea Harriers provided fixed-wing air defence while the RAF Harriers focused on ground-attack missions in support of the advancing British land force. The Harrier was also extensively redesigned as the AV-8B Harrier II and British Aerospace Harrier II by the team of McDonnell Douglas and British Aerospace.
In box review Here
Subscribe Now For Unlimited Video Access

Harrier GR.3 Rapid Video Build : Kinetic Model Kits : 1/48 Scale
Video not available - You need to be subscribed to view these videos

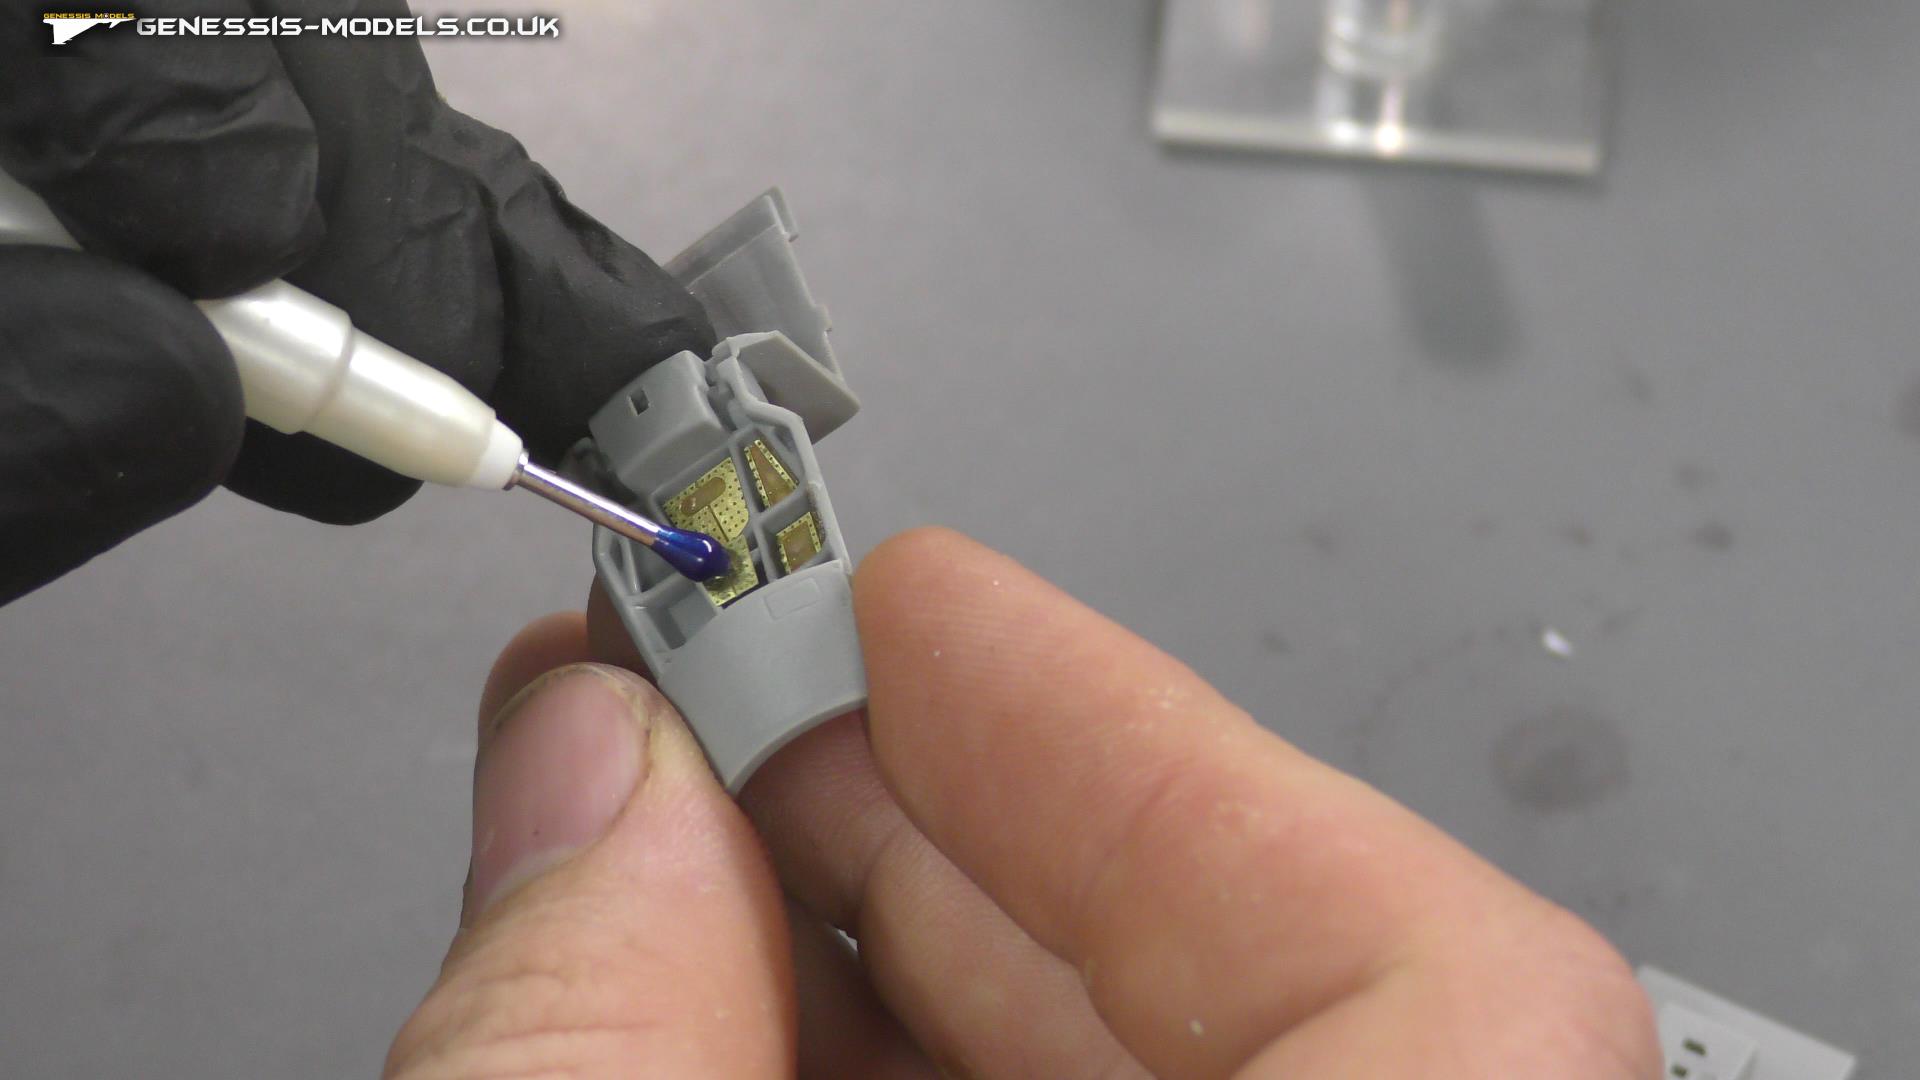
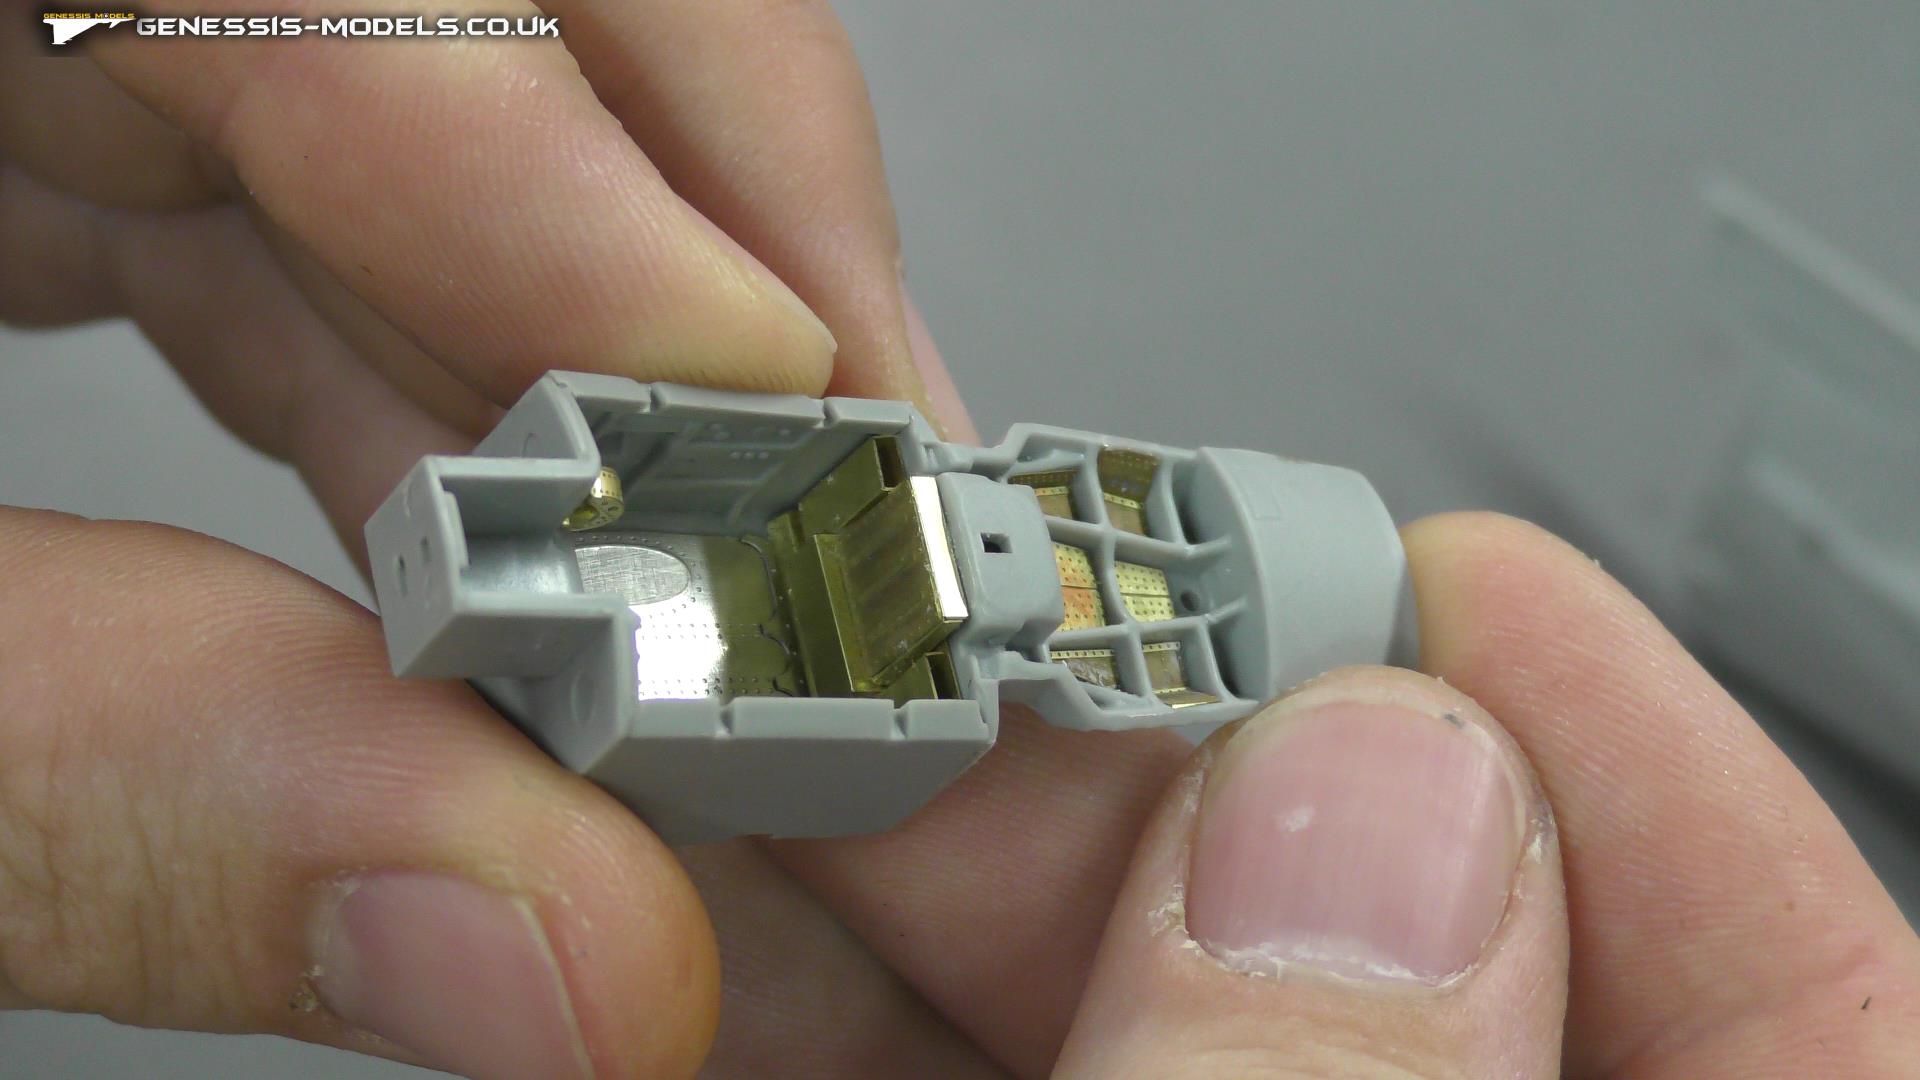
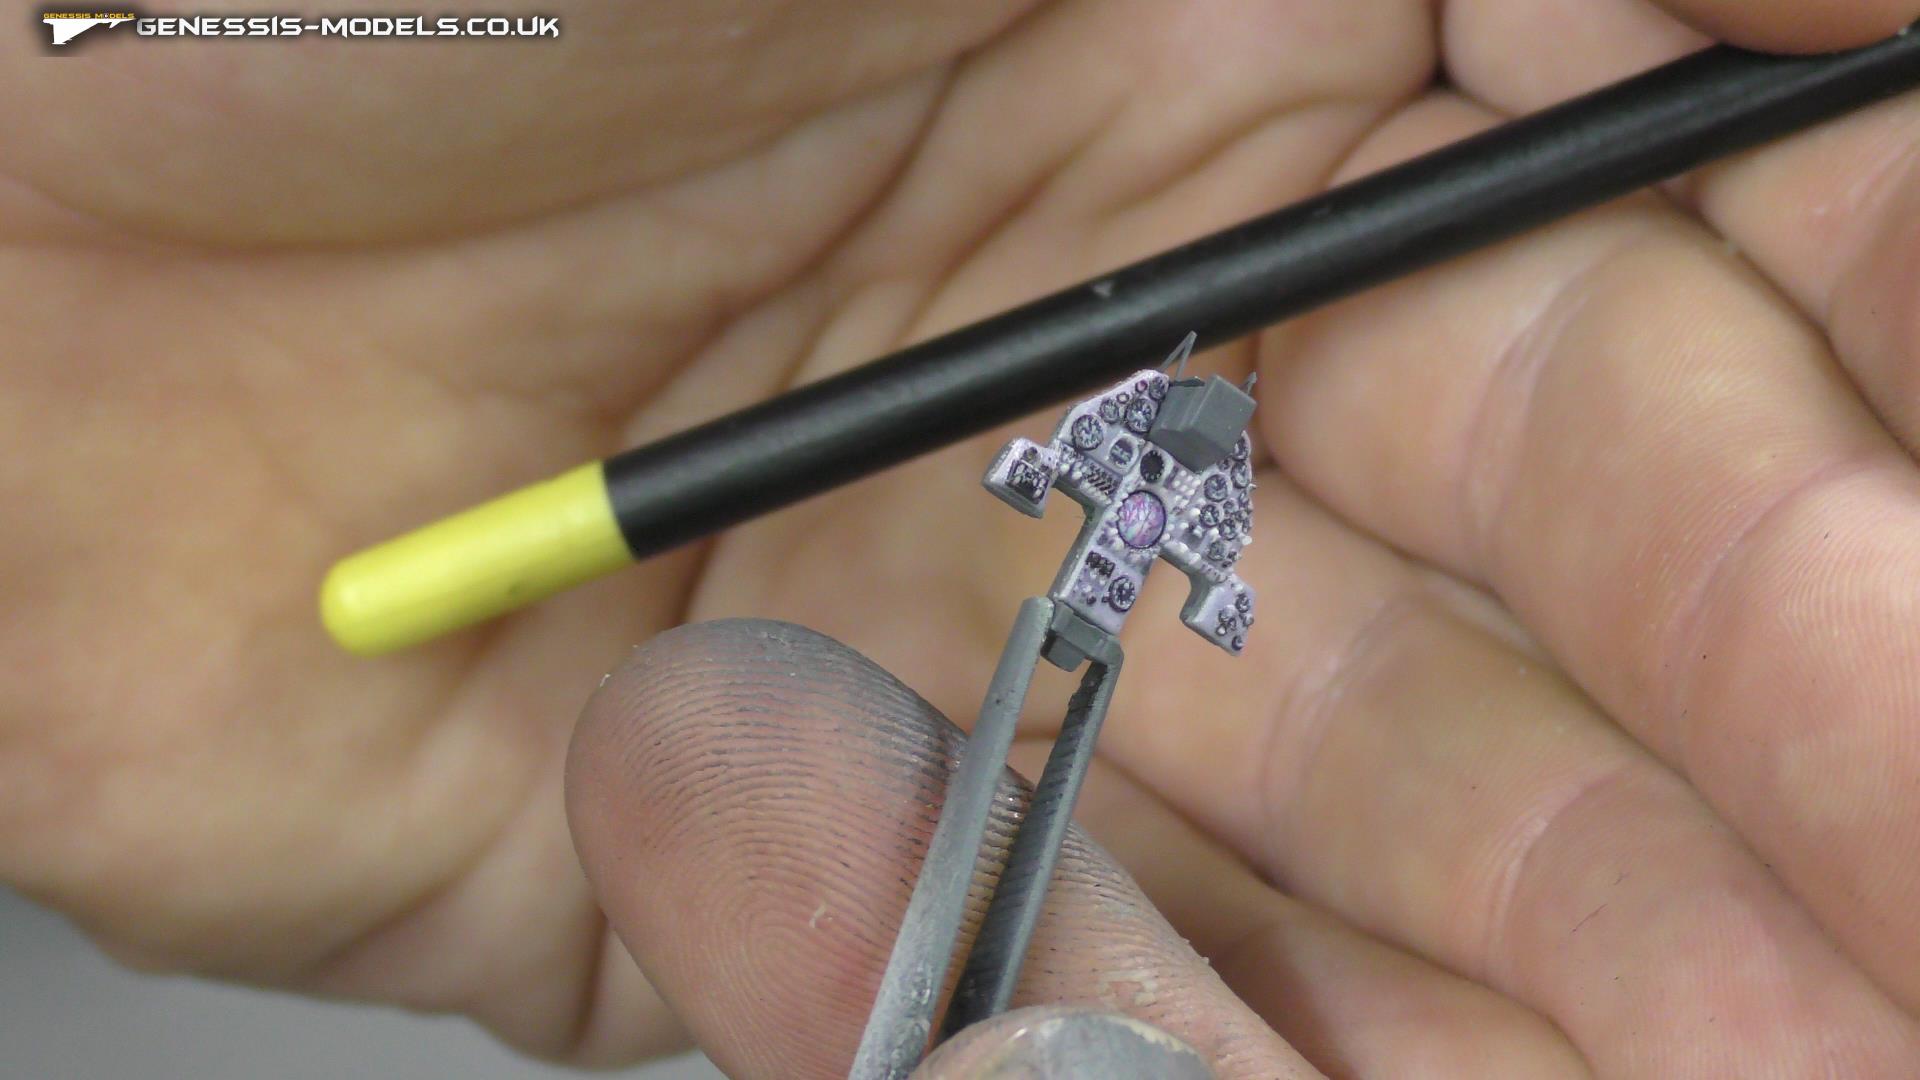
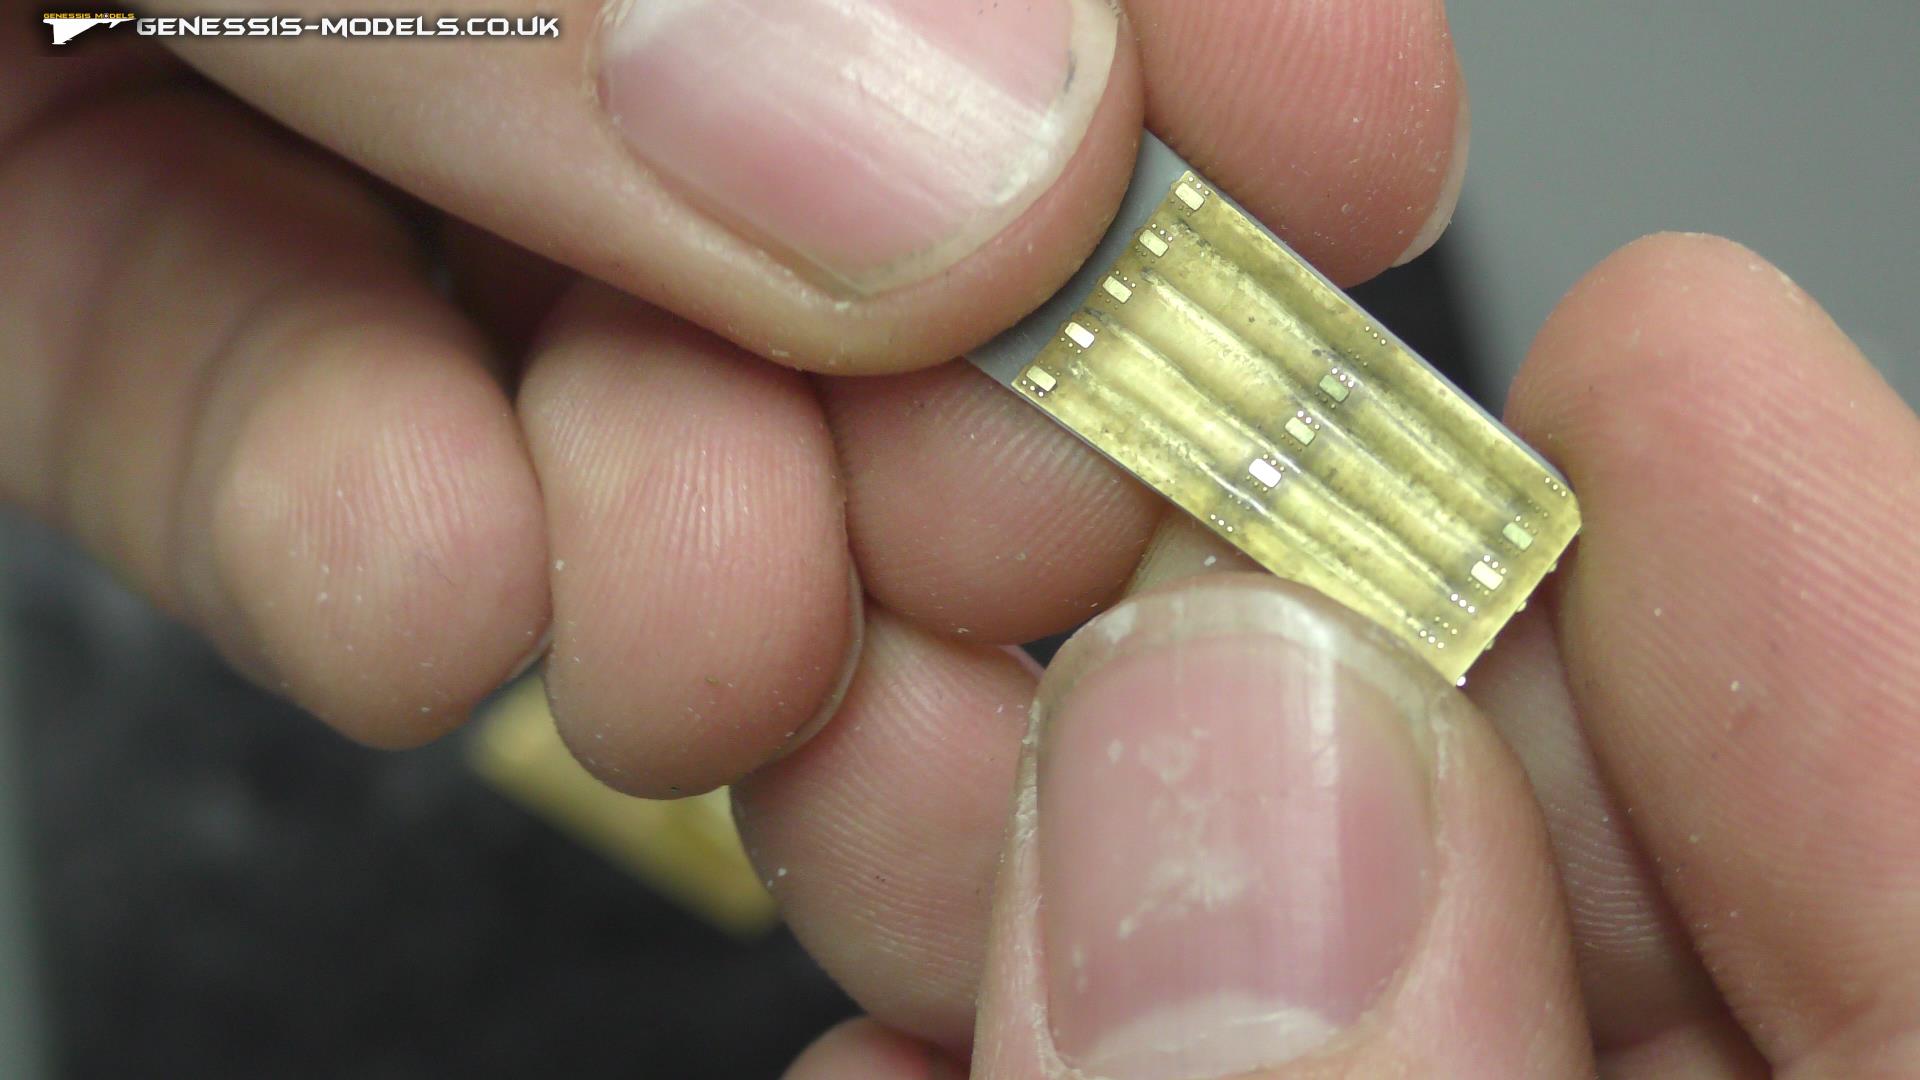
Photo-etch Madness : Building The Kinetics Harrier GR.1/GR.3 : 1/48 Scale : Video Build : Episode.1
We start a new build with the Kinetic model kits Harrier GR.1/GR.3, I’m going to be building the GR.3 variant, we also have lots of after market parts with this, lots of photo-etch and for the first time 3d decals, so lets get start with the photo-etch madness.
Special Tools: Trumpeter : Photo Etched Parts Bender : Large : 79x59mm
Consumables: Tamiya extra thin cement
Video not available - You need to be subscribed to view these videos
Scratch Building : Building The Harrier GR.1/GR.3 Kinetics : 1/48 Scale : Video Build : Episode.2
Moving along with episode 2, I begin to add some contact points for our 3d decals to be able to be laid down on using some spare photo-etch we have left over, I also begin scratch building the rear of the cockpit because kinetic did not add any there.
Special Tools: Eduard : Circles And Ovals Templates : Assorted Sizes
Consumables: Tamiya extra thin cement
Video not available - You need to be subscribed to view these videos
3D Decaling : Building The Harrier GR.1/GR.3 Kinetics : 1/48 Scale : Video Build : Episode.3
3D Decaling is what it’s about in this episode, but are they good or bad, is it better to stick with photo-etch, or maybe the Manufacturer “kits world” are just not up to the task, lets find out and get decaling, O and a bit more photo-etch to do as well.
Special Tools: Tamiya : Decal Tweezers
Consumables: Microscale : Micro Kristal Klear : Canopy Glue
Video not available - You need to be subscribed to view these videos
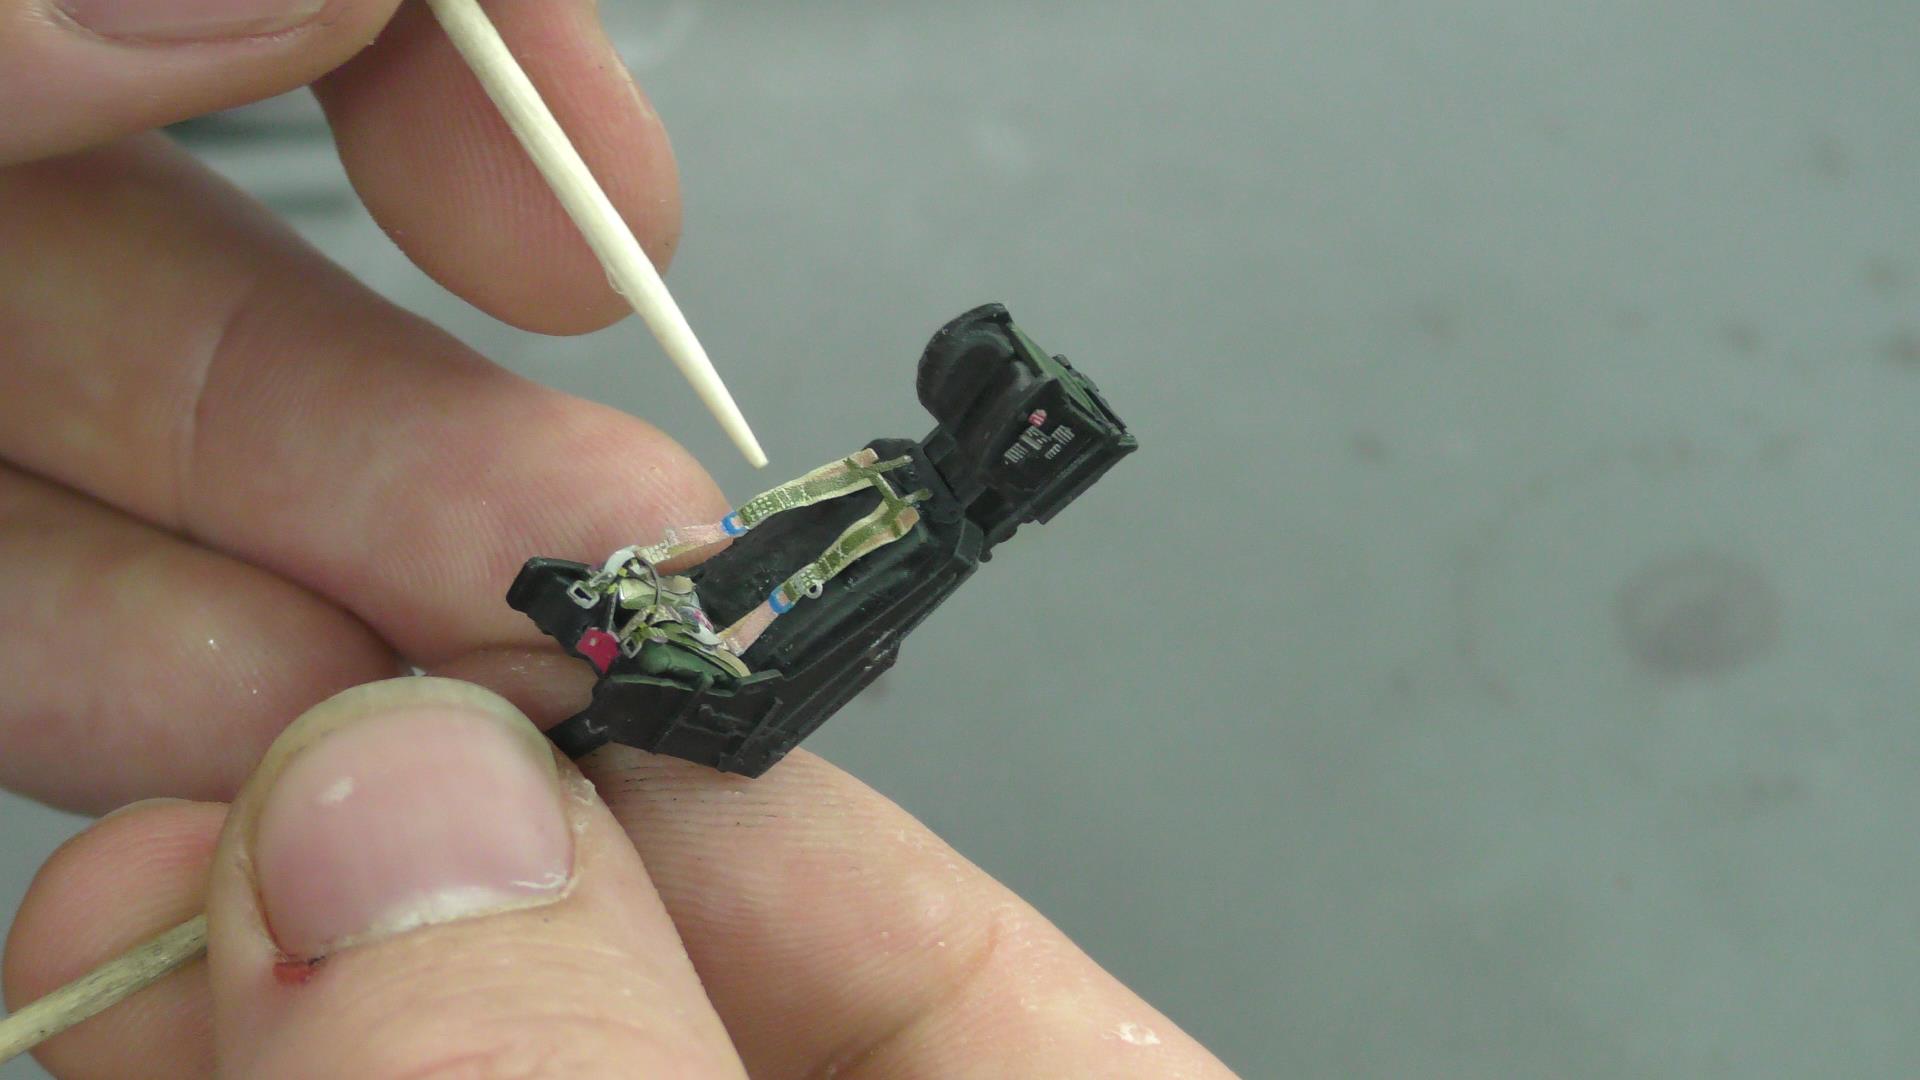
Weathering Cockpit : Building The Harrier GR.1/GR.3 Kinetics : 1/48 Scale : Video Build : Episode.4
With the 3d decals in place now, we can begin some painting, from basics to washes to highlighting, we will cover a bit of chipping and move along to adding photo-etch seat belts and then do oil wash weathering in the cockpit tube and ejection seat.
Special Tools: Trumpeter : Tweezers Set : 4 In Set
Consumables: Tamiya : Mini XF-85 Rubber Black : Acrylic
Video not available - You need to be subscribed to view these videos
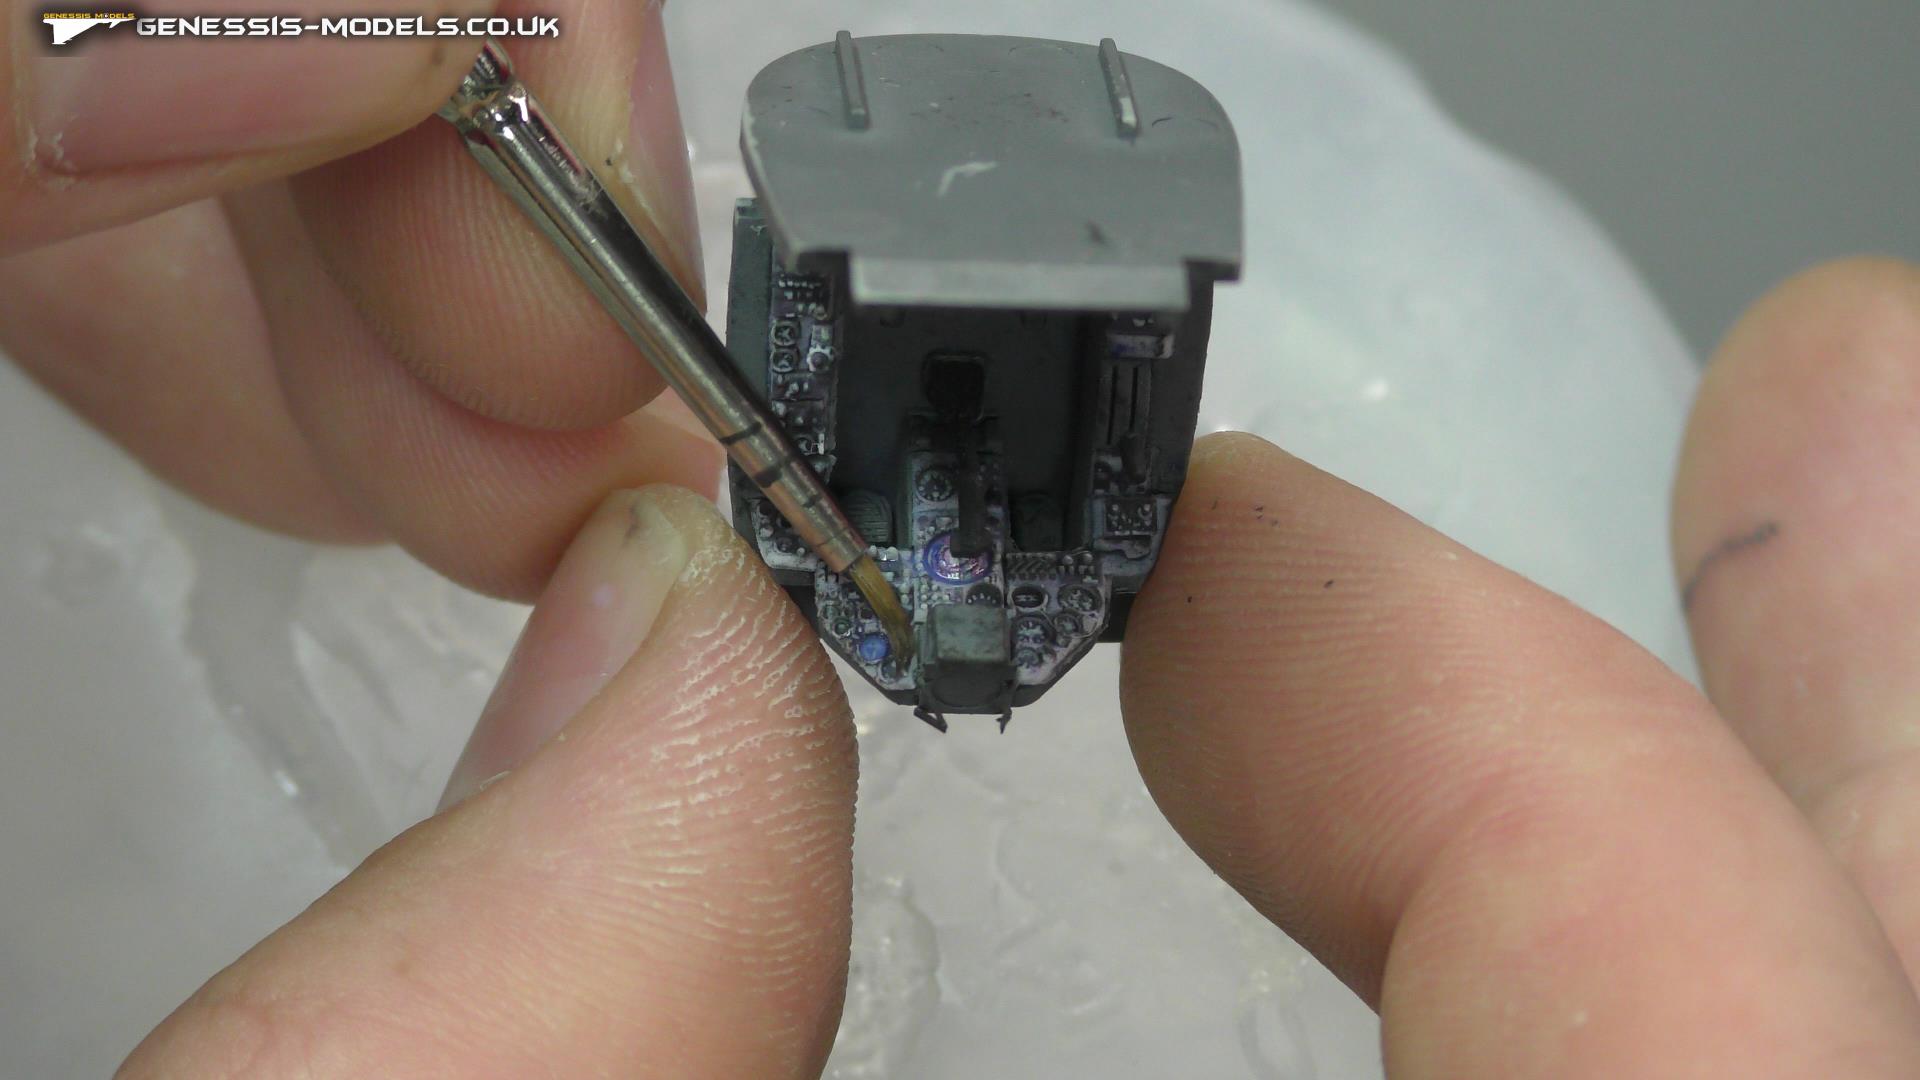
Final Cockpit Bits : Building The Harrier GR.1/GR.3 Kinetics : 1/48 Scale : Episode.5
Weathering the cockpit, is started by using ammo’s oil brushers, this time to bring out the finer details of the instrument panels and ejection seat, and to also give the hole cockpit a feathered dirty look, this is followed by adding a matt coat to bring all the areas together under one varnish.
We finish of the episode by making our glass areas on the instrument display panel look like glass by using AK Interactives Glass coat gauzy agent.
Special Tools: Mr Hobby : T-104 : Mr Color Thinner : Lacquer
Consumables: Mr Hobby : H-40 Flat Base Matte : Aqueous Hobby Color : Acrylic
Video not available - You need to be subscribed to view these videos
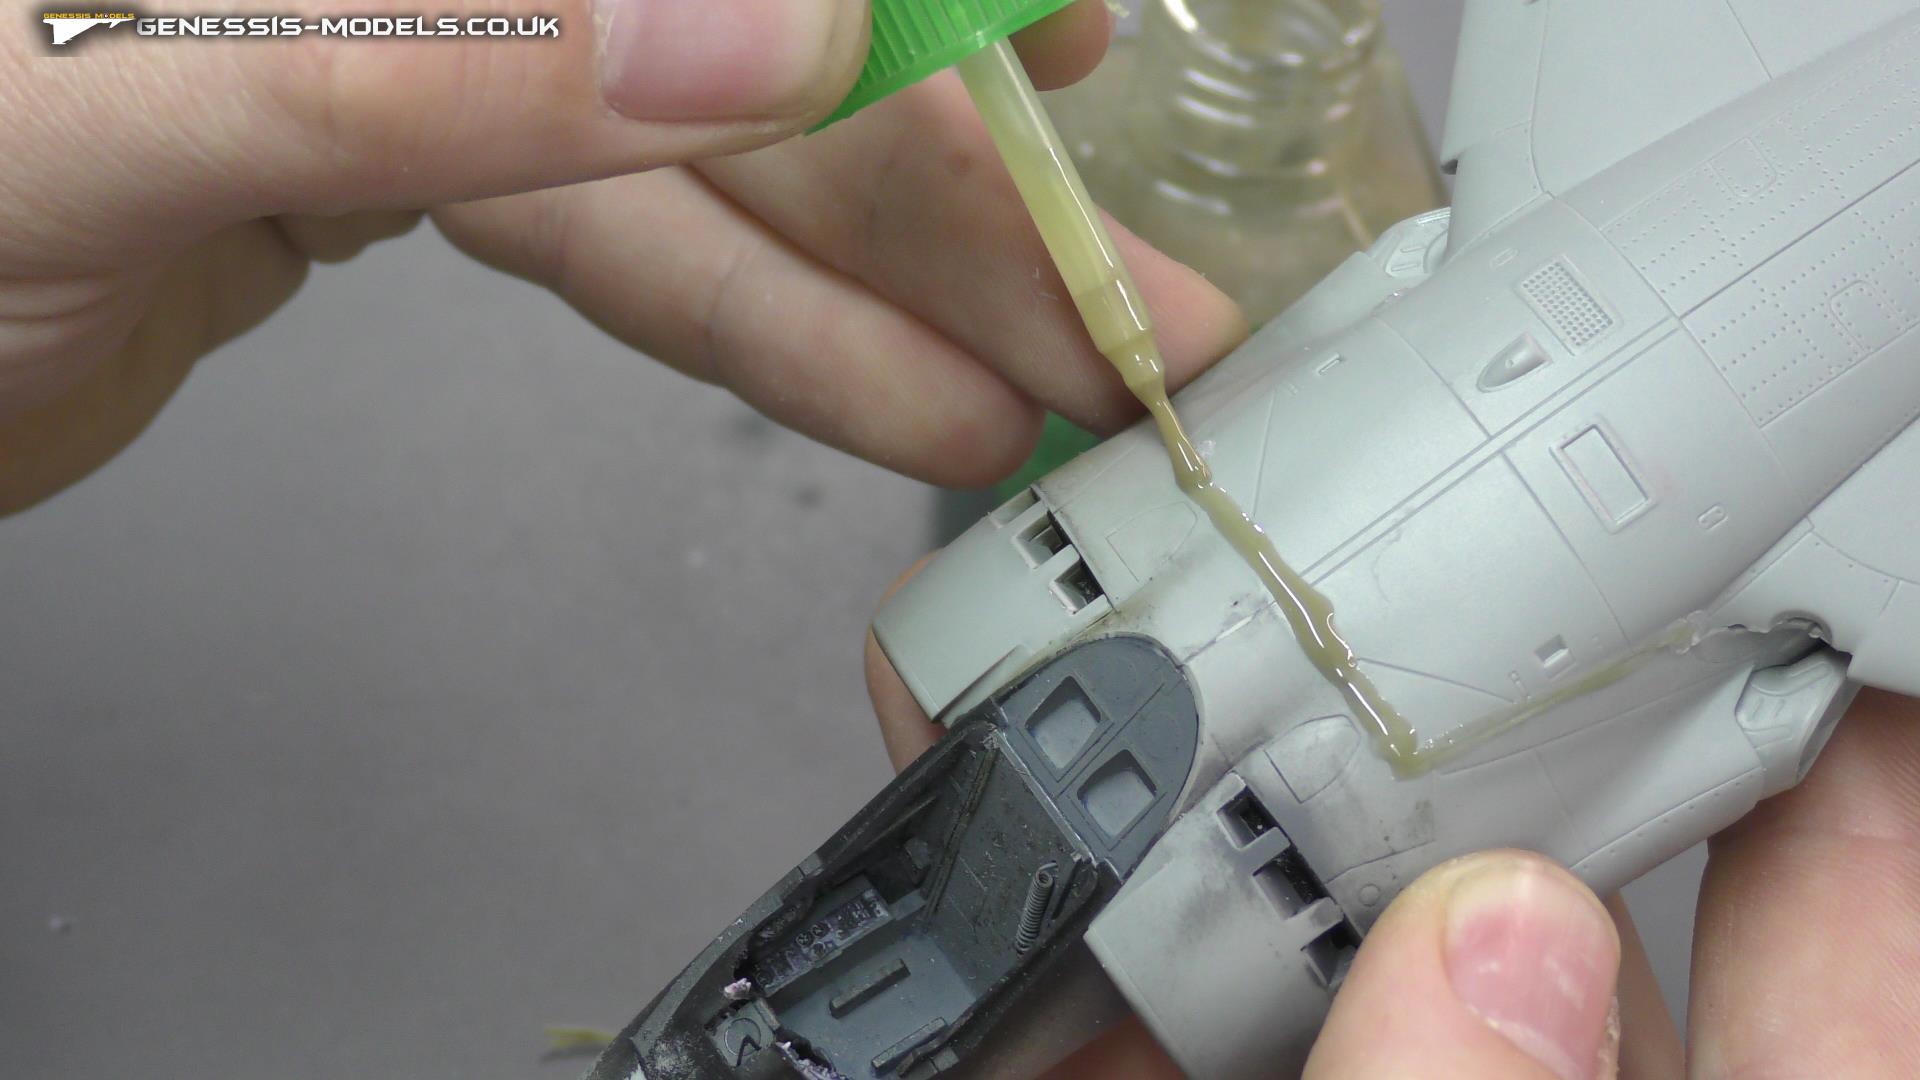
Fuselage Construction : Building The Harrier GR.1/GR.3 Kinetics : 1/48 Scale : Episode.6
In this episode we go over the fundamentals of bringing our fuselage together and to get the tricking moving engines to go in to our aircraft, we show you how to and what glues to use like Tamiya extra thin plus Mr.Cement SP Black.
MC132 Mr. CEMENT SP Black is a black colored Mr. CEMENT SP, so it has a fast drying speed and high adhesive strength.
This is a “BRUSH ON” type cement, so you must put together the plastic parts first, and then brush on the cement on the gap between the parts.
With this black colored cement, you can easily check to see how much cement is applied and if it has been applied evenly.
Not recommended to apply on white or light colored plastic surfaces because the cement will be visible. Use clear colored MC131 instead.
Special Tools: Shesto : G-Clamps And Magnet : X3
Consumables: Mr Hobby : Mr Cement SP Black : 40ml
Video not available - You need to be subscribed to view these videos
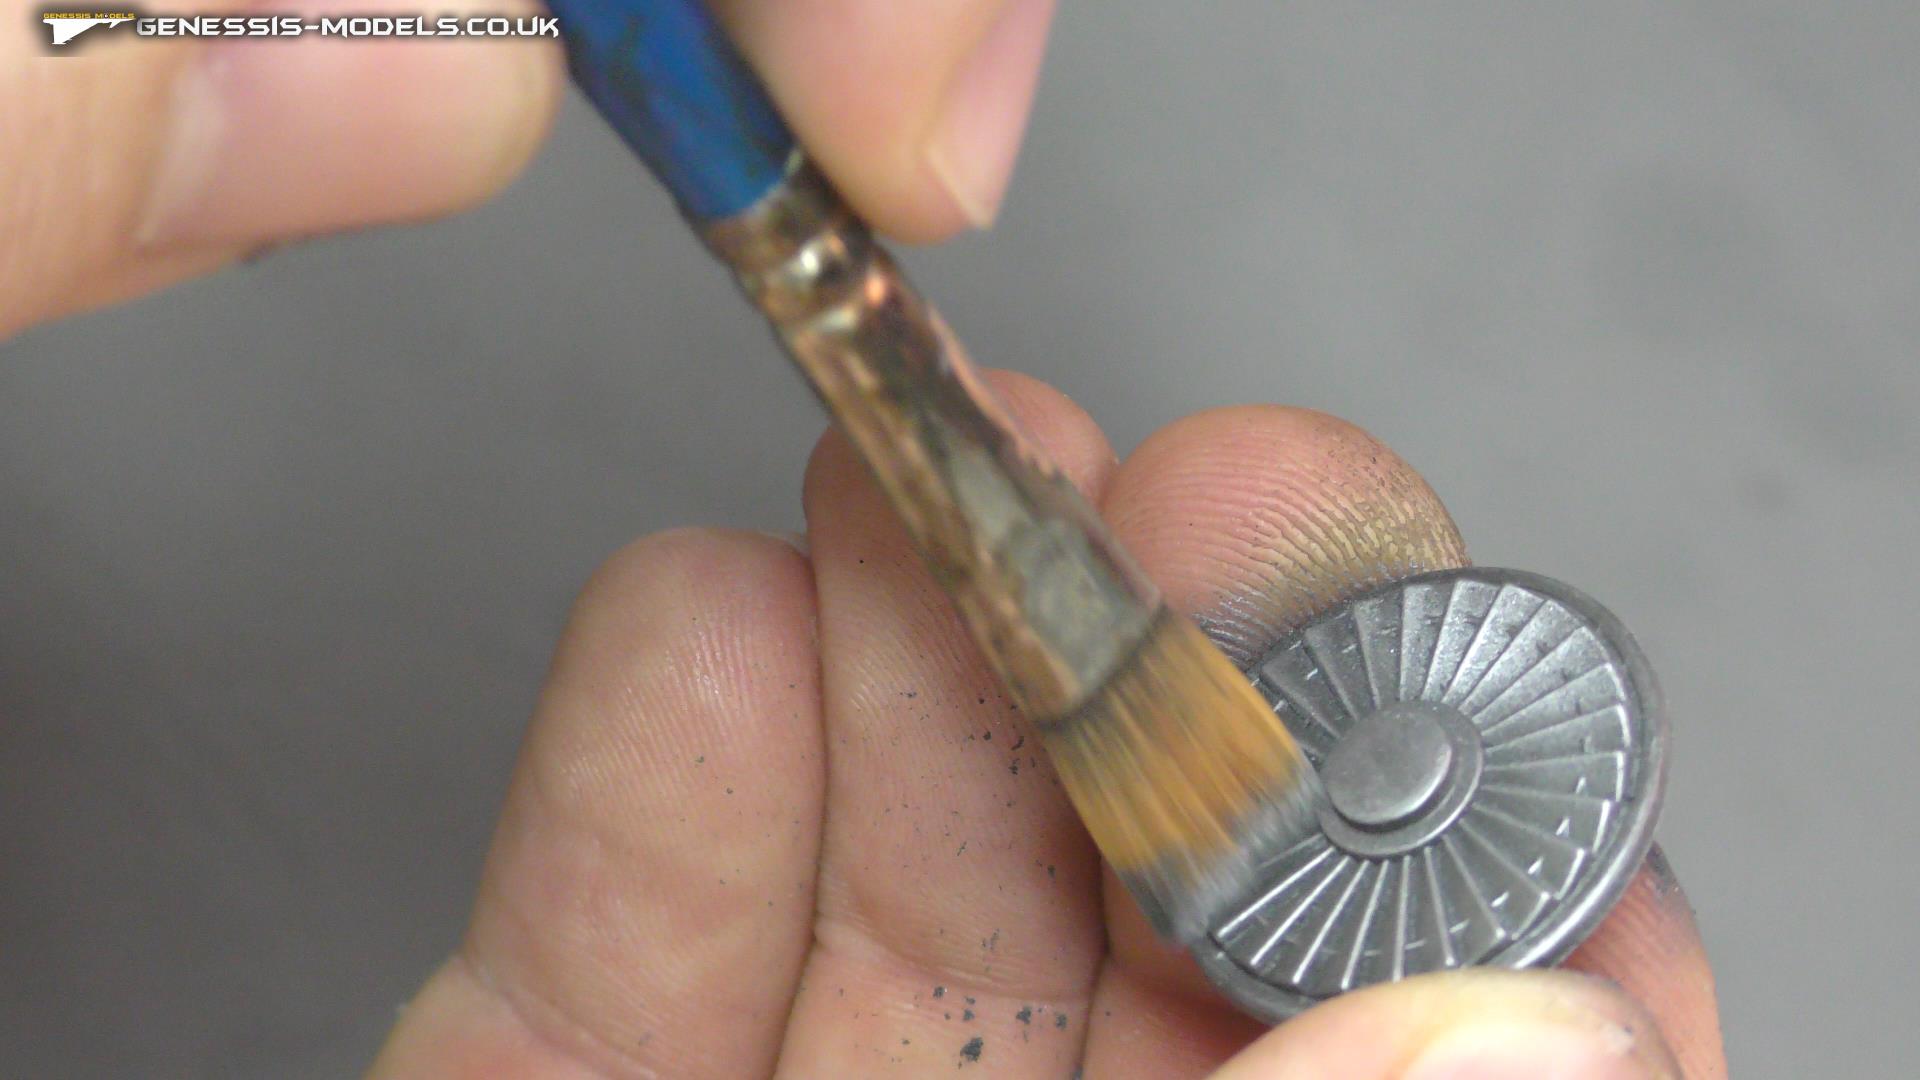
Metal Polishing Powder : Building The Harrier GR.1/GR.3 Kinetics : 1/48 Scale : Episode.7
With this Harrier by Kinetics, we need to spend a bit of time around the air intakes, so I will show you how to use some powdered buffable metal paints for our intake fans as well as making some mask for them too, we move along with getting the wings ready with some sanding and remove a nasty fingerprint mark.
Special Tools: Tamiya : Tamiya Extra Thin Cement : Quick-Setting : 40ml
Consumables: Mr Hobby : H-331 Dark Seagray BS 381C/638 GB Aircraft : Aqueous Hobby Color : Acrylic
Video not available - You need to be subscribed to view these videos
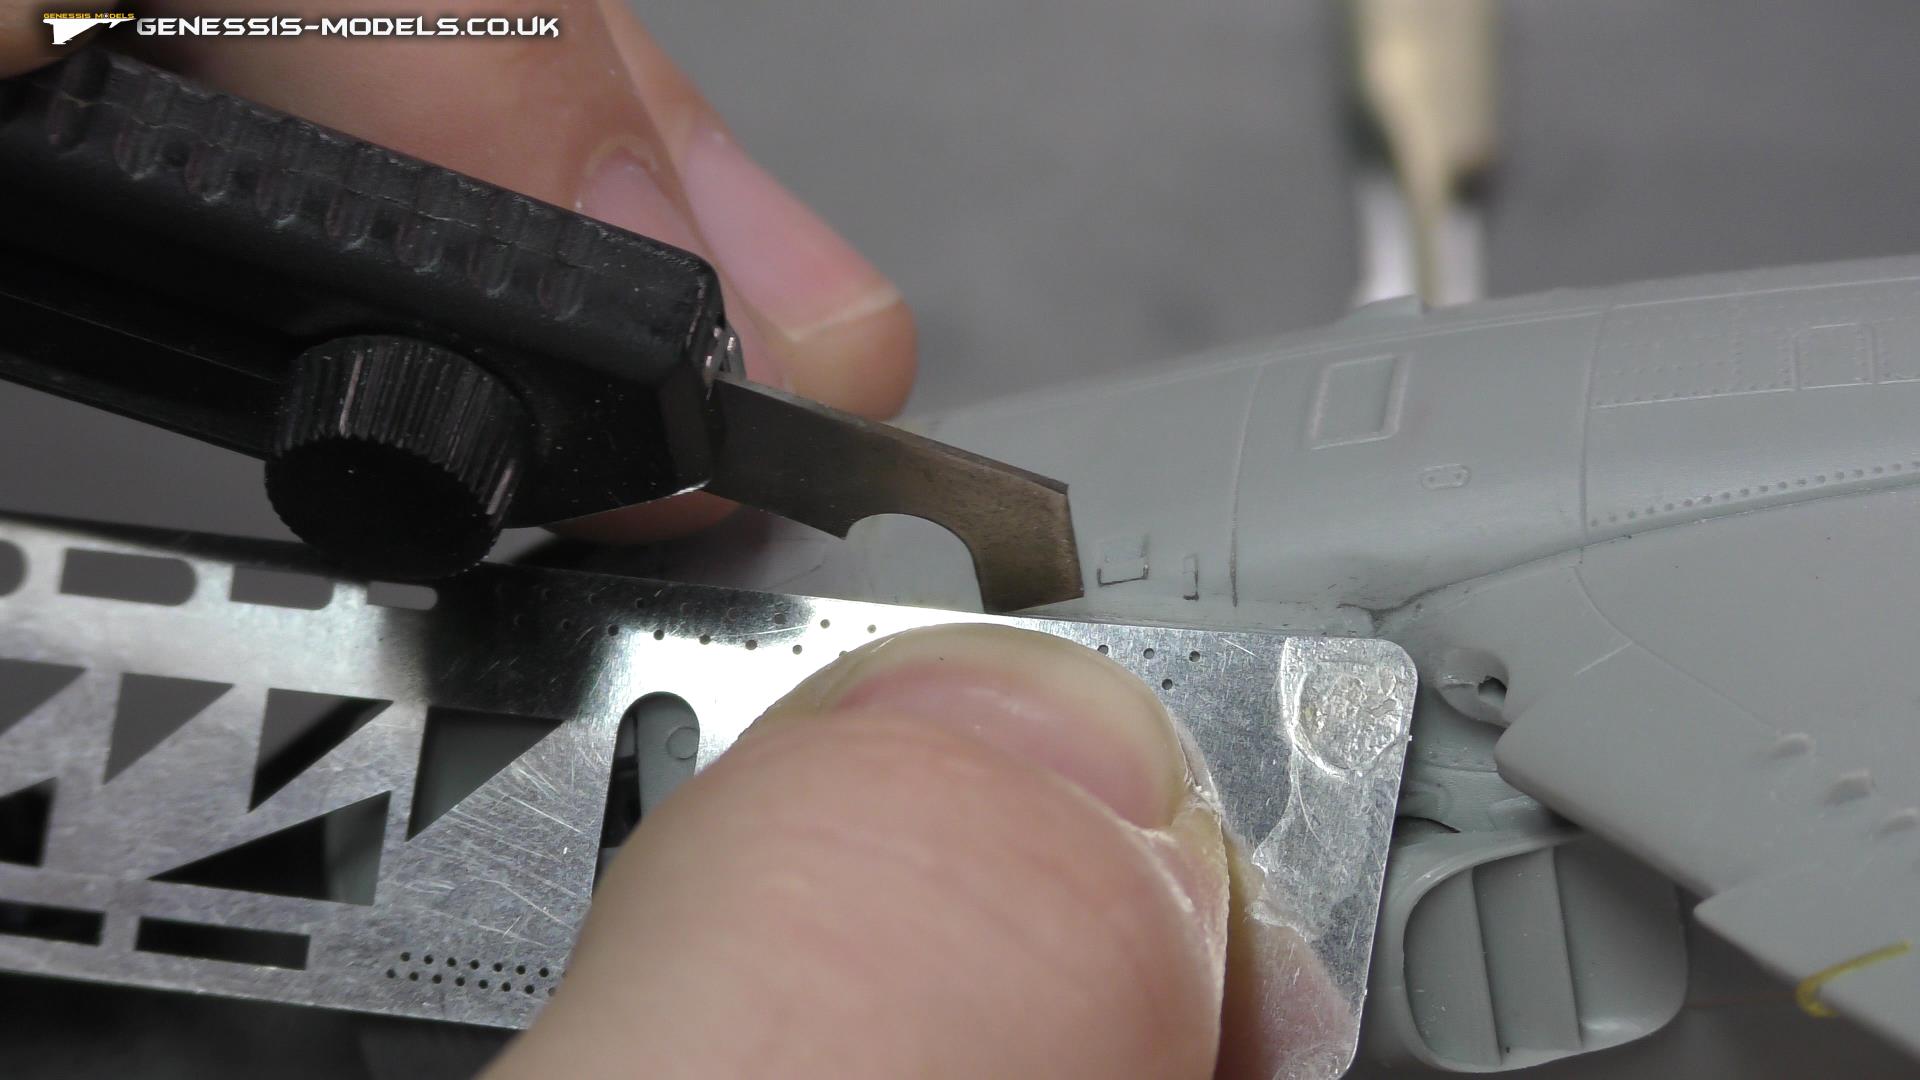
Building Engines : Building The Harrier GR.1/GR.3 Kinetics : 1/48 Scale : Episode.8
We tackle some more photo-etch where I explain in more detail than the instructions how to build the engine area, with some tips on dealing with flash, I also show you how to add photo-etch vortex generators in a nice secure good looking way.
Special Tools: CMK : Razor Saw Holder
Consumables: Mr Hobby : H-330 Dark Green BS 381C/641 GB Aircraft : Aqueous Hobby Color : Acrylic
Video not available - You need to be subscribed to view these videos
Advanced Gluing : Building The Harrier GR.1/GR.3 Kinetics : 1/48 Scale : Episode.9
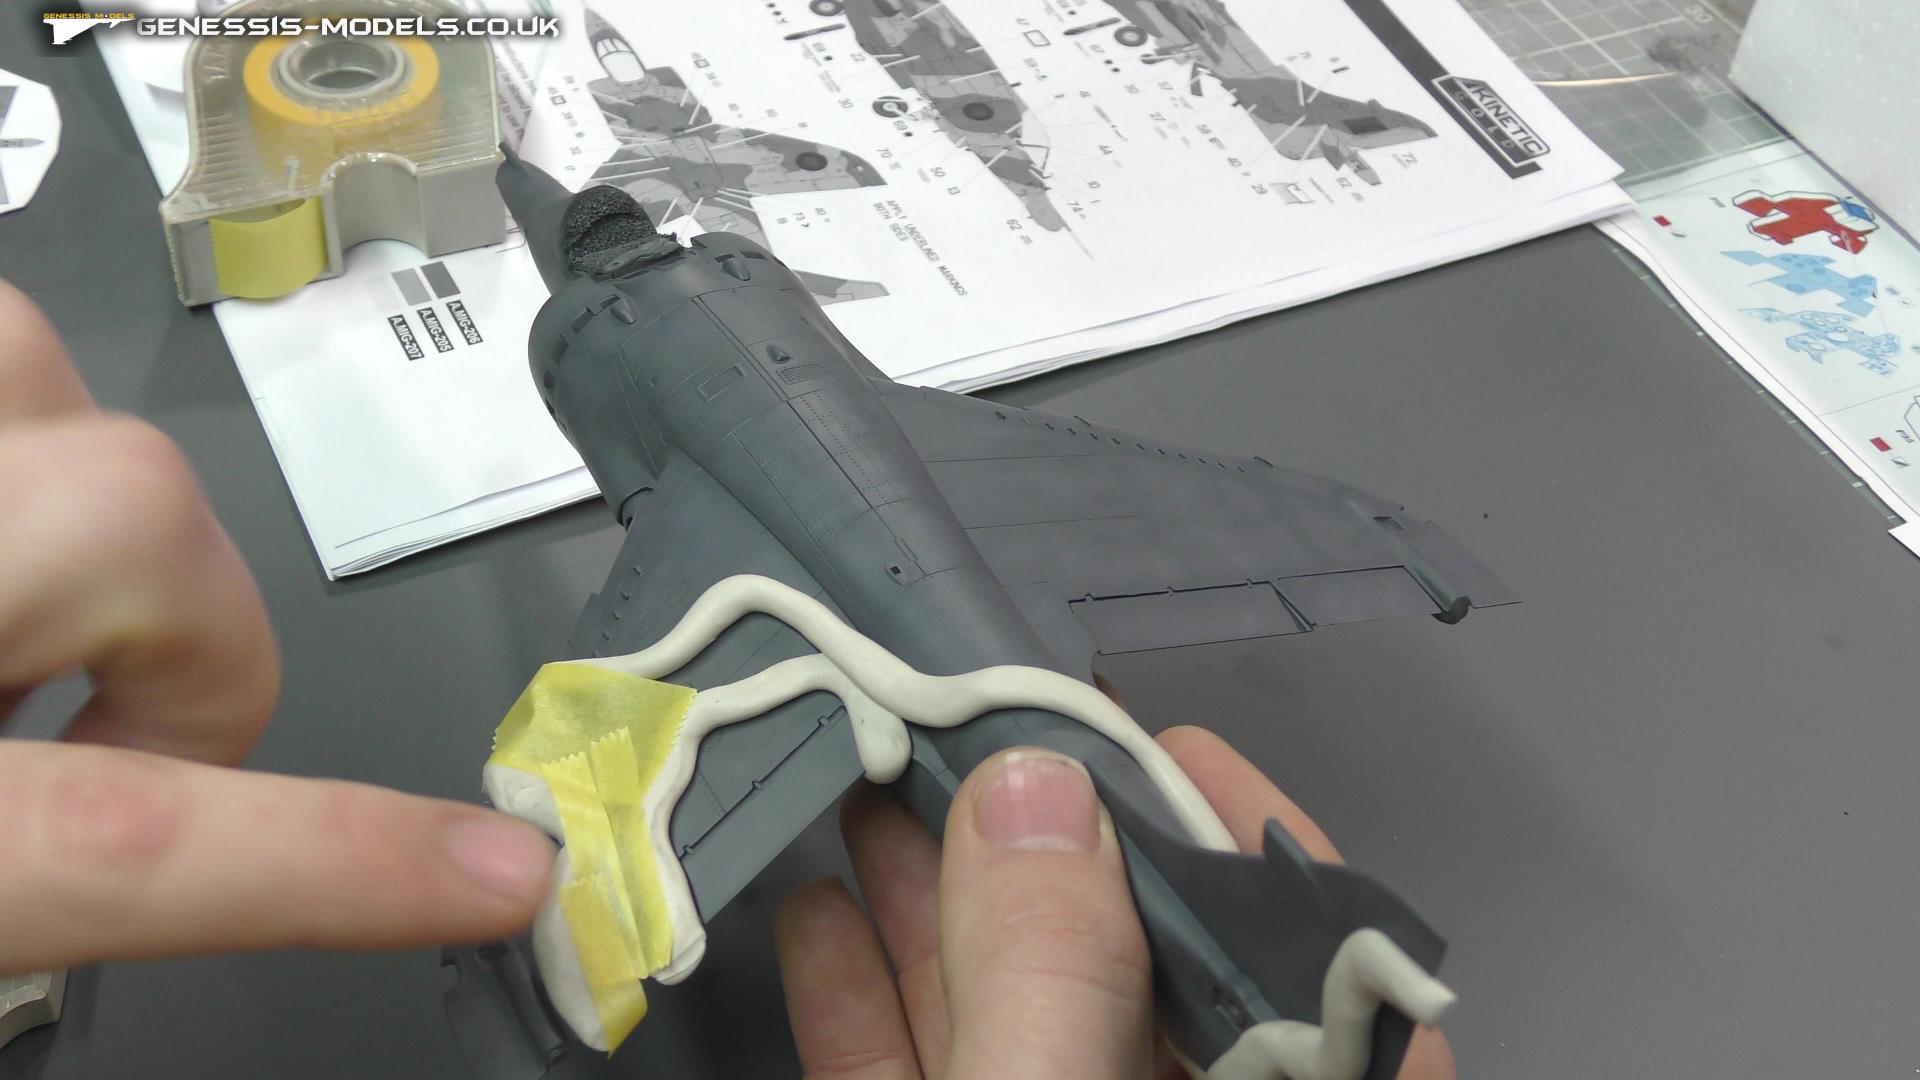
The hard part of our build begins with the wing section being glued to our fuselage, we begin by sanding and test fitting to get these to section to fit as best as possible, but it will need more help than just that, so I will show you how to spot glue, to shape our glue lines to not have any steps. I also show you how to make your own filler which is best for scribing on to join lines.
Special Tools: Albion Alloys : Sanding Files : 6mm : Coarse
Consumables: Tamiya : Tamiya Extra-Thin Cement : 40ml
Video not available - You need to be subscribed to view these videos
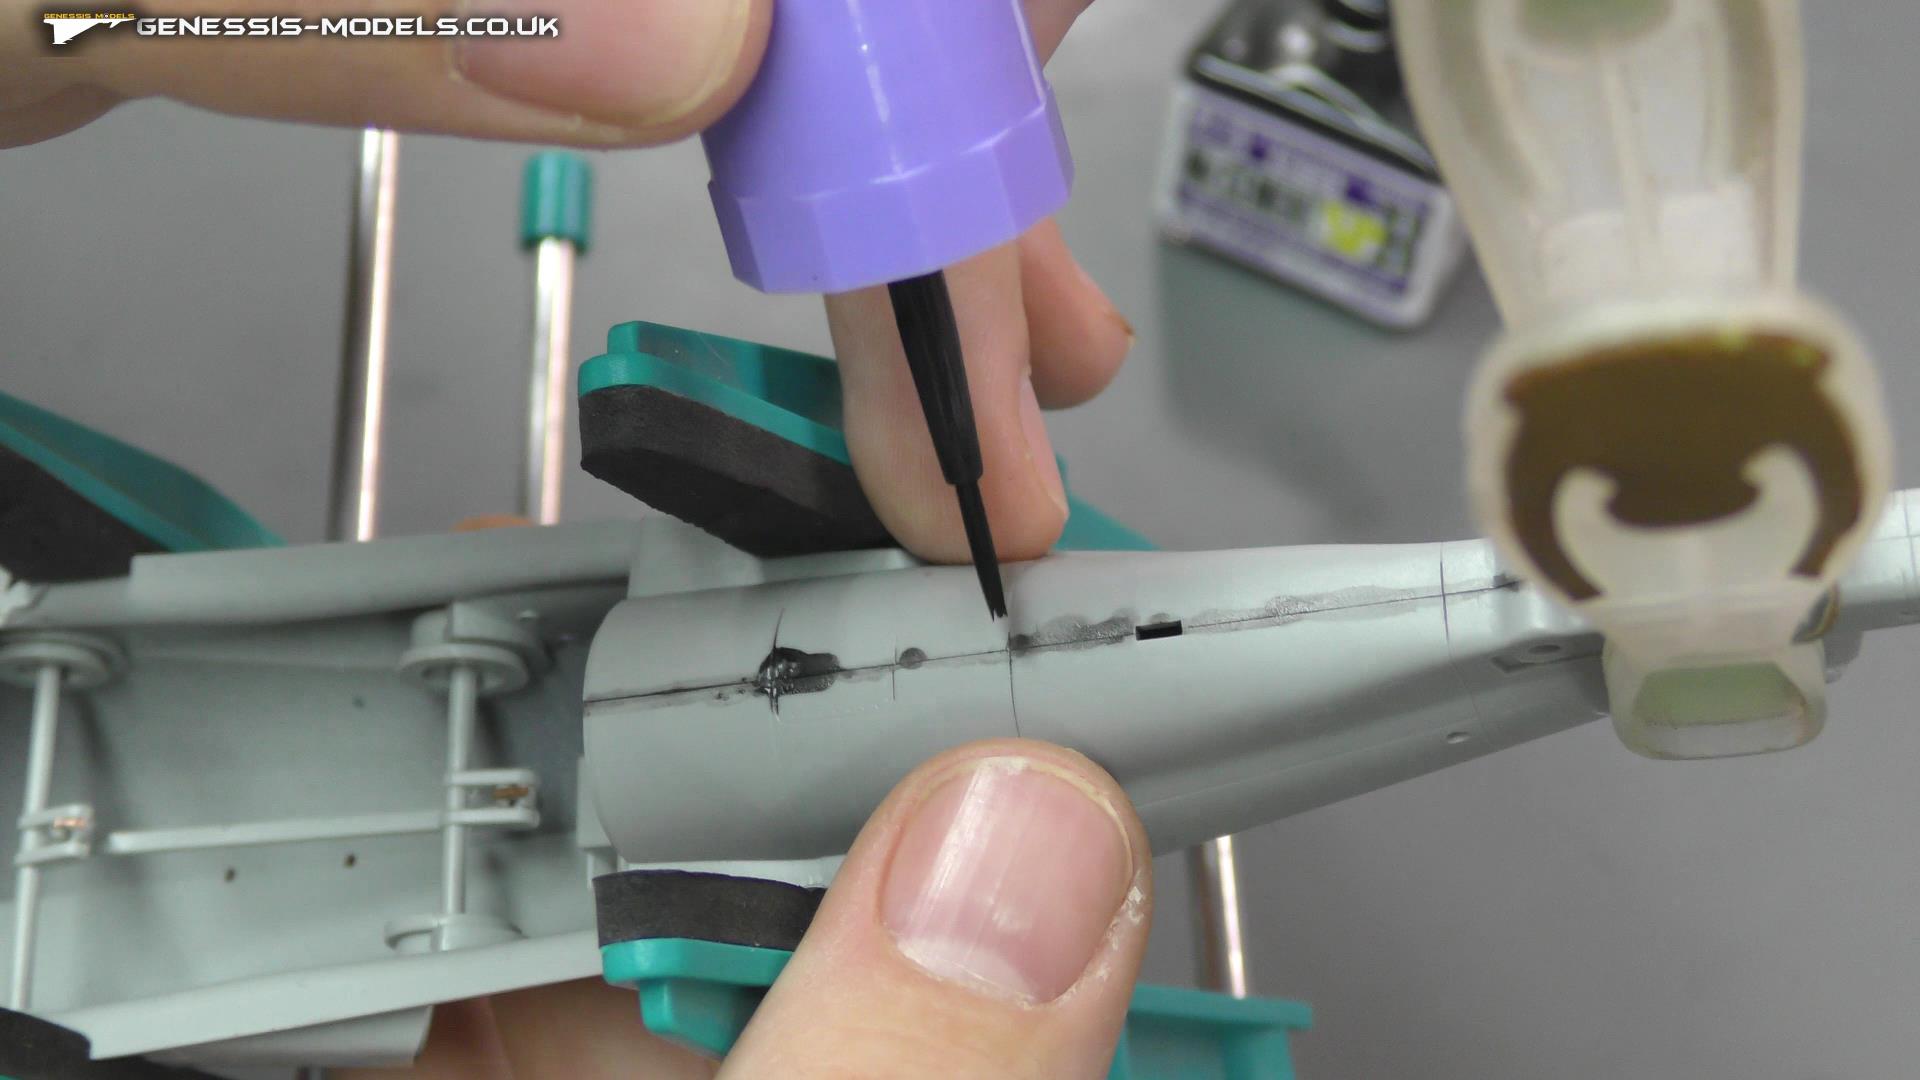
Sanding & Scribing : Building The Harrier GR.1/GR.3 Kinetics : 1/48 Scale : Episode.10
We can now begin to sand and scribe at our home brew filler now that it’s had a good 2 days to dry, we sand at the area with 100 grit sanding sticks, we mainly do this to remove all the steps and gaps so as we can spray on some black paint on to see how it looks. Then we go on to showing the scribing on our join line and how it looks so much nicer than leaving it as a glue line.
Special Tools: Tamiya : Plastic Scriber II
Consumables: Albion Alloys : Mini Sanding Files : 15 Assorted : Multi-Pack
Video not available - You need to be subscribed to view these videos
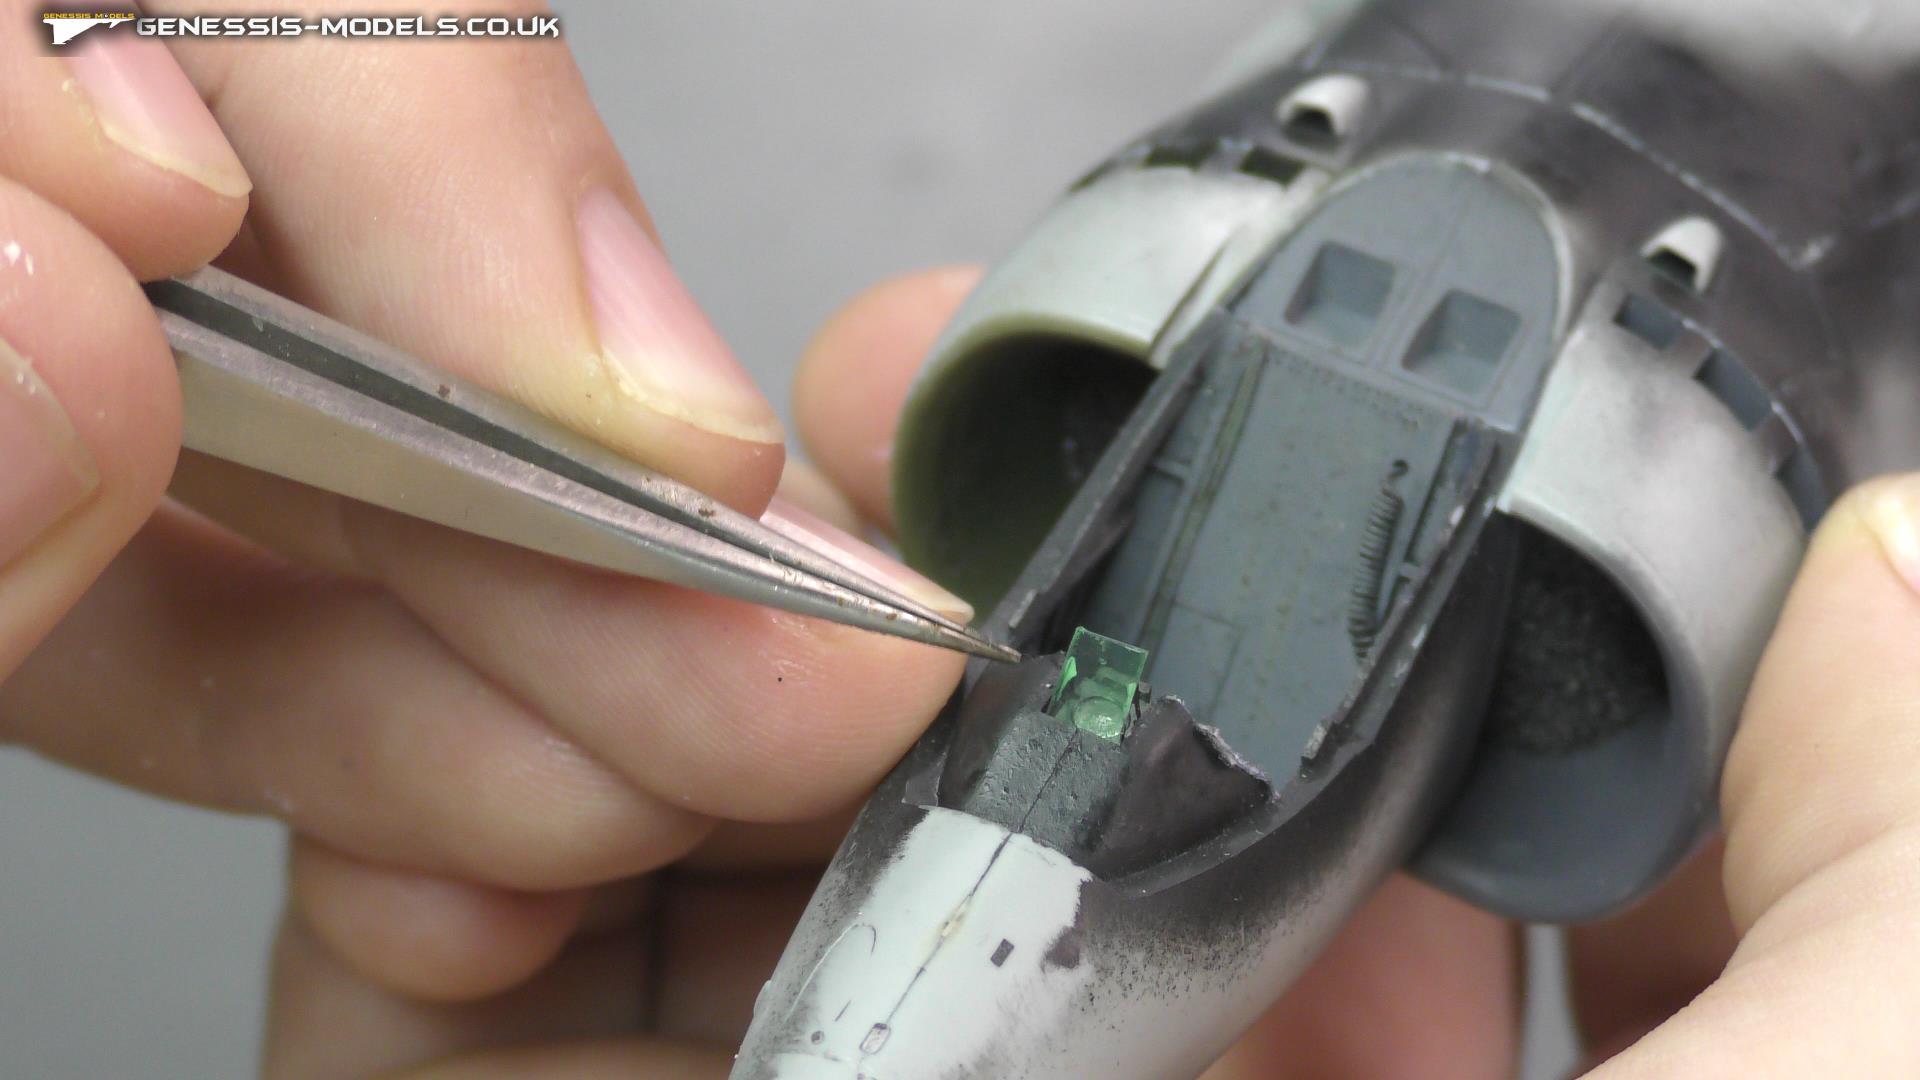
HUD Installation : Building The Harrier GR.1/GR.3 Kinetics : 1/48 Scale : Episode.11
We look at the heads up display and how to get a nice green tinge to the clear plastic sheet we get with our aftermarket cockpit parts from Eduard, I also show how to install the HUD in the cockpit with some micro crystal clear, also in this episode we tackle some round scribing and land gear wheel building.
Special Tools: Eduard : Circles And Ovals Templates : Assorted Sizes
Consumables: Microscale : Micro Kristal Klear : Canopy Glue
Video not available - You need to be subscribed to view these videos
Canopy Mask & Install : Building The Harrier GR.1/GR.3 Kinetics : 1/48 Scale : Episode.12
We are just doing some final bits before we begin the spraying stage, this includes getting the canopy masking done and sealing the cockpit ready for spraying, also we do some scratch building on the 2” navy rockets to look more realistic and aquert.
Special Tools: Tamiya : Straight Tweezers
Consumables: Tamiya : Mini X-25 Clear Green : Acrylic
Video not available - You need to be subscribed to view these videos
Preparing For Spraying : Building The Harrier GR.1/GR.3 Kinetics : 1/48 Scale : Episode.13
Spraying beings now, but for a good spray job preparation is key, so we show you how to seal in your cockpit and begin cleaning the surface of your model ready to spray, which is followed by showing you how to prime your model before priming your model ??
Special Tools: Shesto : Reverse Action Tweezers Straight Tip/Fibre Grip : 160mm
Consumables: Mr Hobby : H-12 Flat Black : Aqueous Hobby Color : Acrylic
Video not available - You need to be subscribed to view these videos
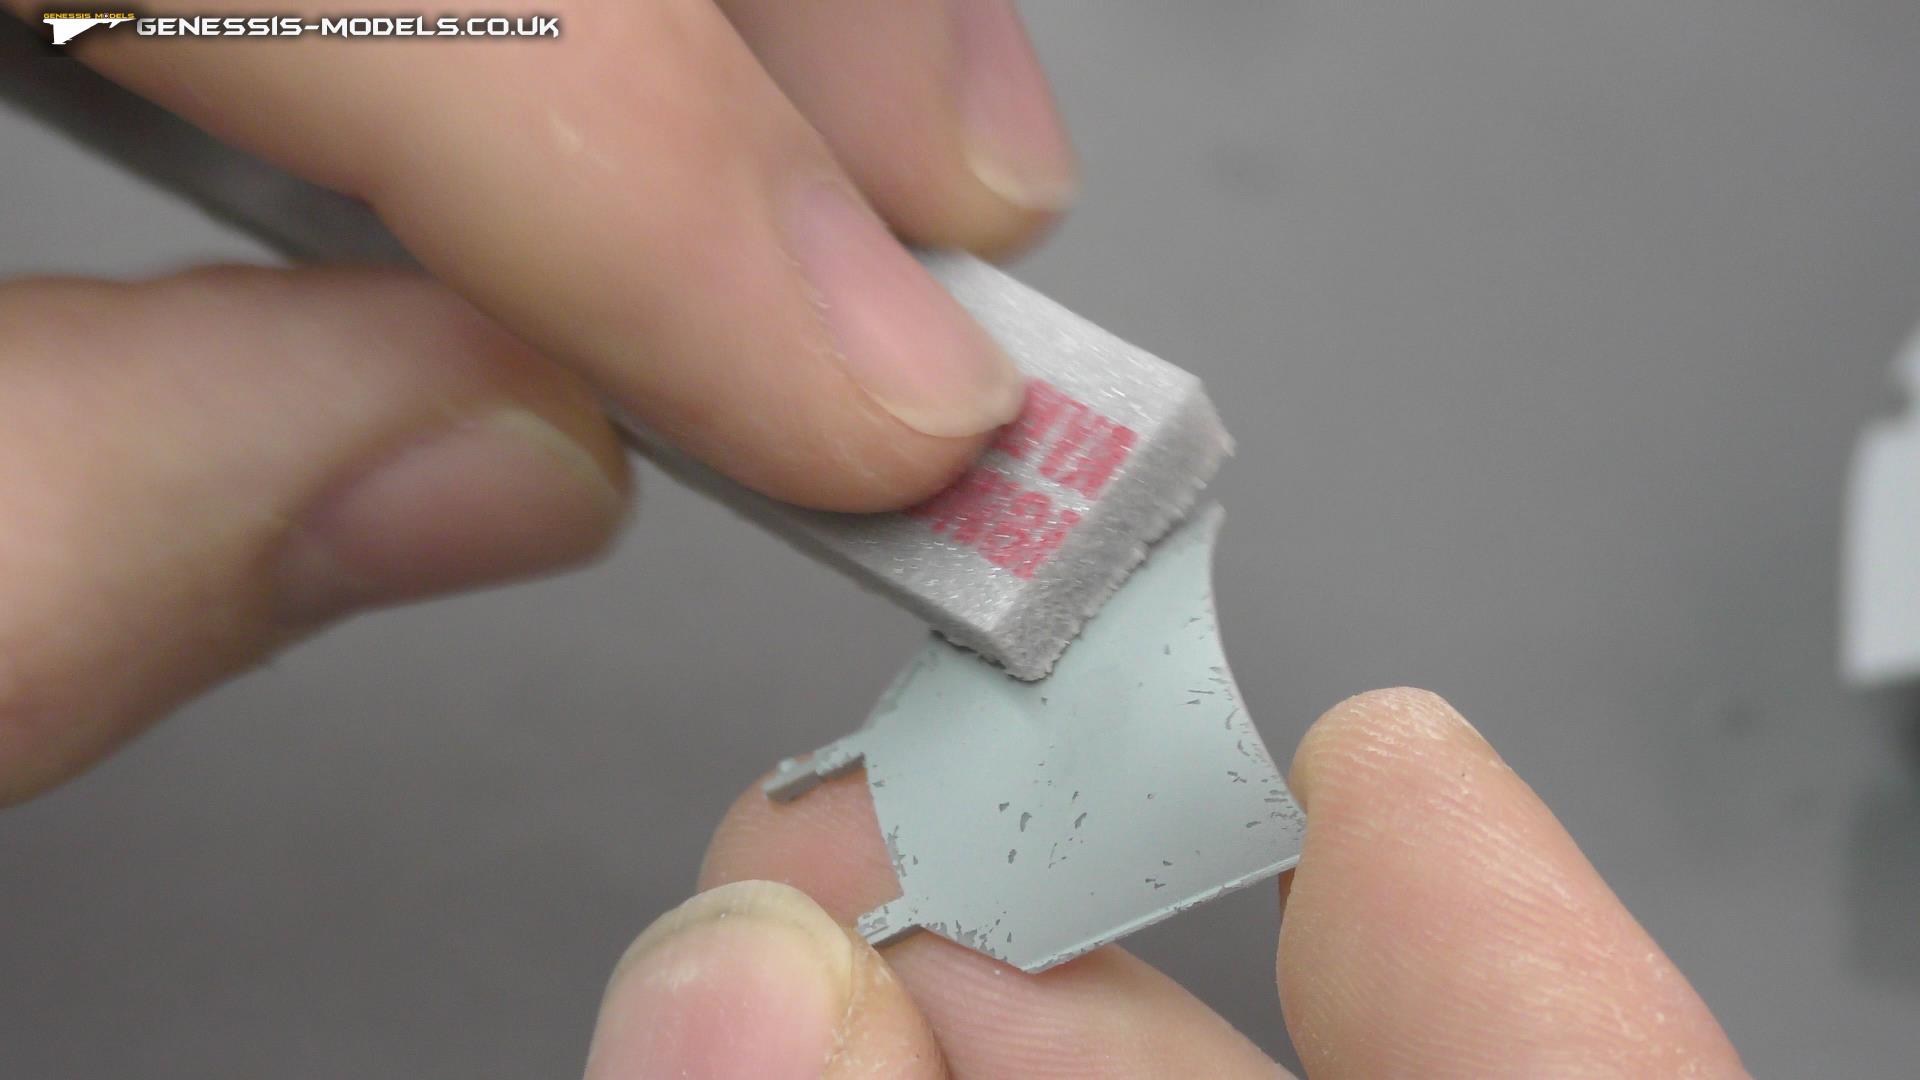
After Priming Prep : Building The Harrier GR.1/GR.3 Kinetics : 1/48 Scale : Episode.14
After priming your model you may have to do some touching up here and there with your filling sanding and scribing, so I will show to with some good techniques how to removing bits of dirt and debris that has got caught in your paint work as well as removing some gaps you may now see with the paint down.
Special Tools:Eduard : Super Glue Applicator Tool Kapatko: ( 10 Pcs )
Consumables: Tamiya : Mini XF-19 Sky Grey : Acrylic
Video not available - You need to be subscribed to view these videos
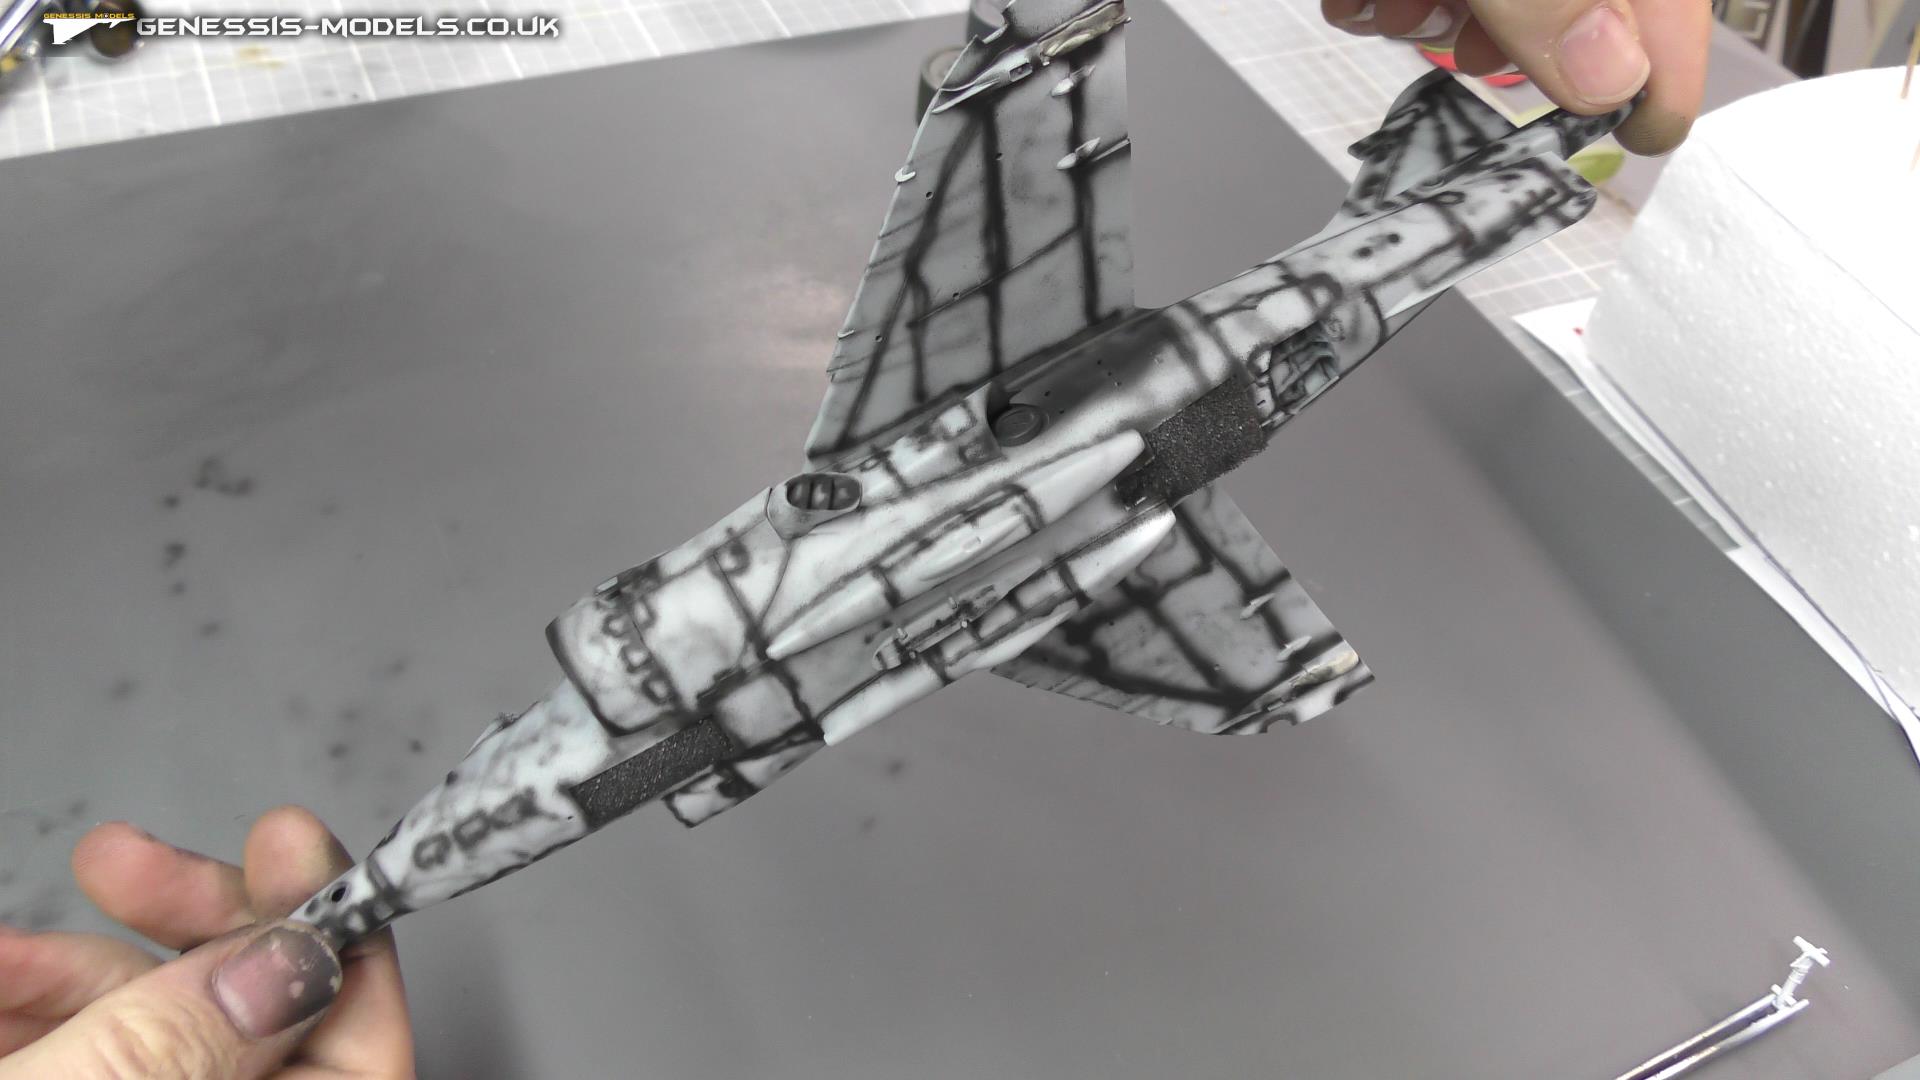
Pre-Shading : Building The Harrier GR.1/GR.3 Kinetics : 1/48 Scale : Episode.15
We look at pre-shading our model, in which to give our normal base coat colours some weathering via spraying as well as some airbrushing basic like cleaning airbrush, plus we begin looking at how to deal with some mistakes in the paint work, this will continue in the next episode.
Special Tools: Shesto : Reverse Action Tweezers Straight Tip/Fibre Grip : 160mm
Consumables: Mr Hobby : H-12 Flat Black : Aqueous Hobby Color : Acrylic
Video not available - You need to be subscribed to view these videos
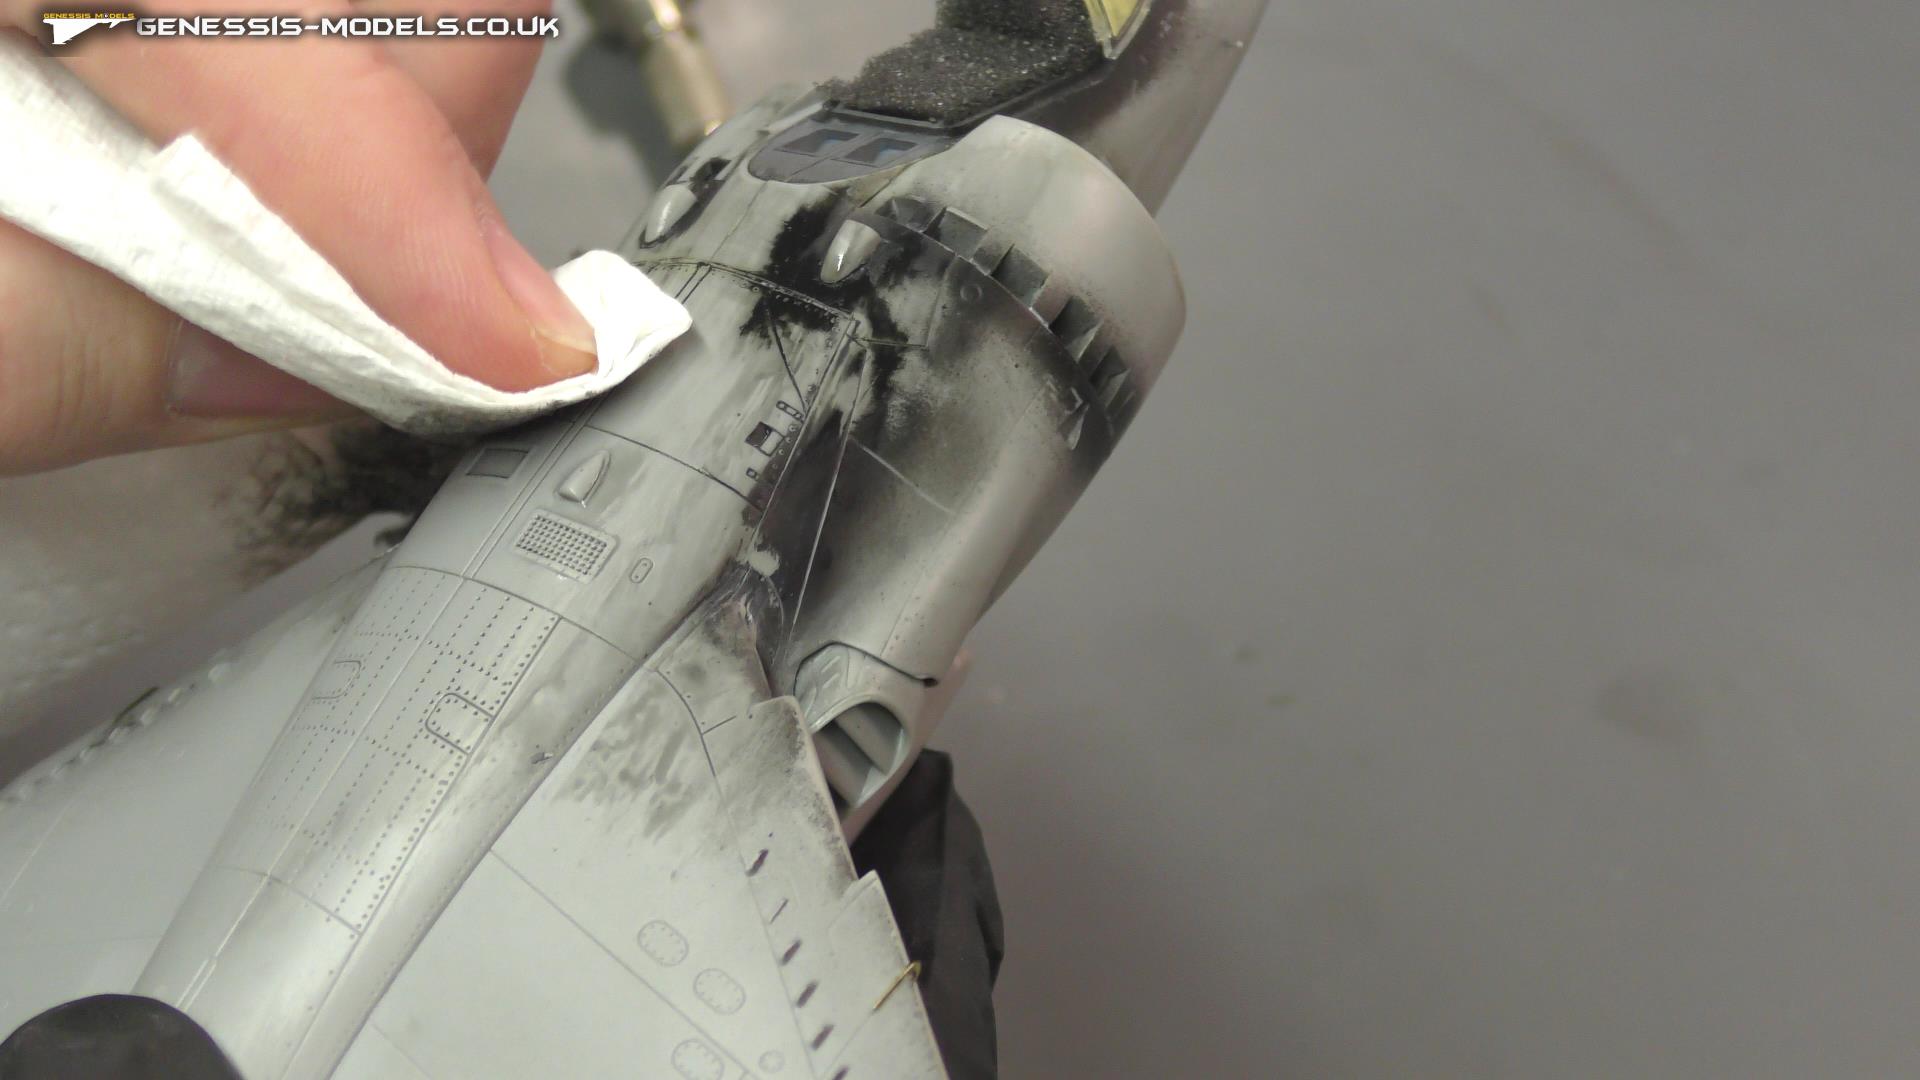
Bleaching & Camo : Building The Harrier GR.1/GR.3 Kinetics : 1/48 Scale : Episode.16
Time to continue with removing our little blemish left over from a spraying mistake, we do this with a very very fine grit sanding stick, the ones you would use for canopies, this is to lightly sand at the area in question, so lightly that we sand away the blemish but still keep the spray work all nice smooth and feathered in.
We also begin the camo stage which I guide you though how to make your camo pattern ready for the next colour.
Special Tools: Tamiya : Masking Tape : 40mm
Consumables: Mr Hobby : H-330 Dark Green BS 381C/641 GB Aircraft : Aqueous Hobby Color : Acrylic
Video not available - You need to be subscribed to view these videos
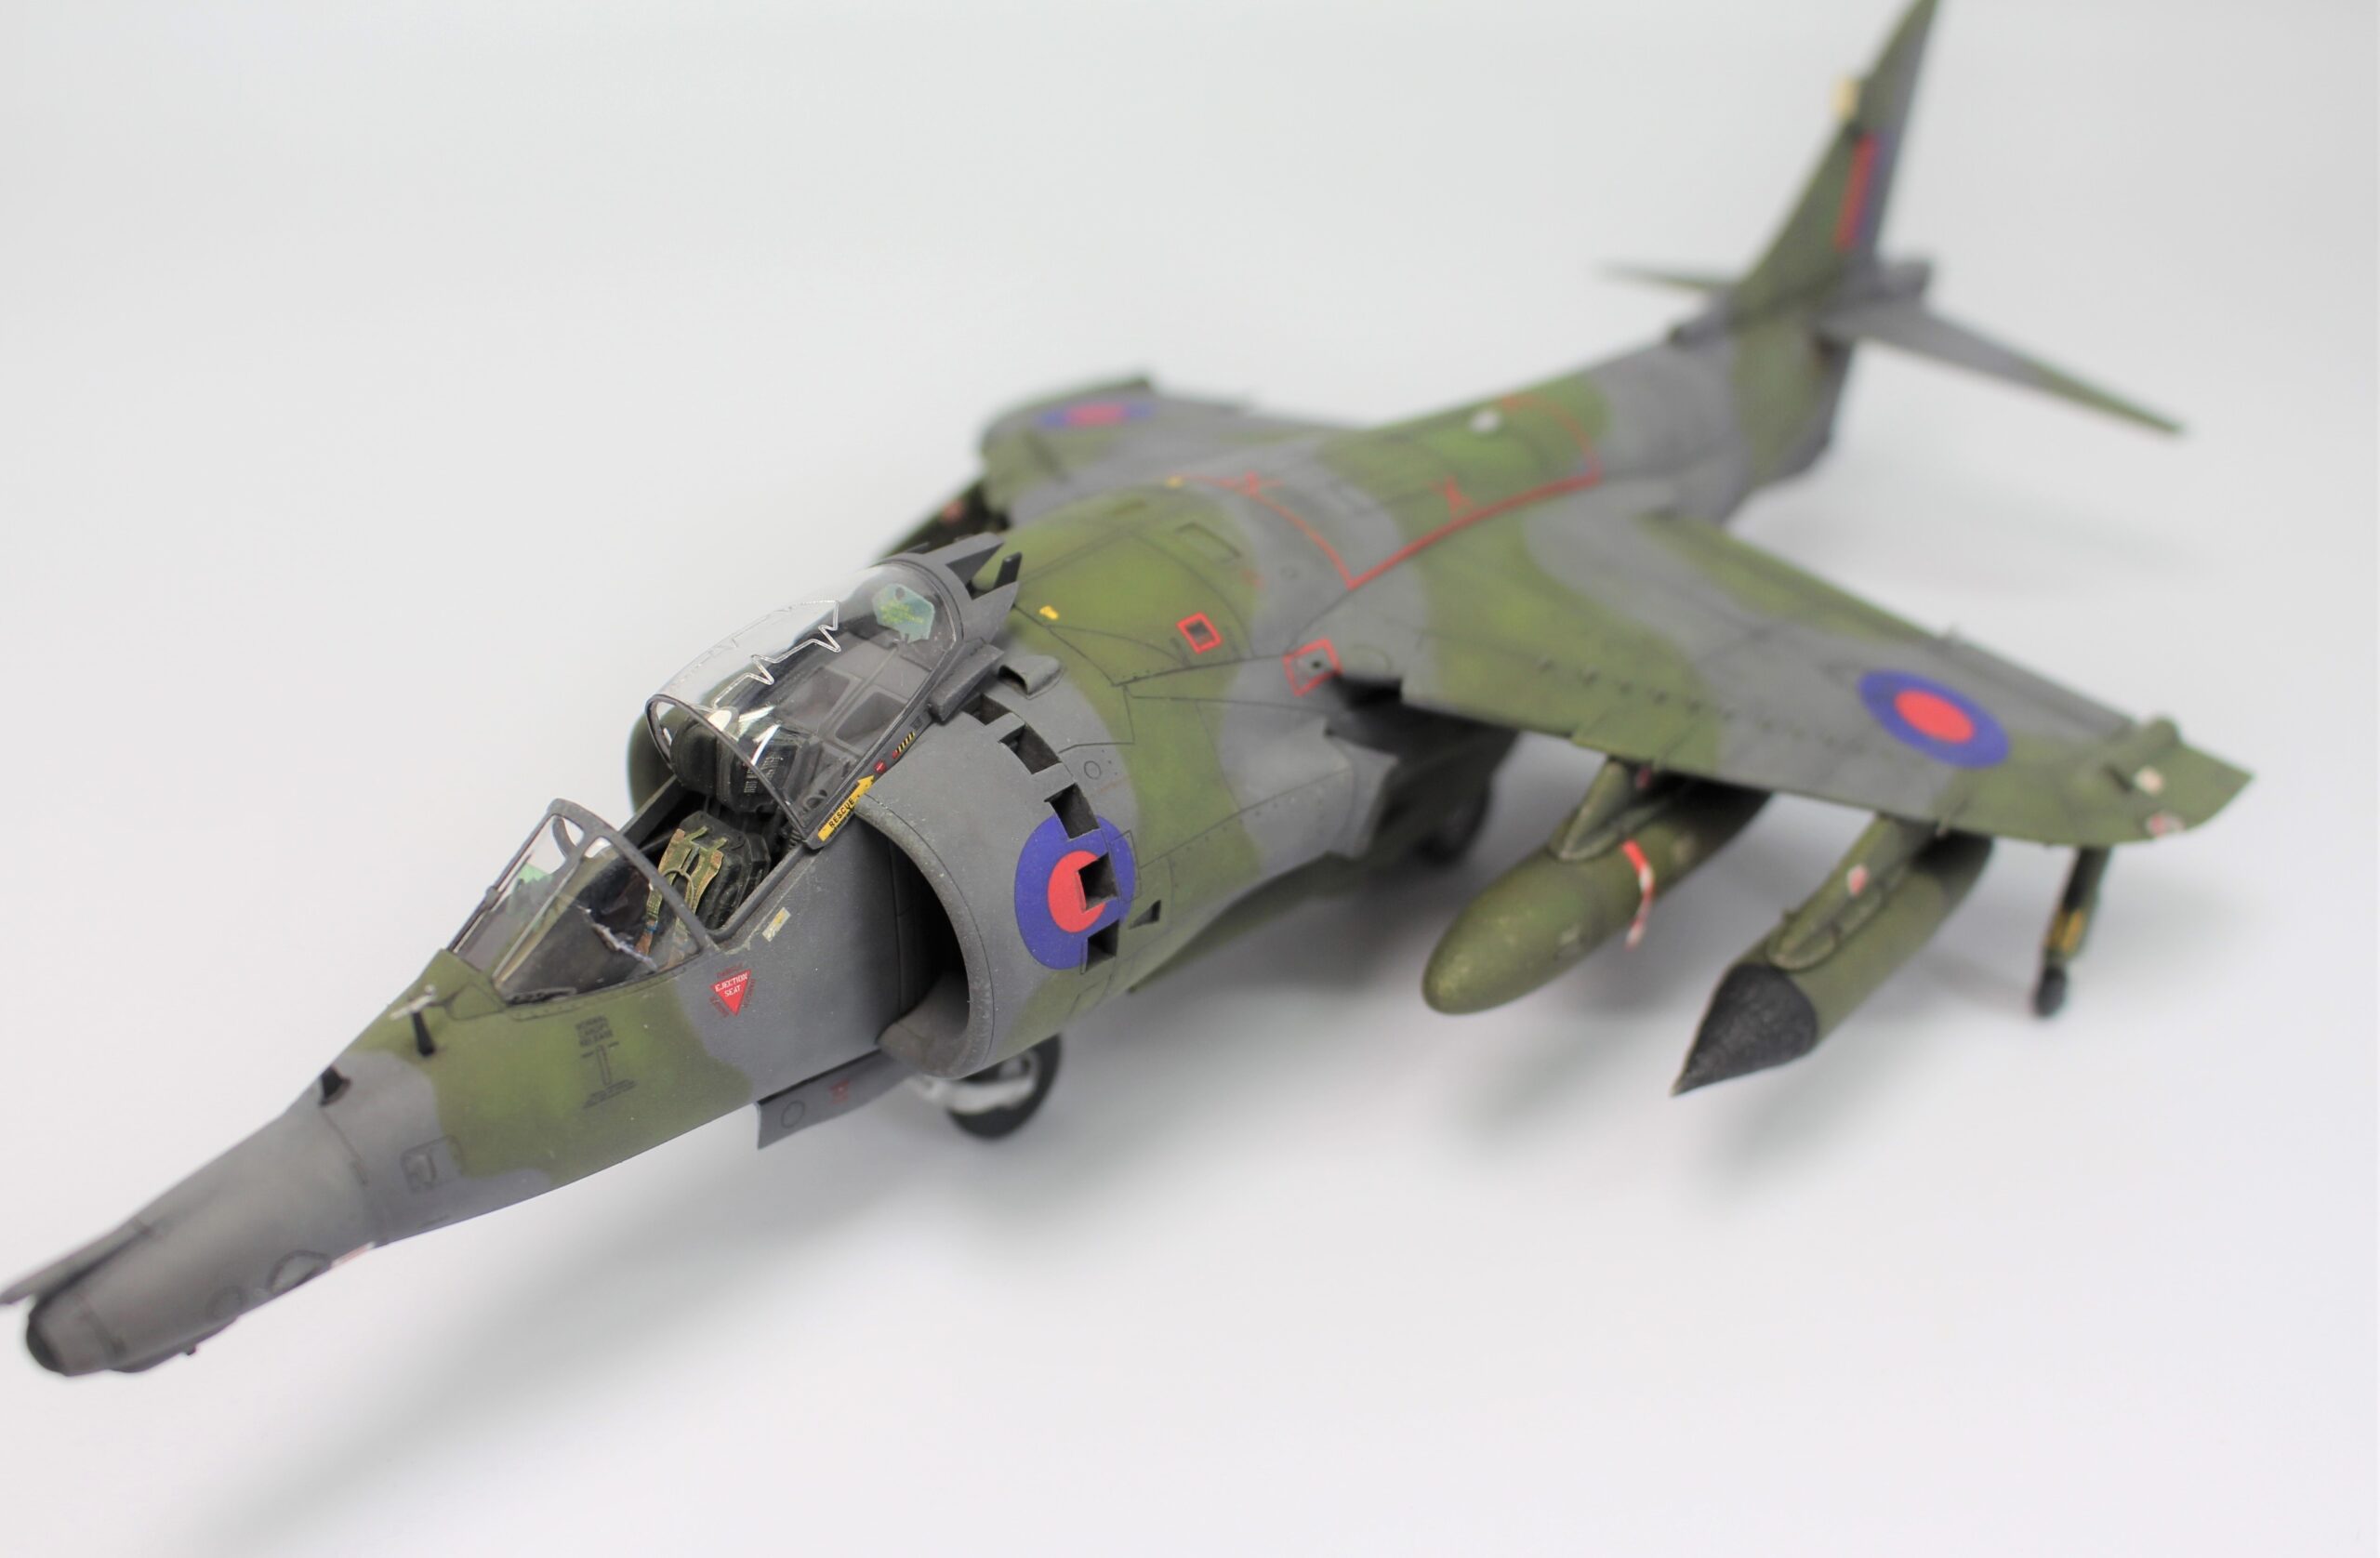
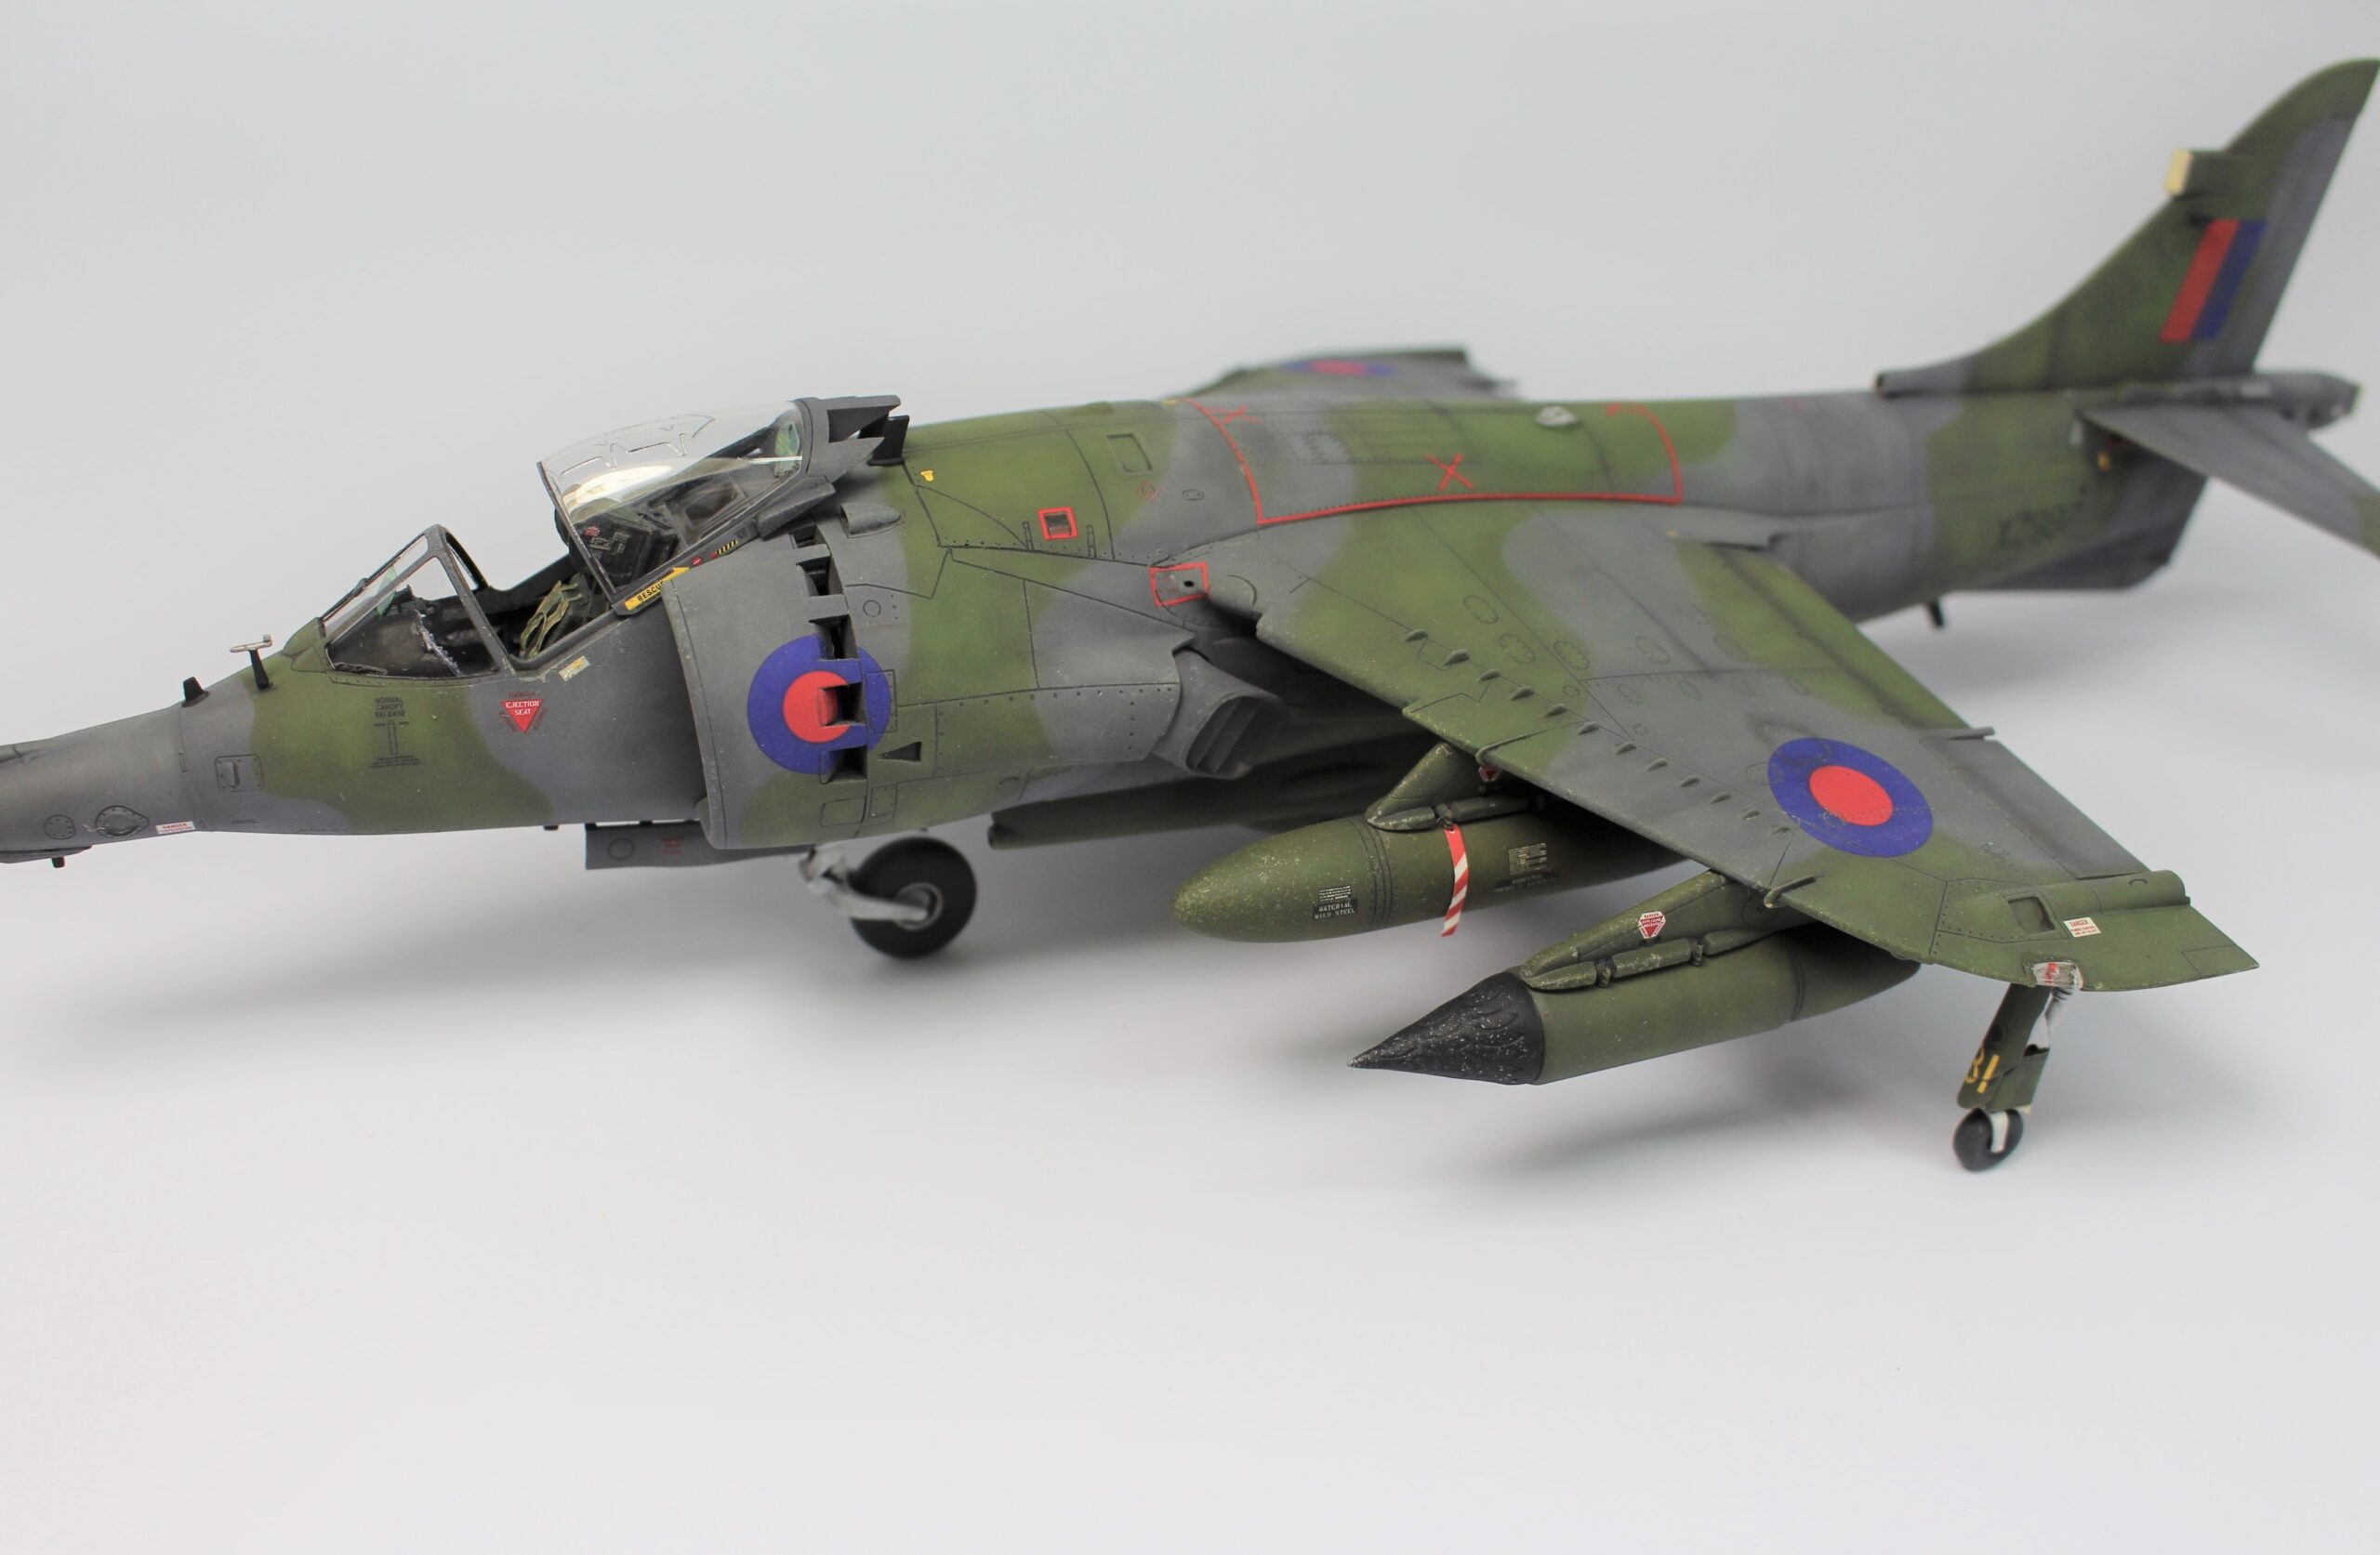
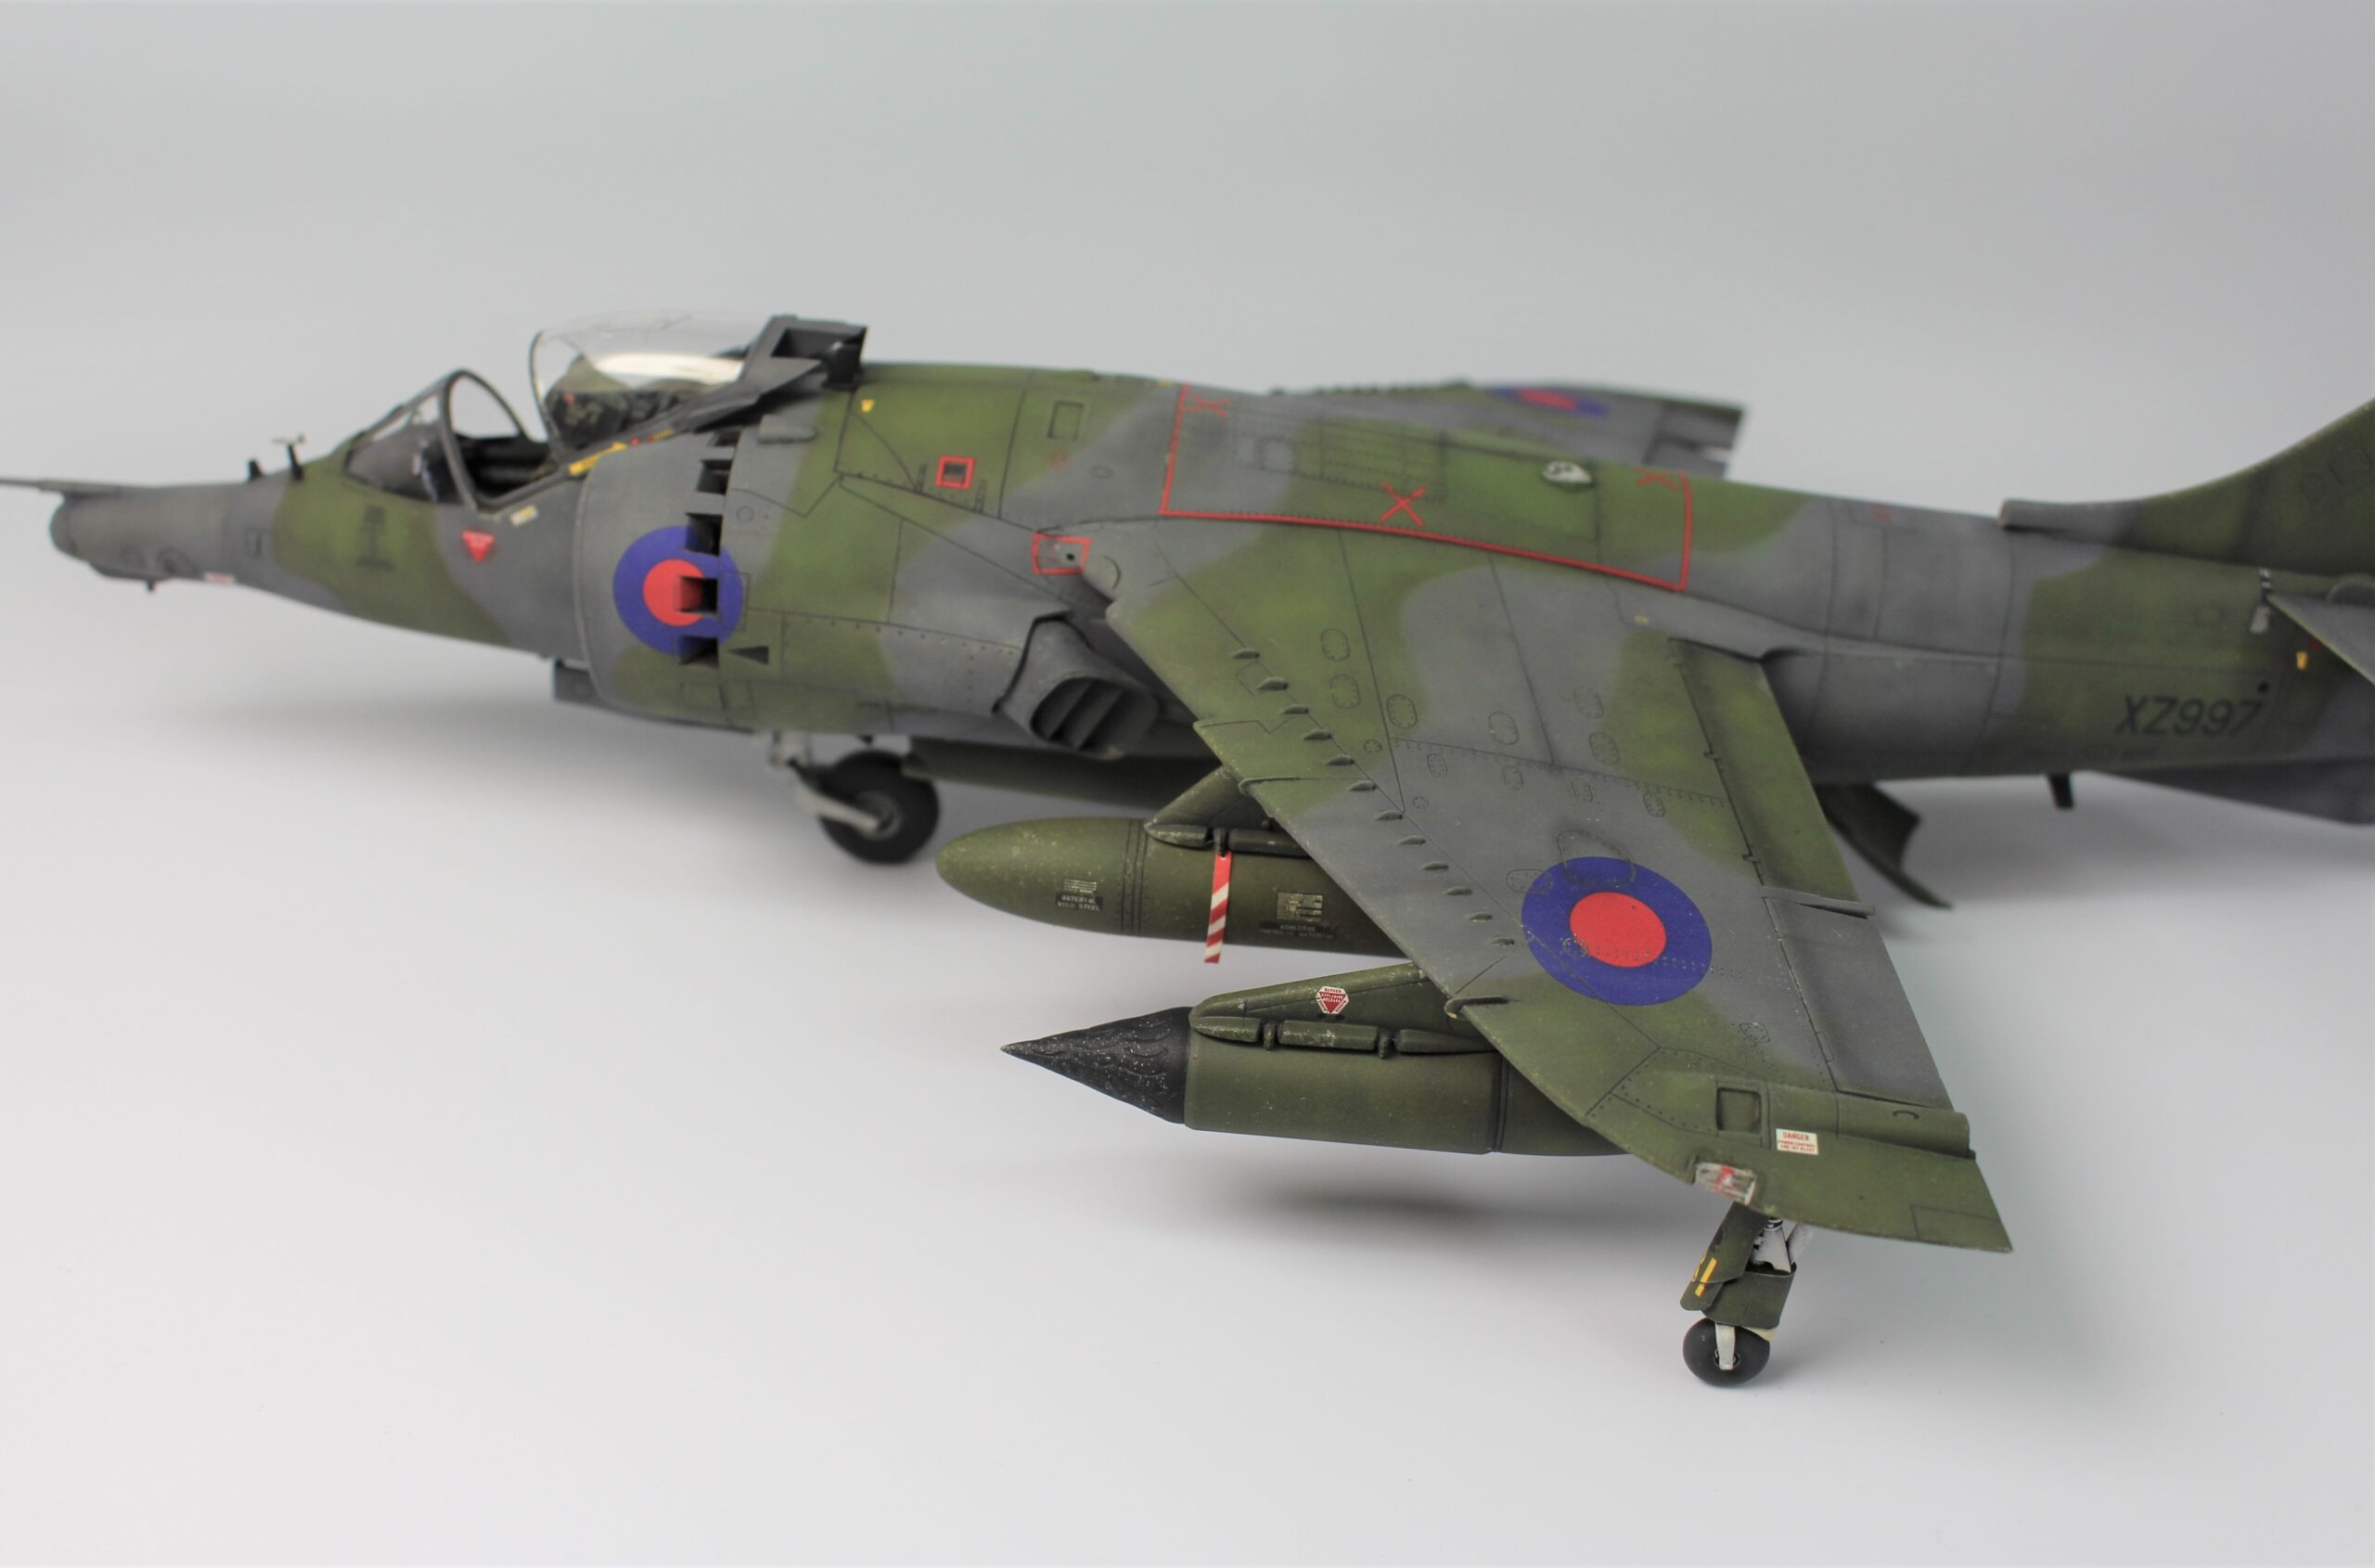
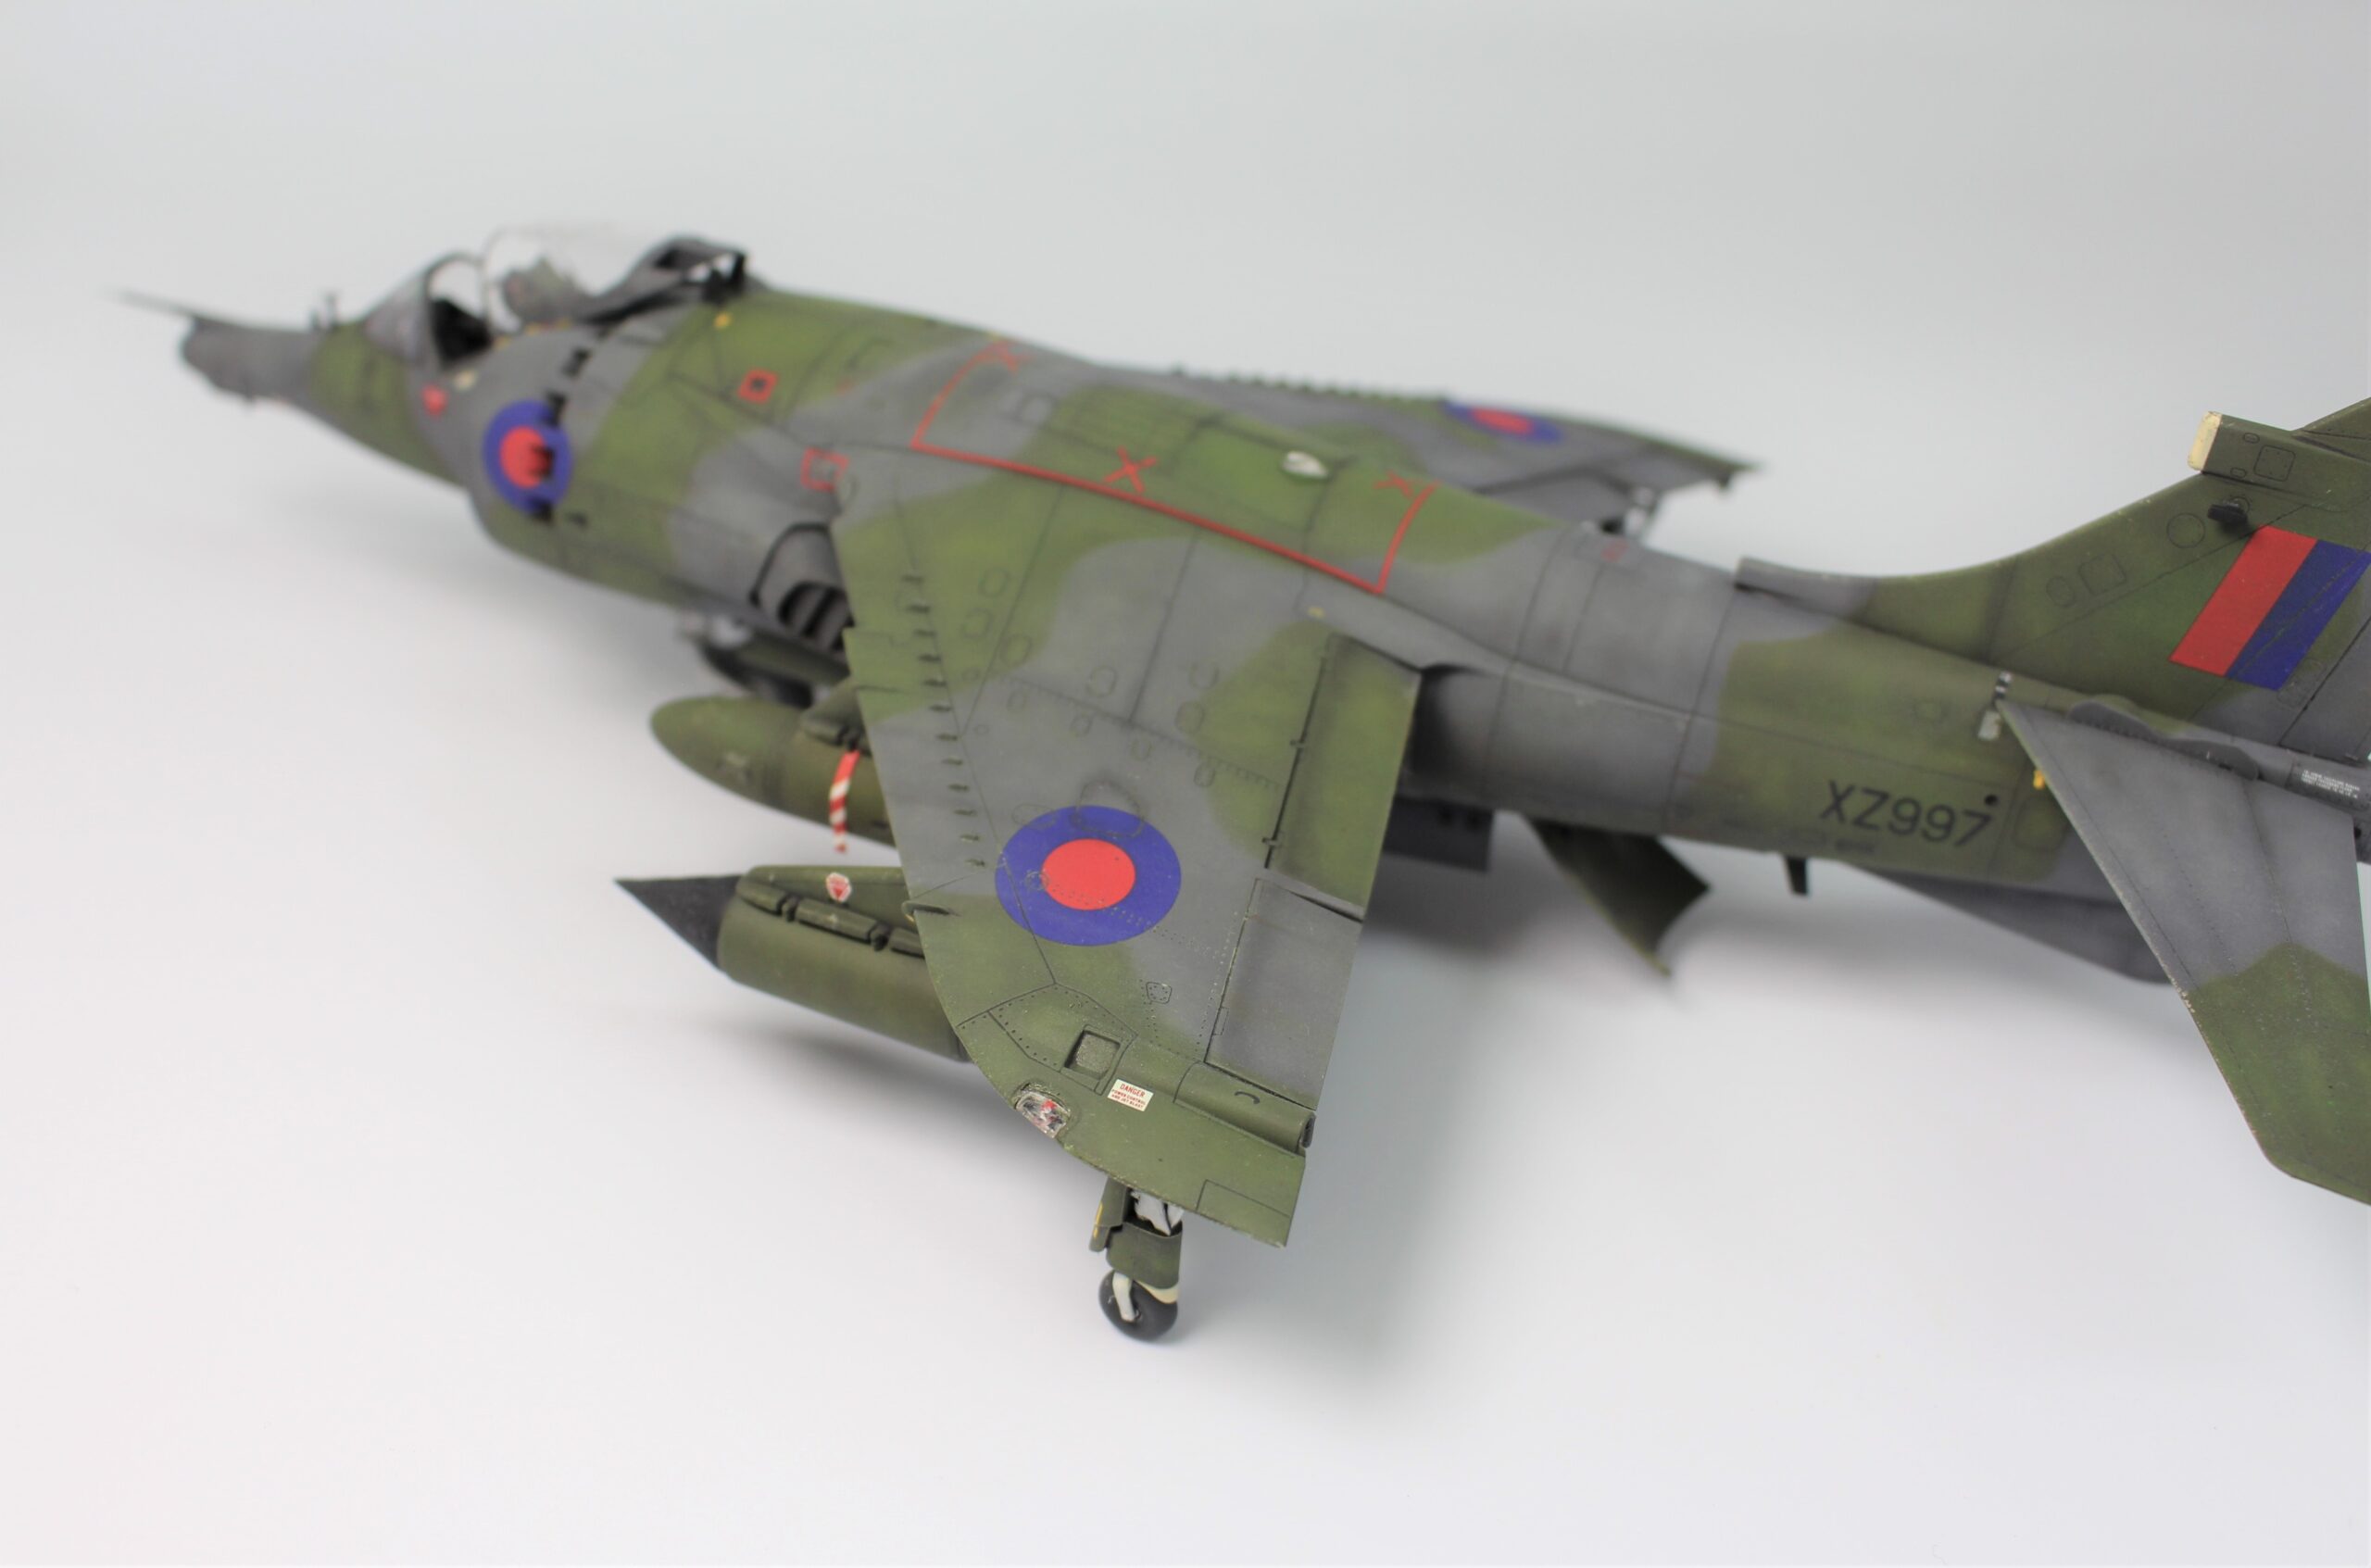
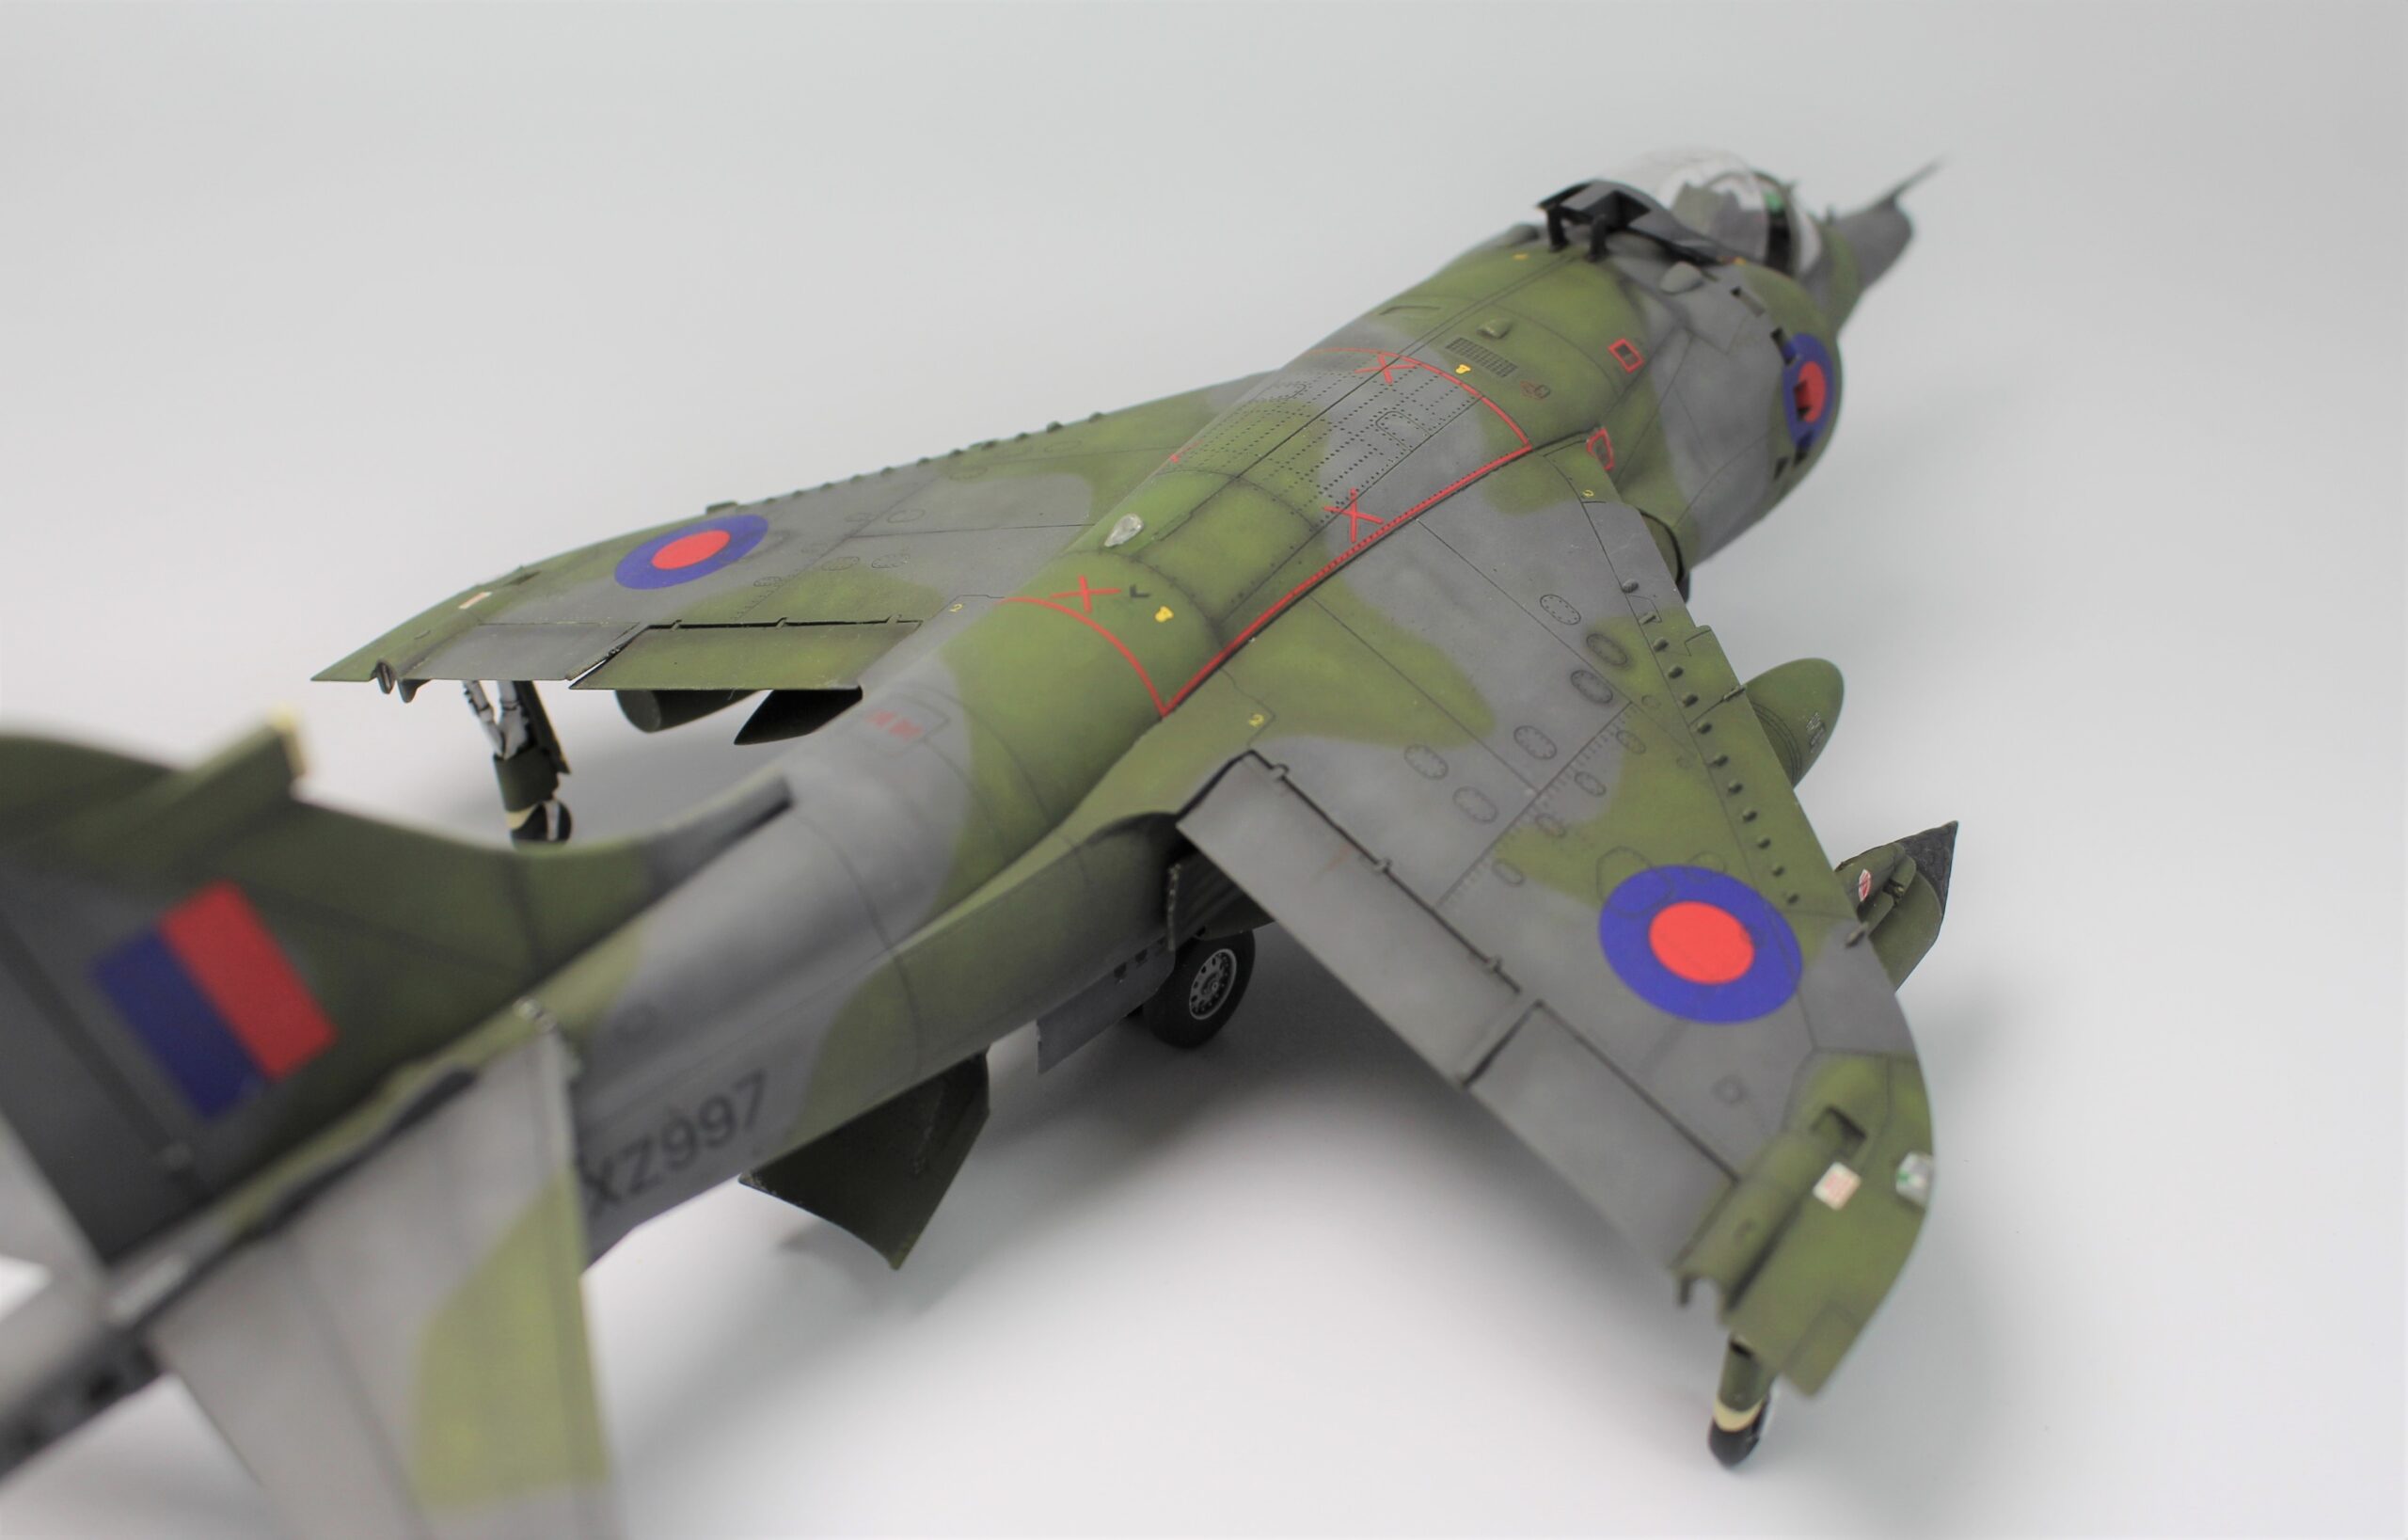
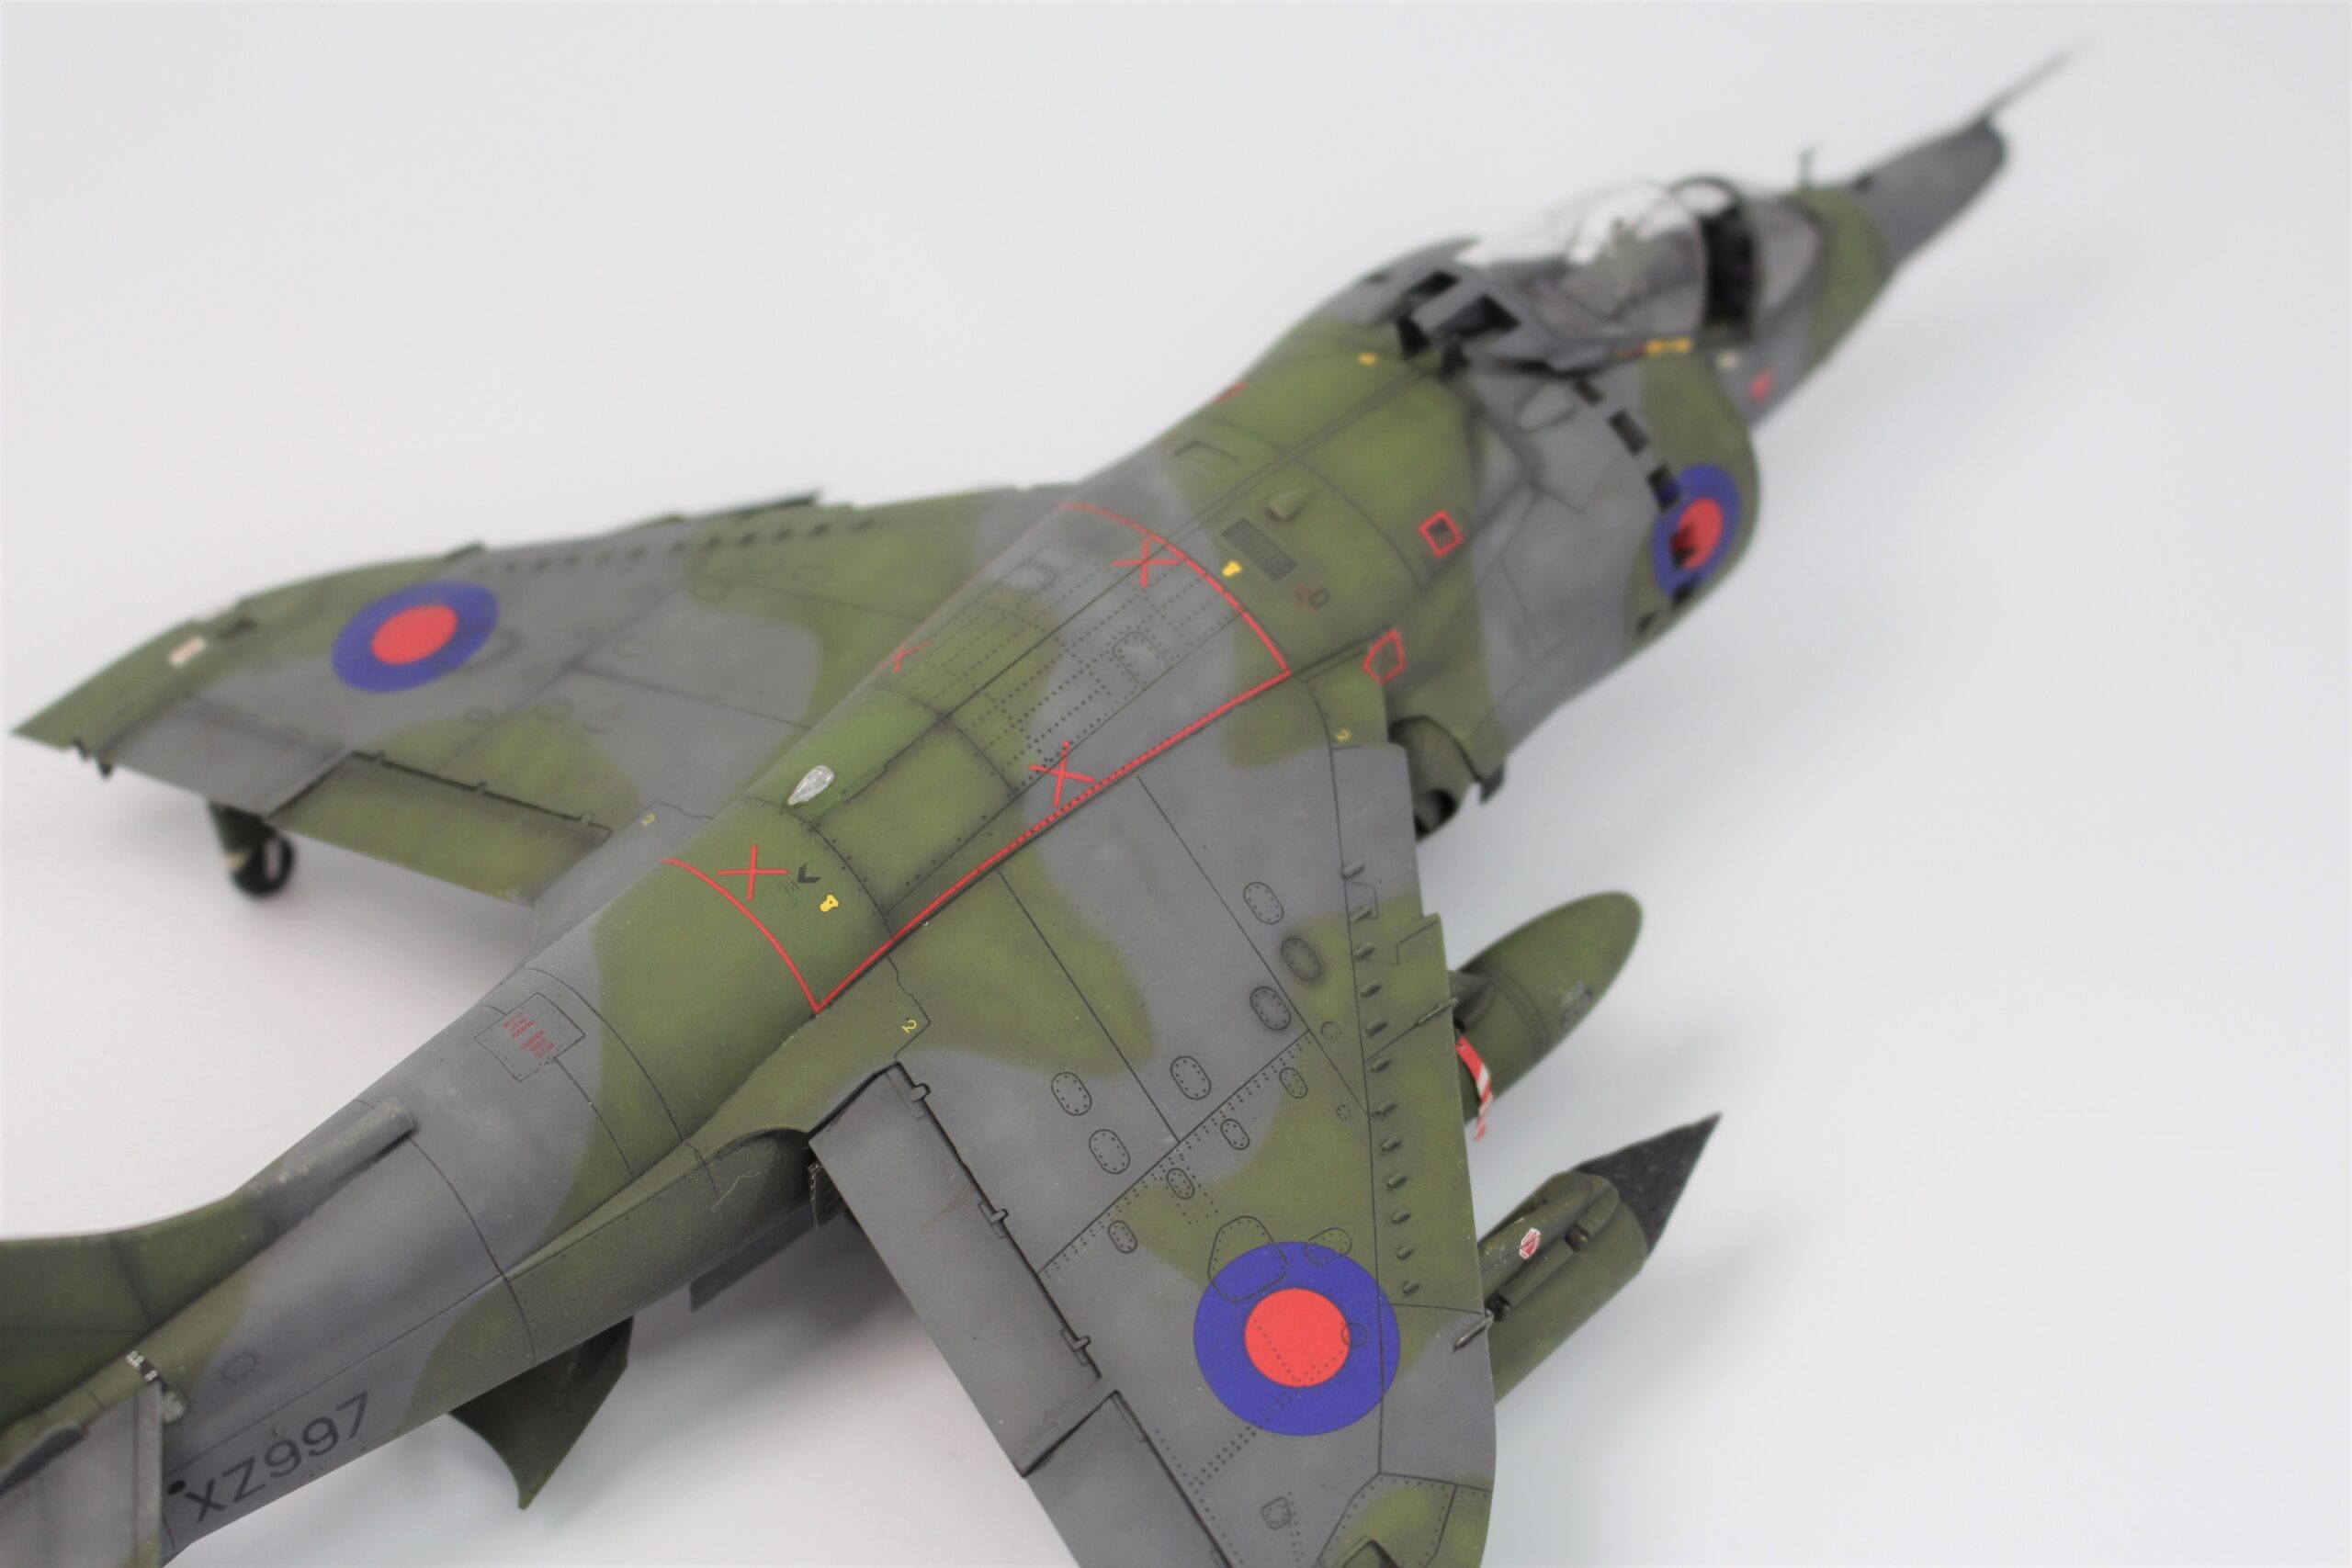
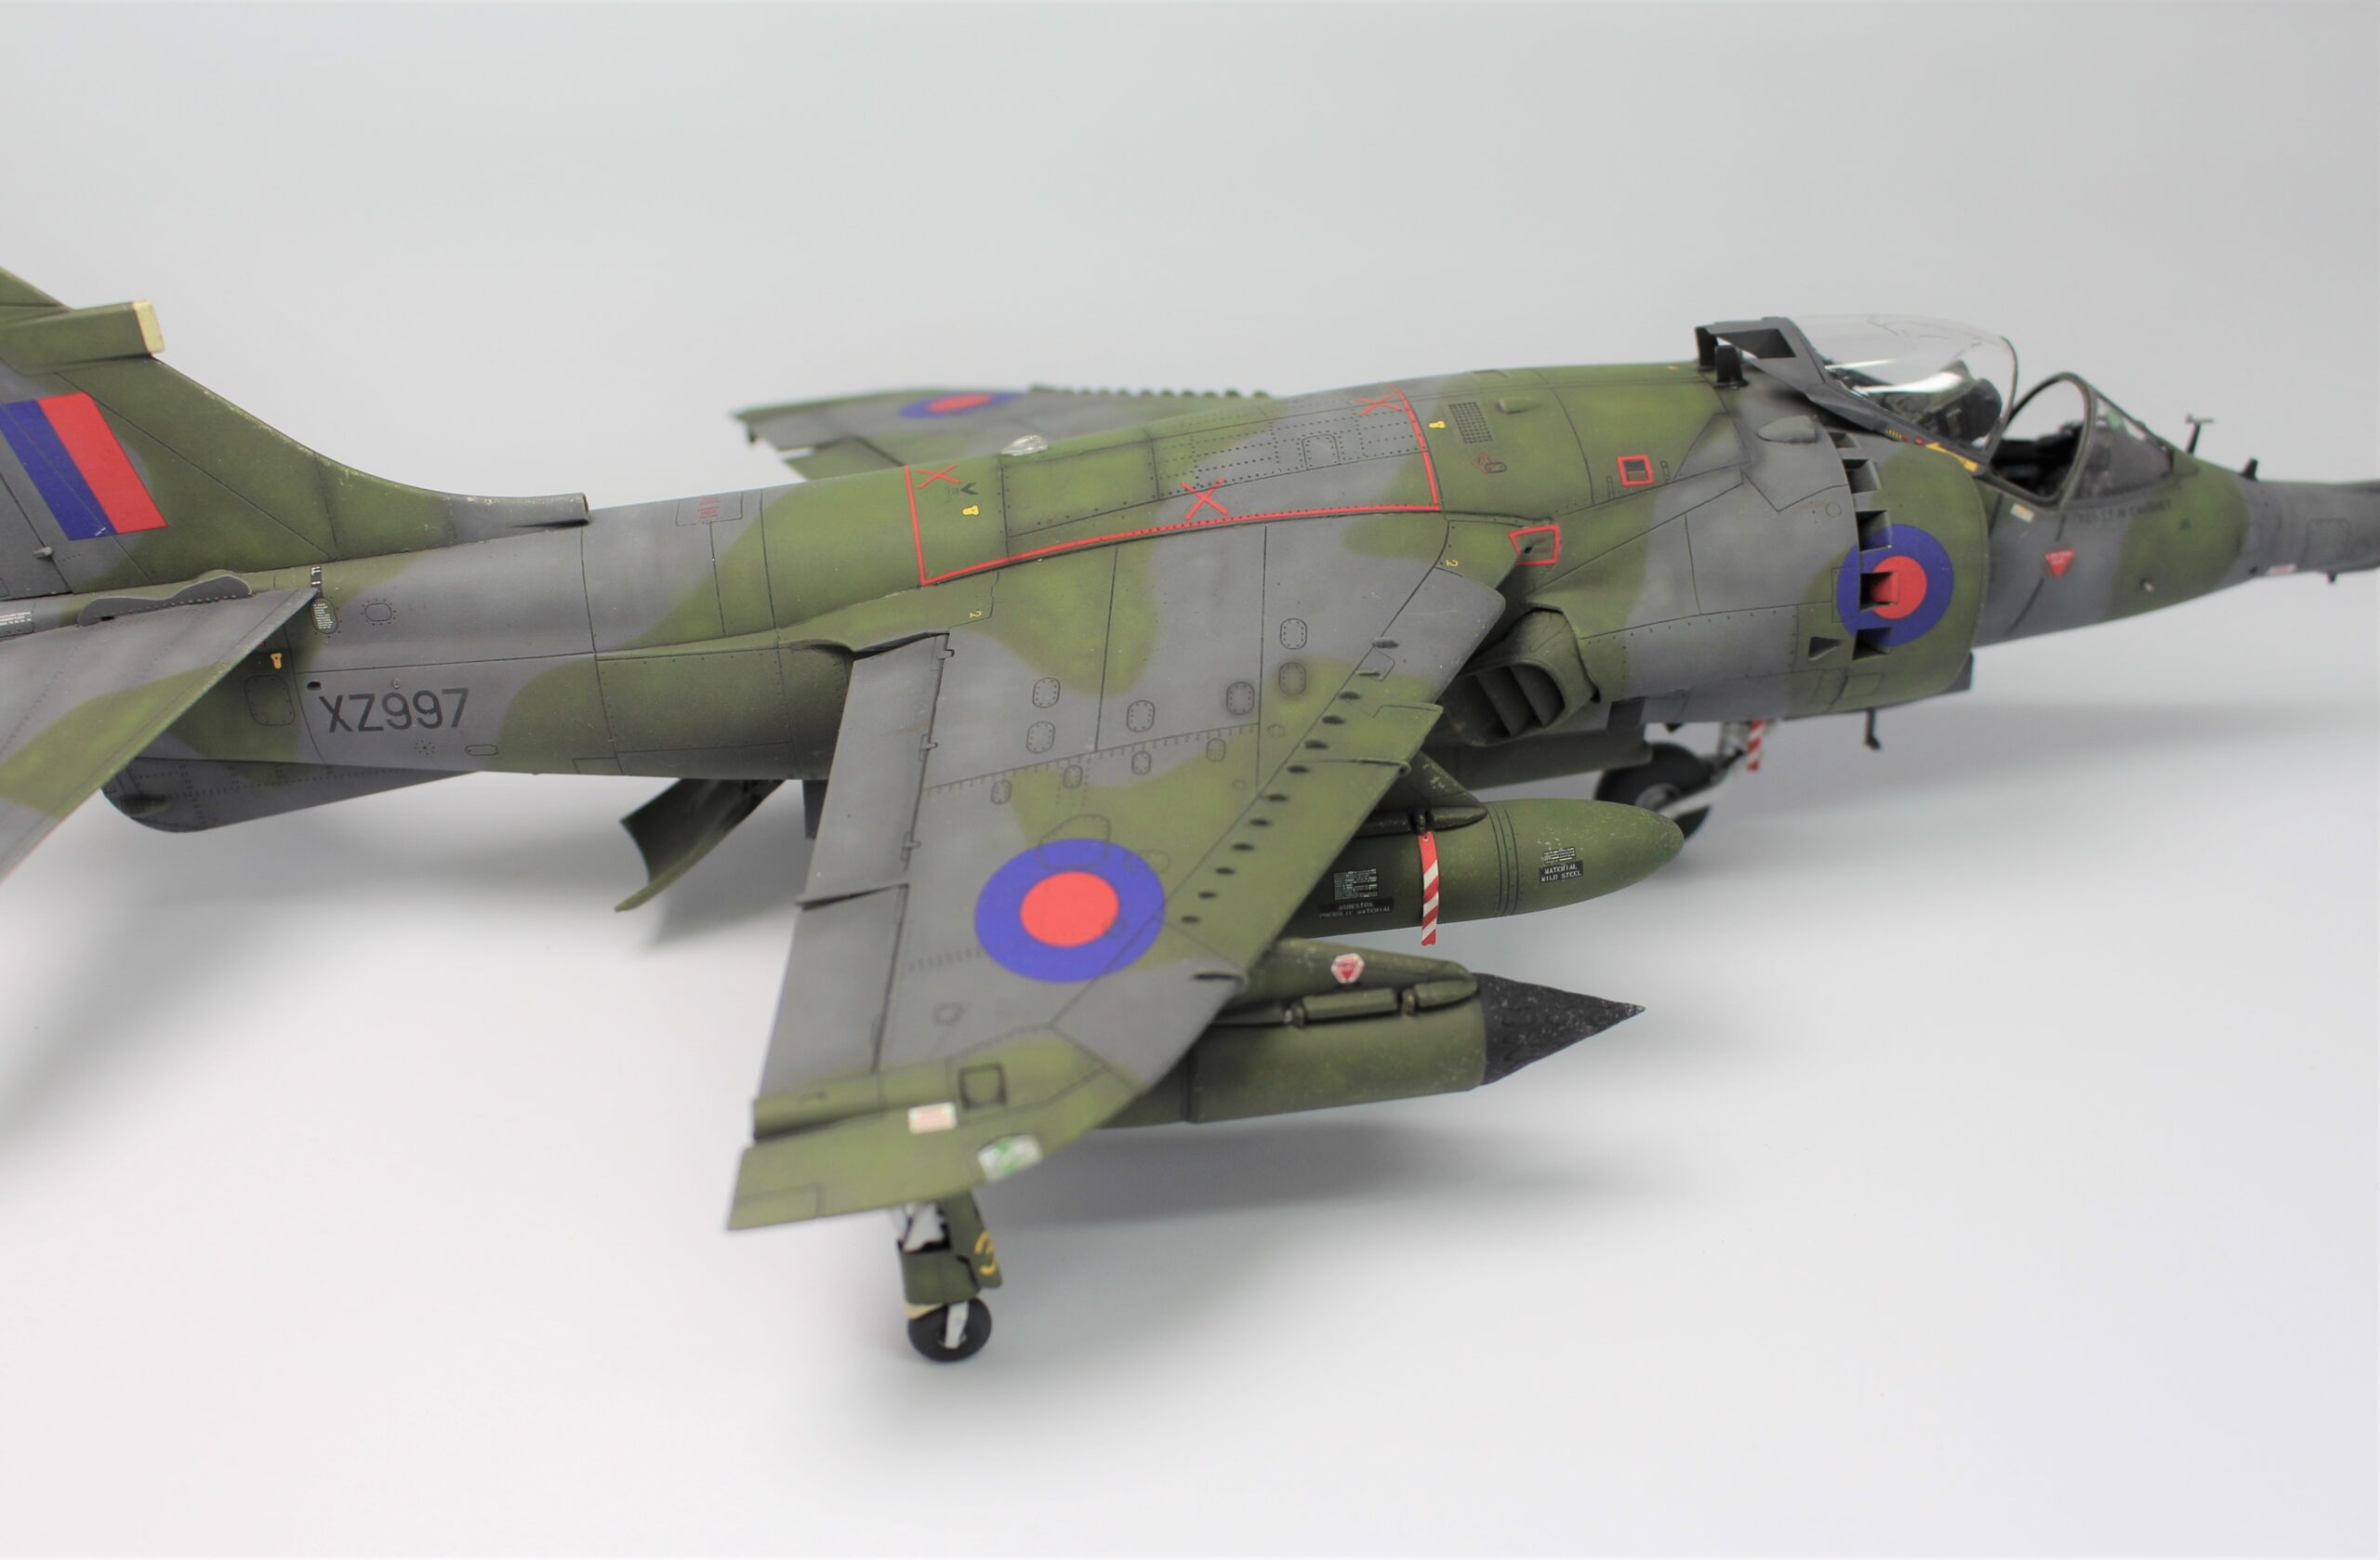
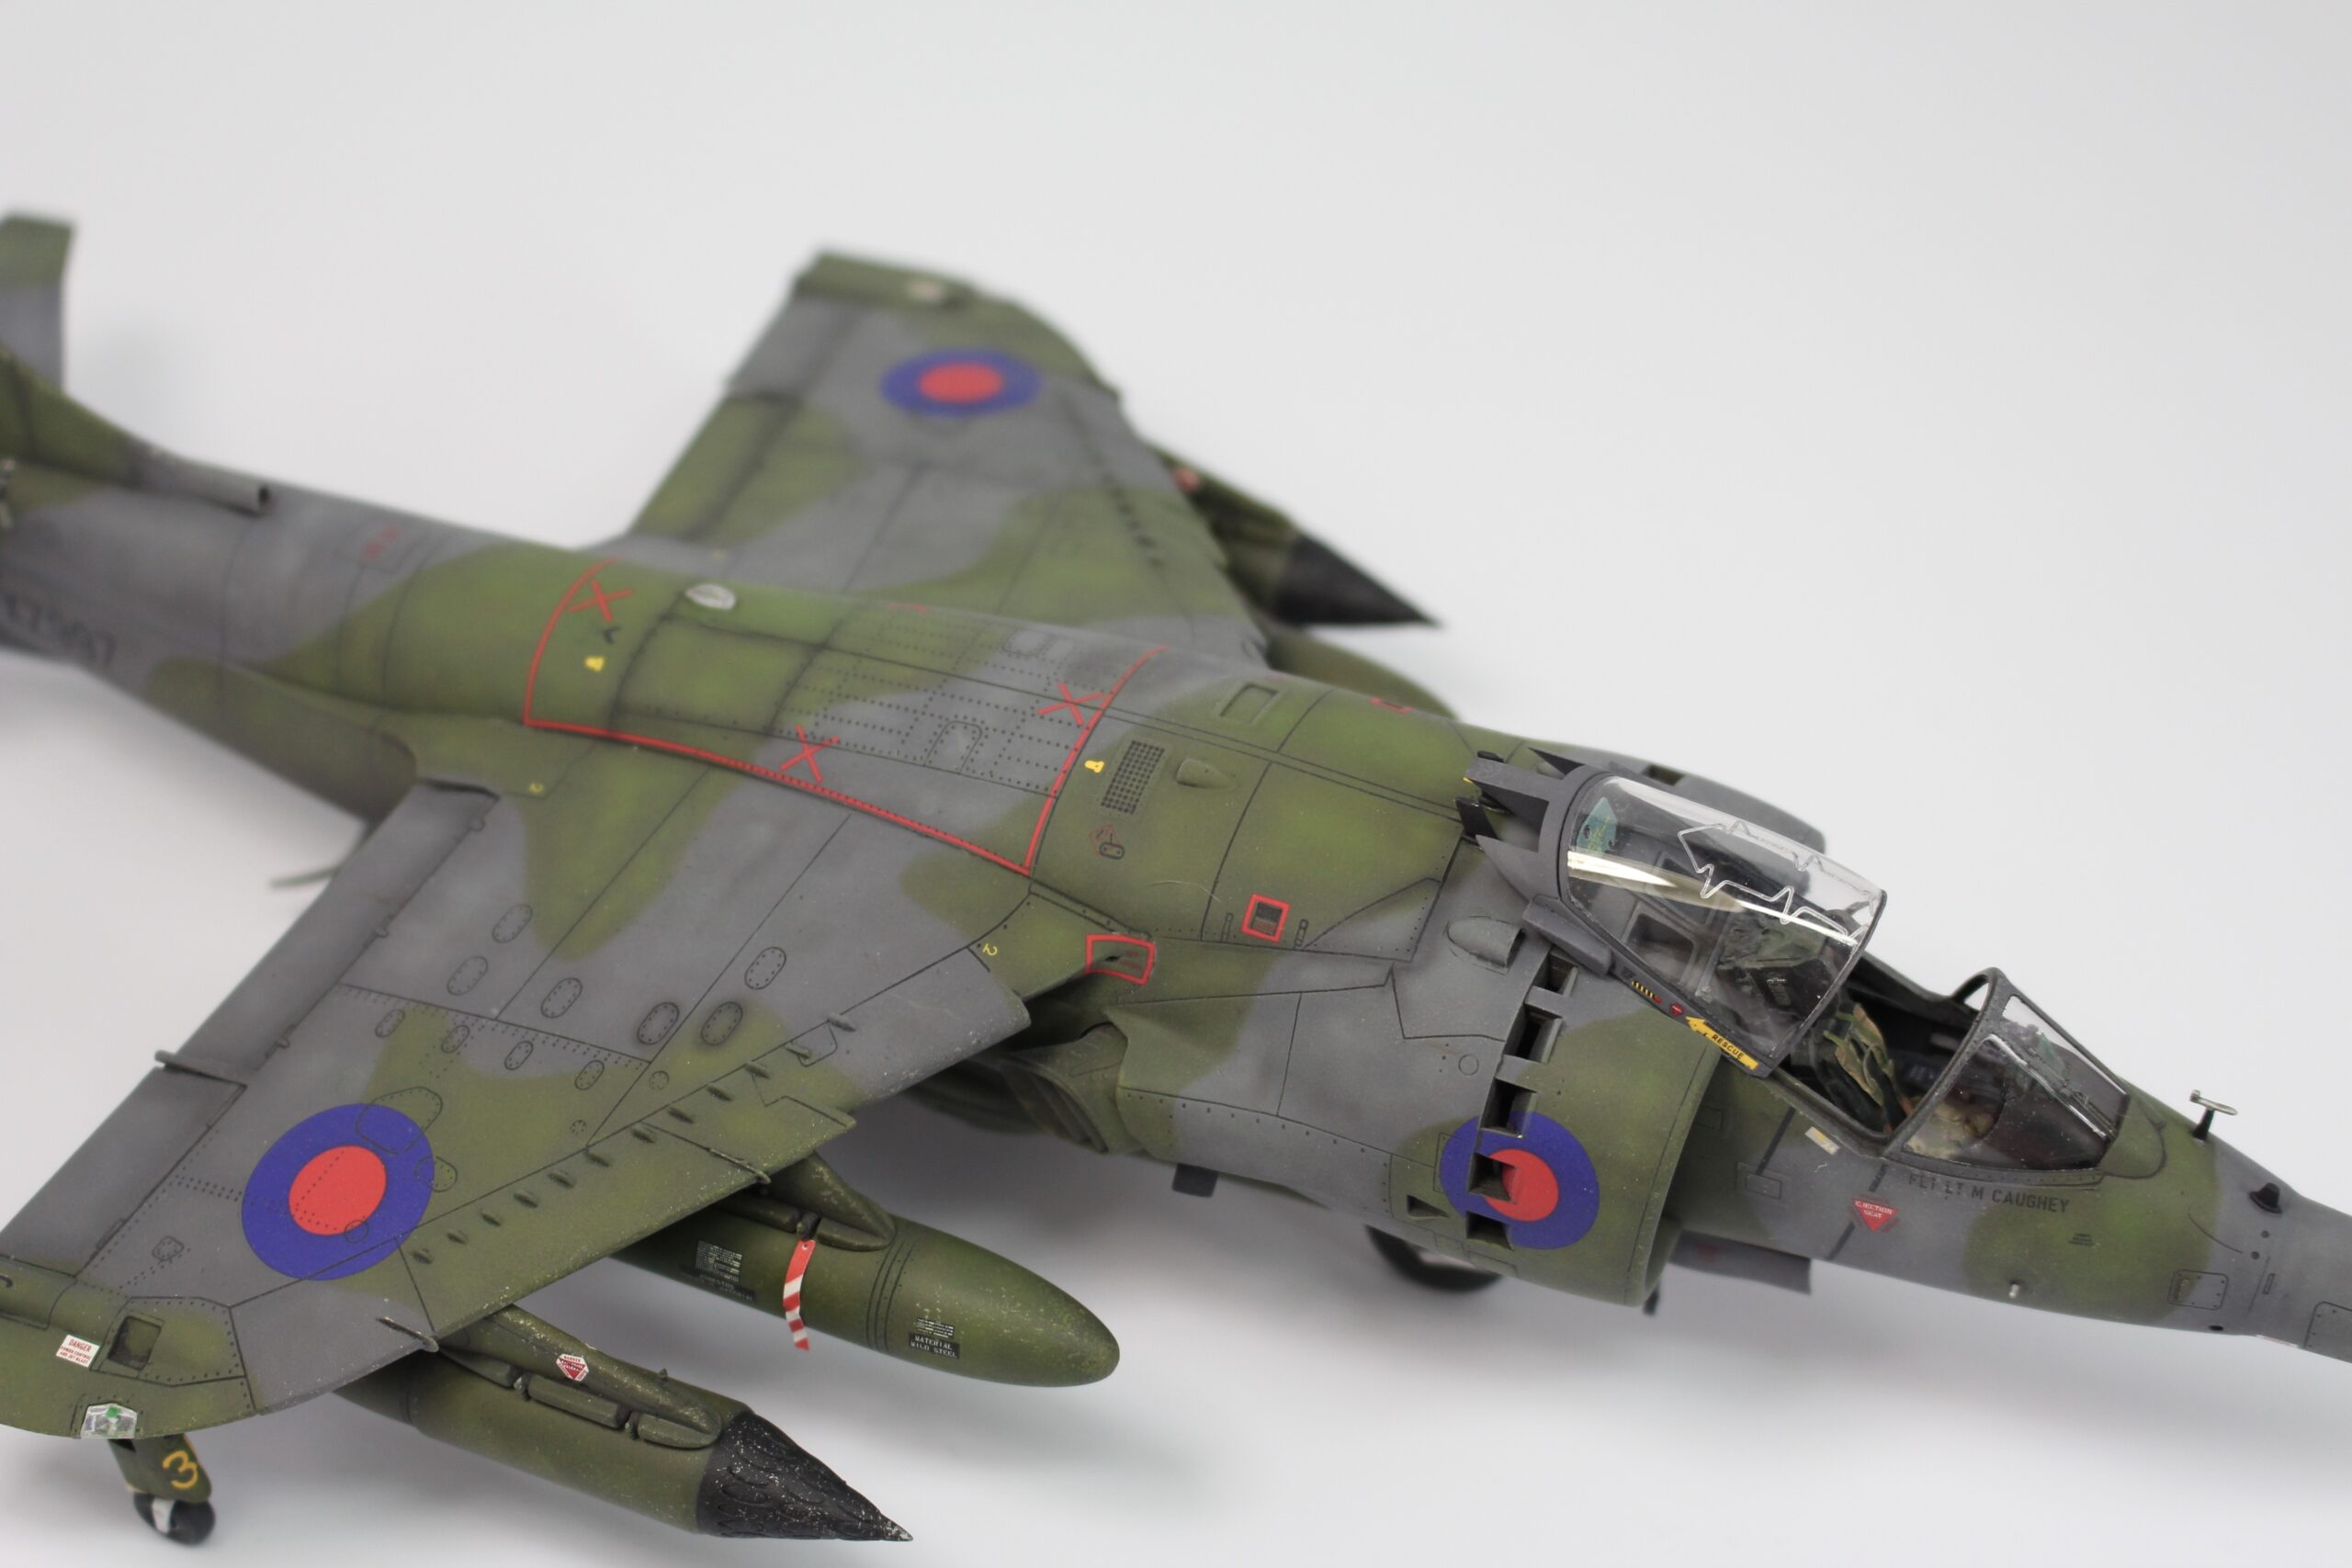
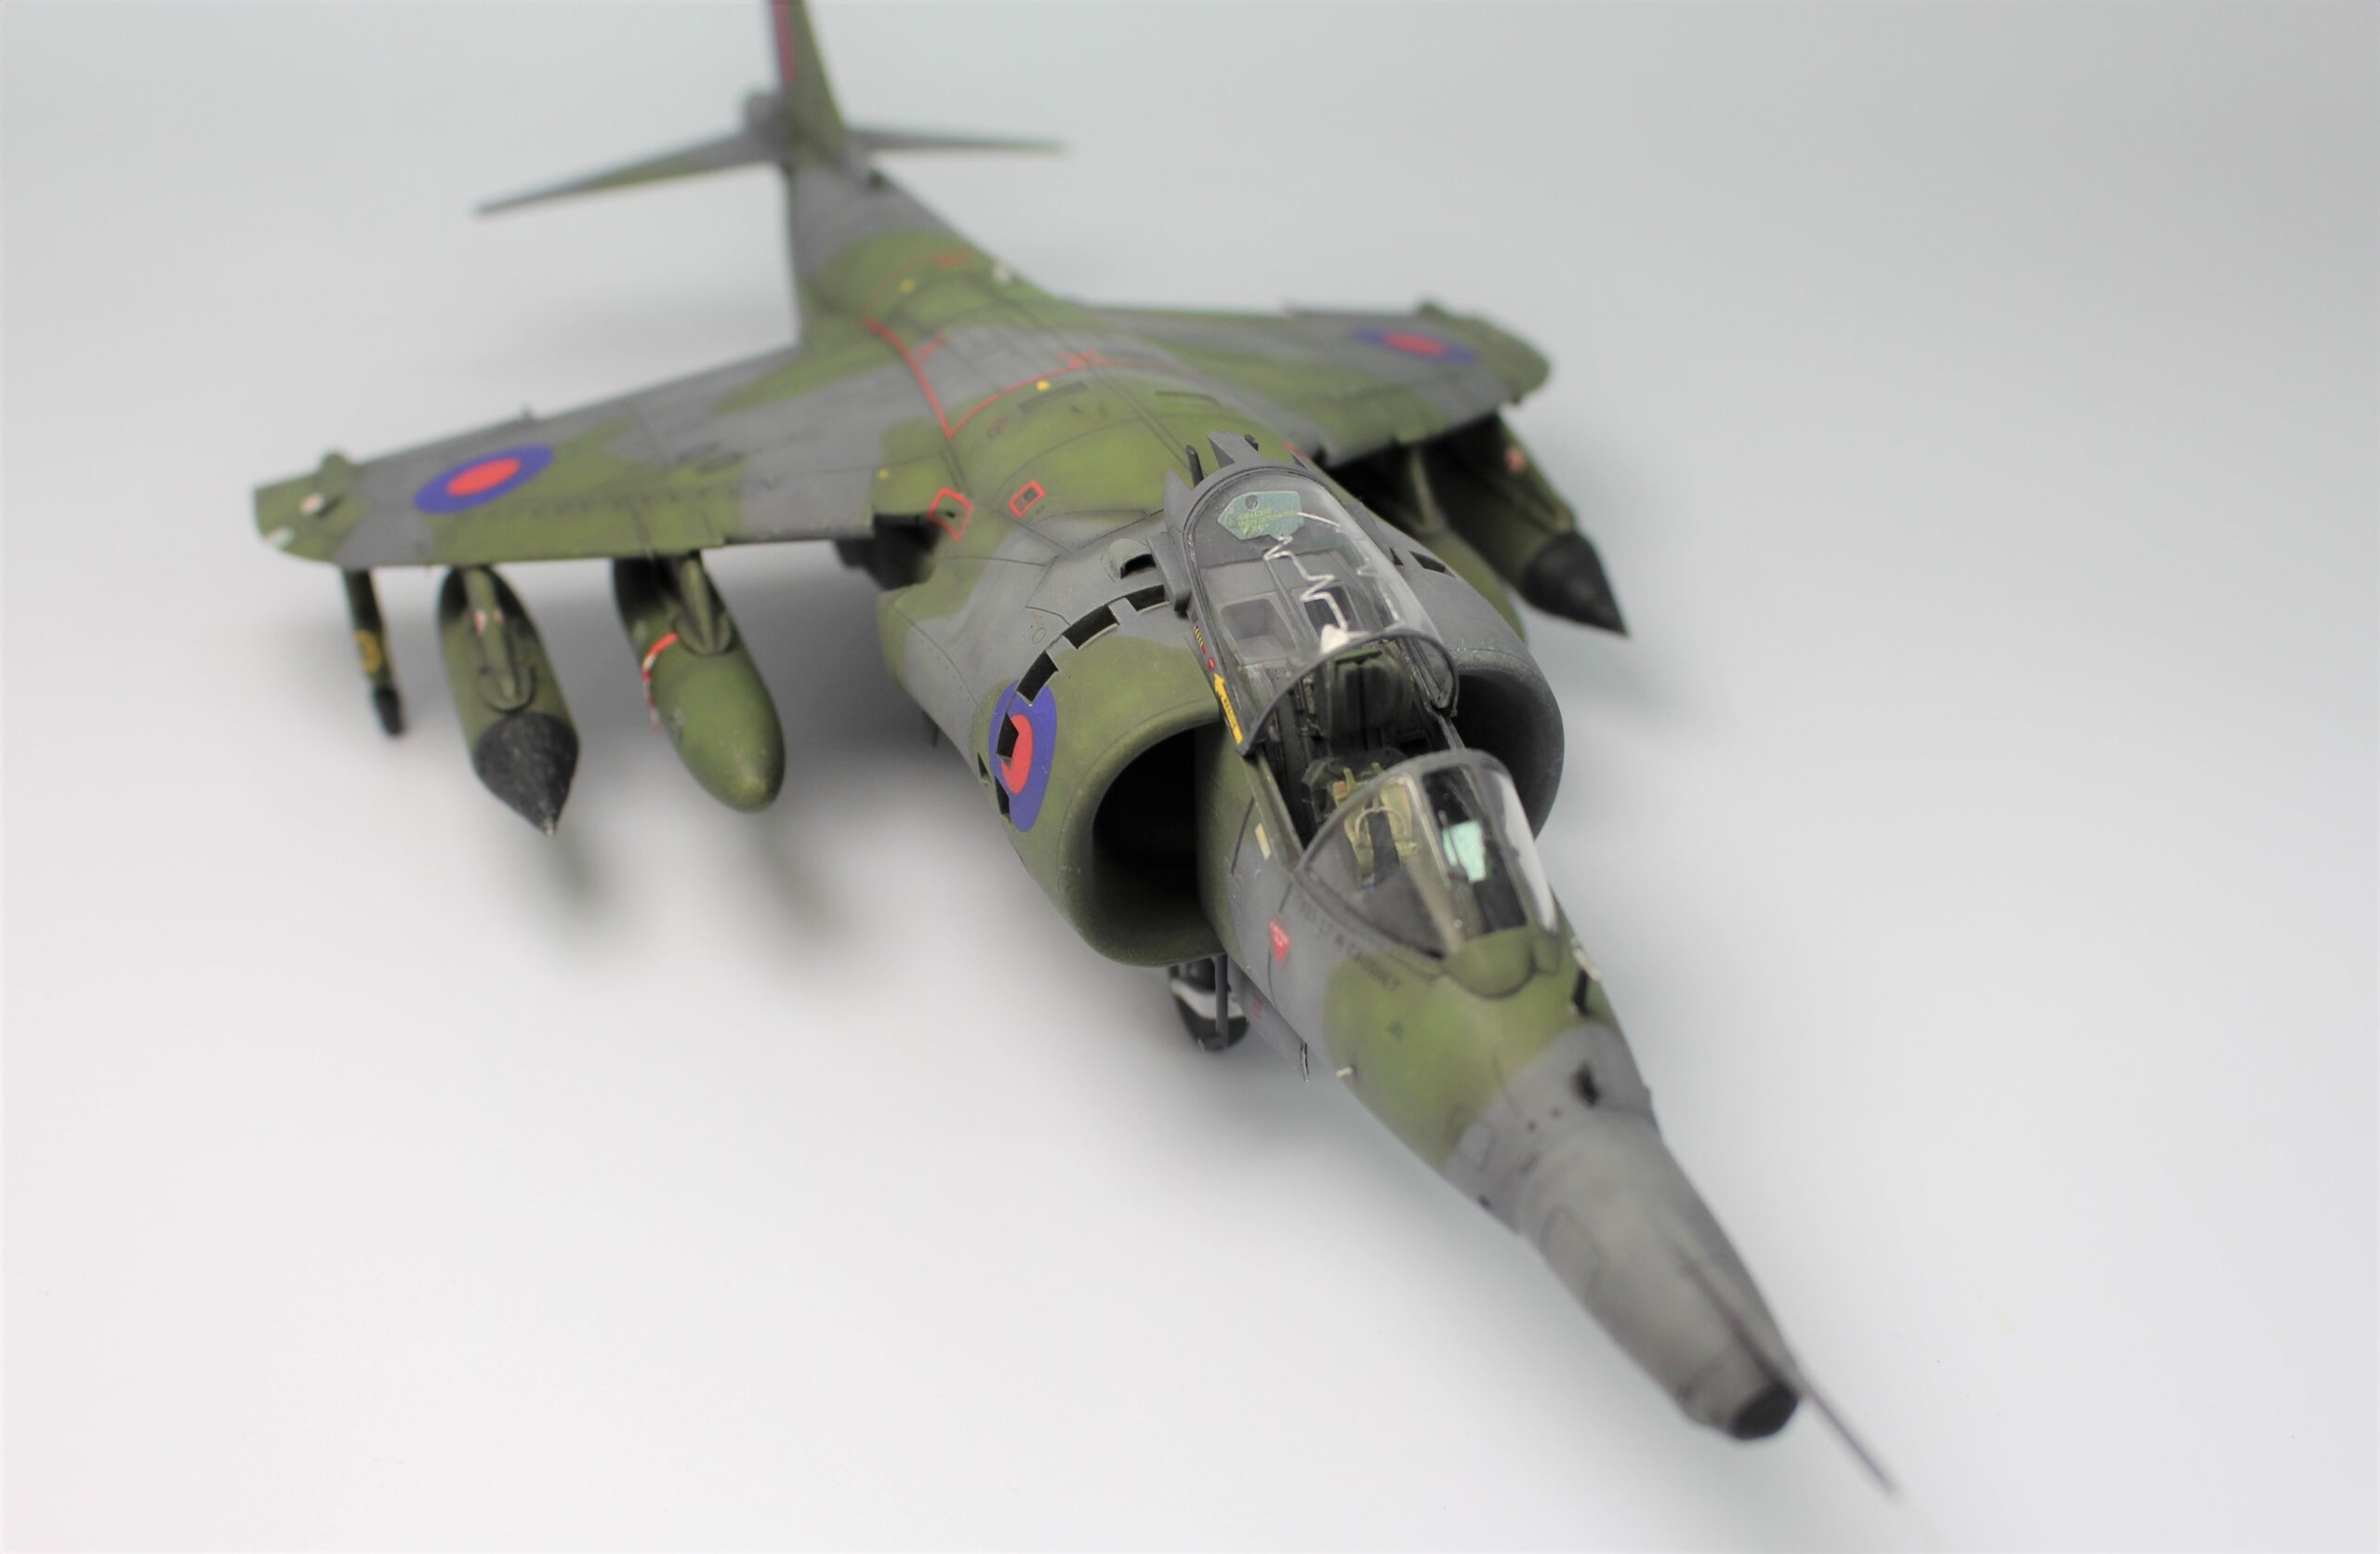
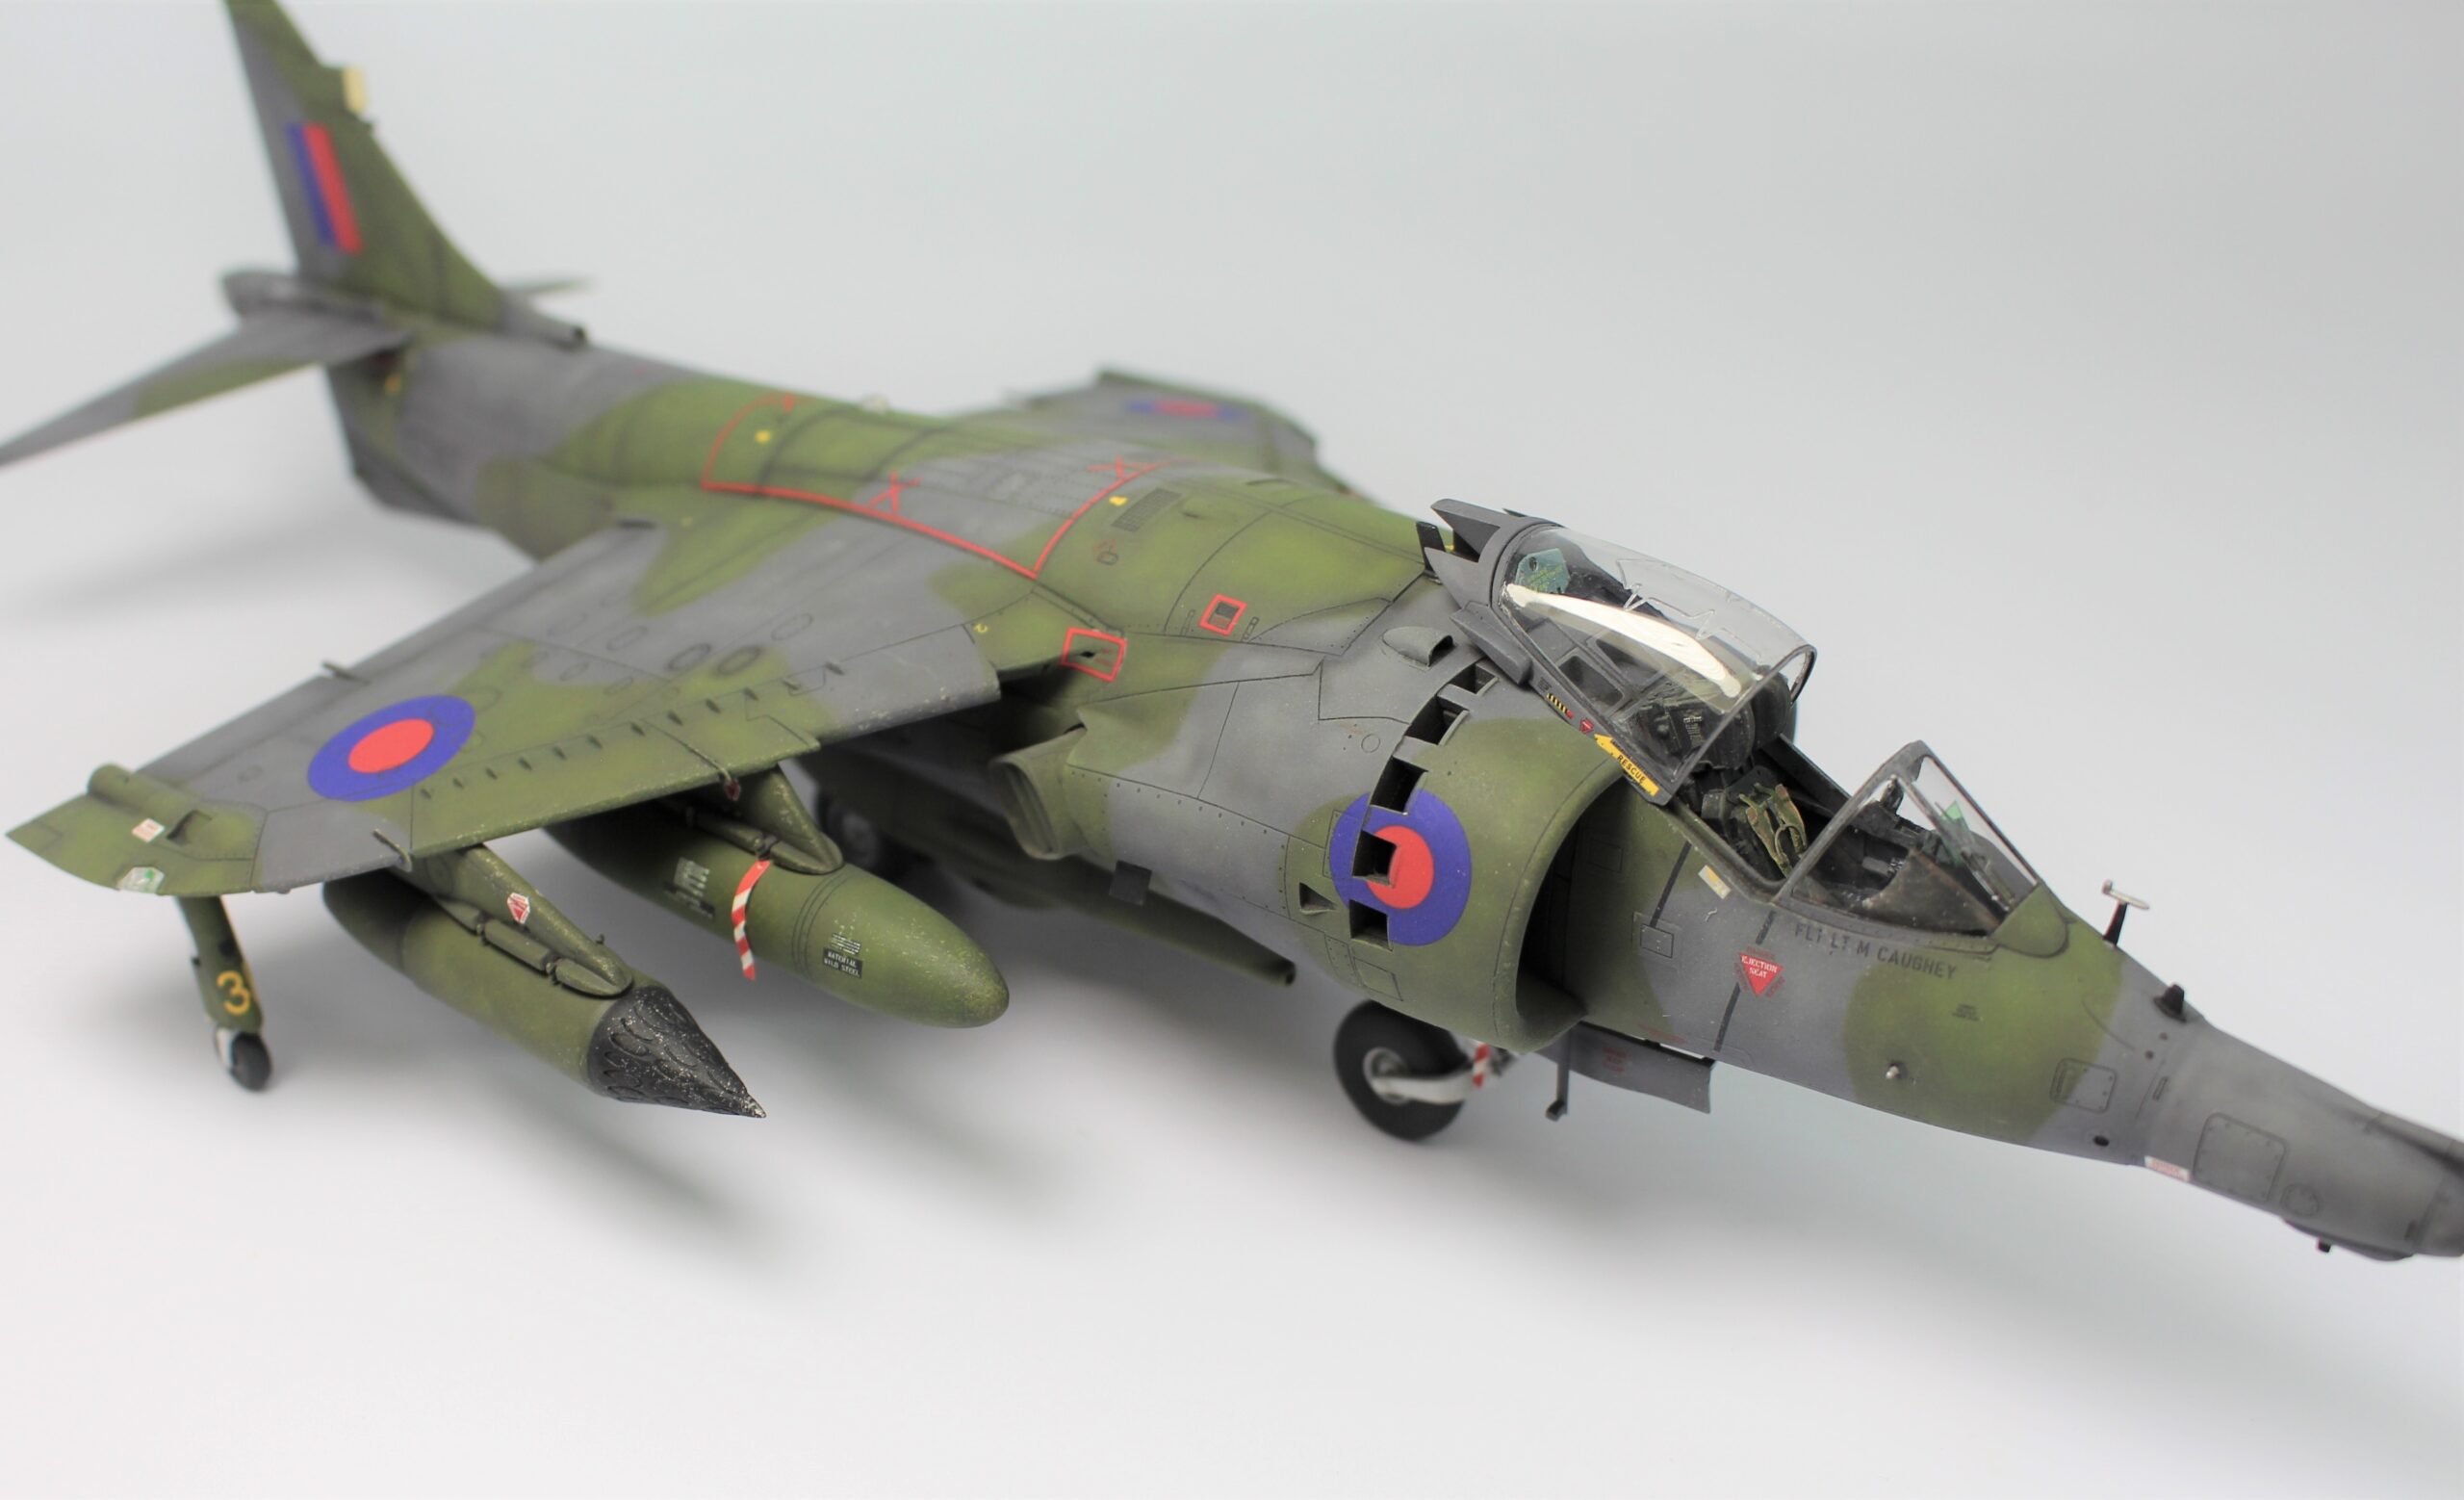
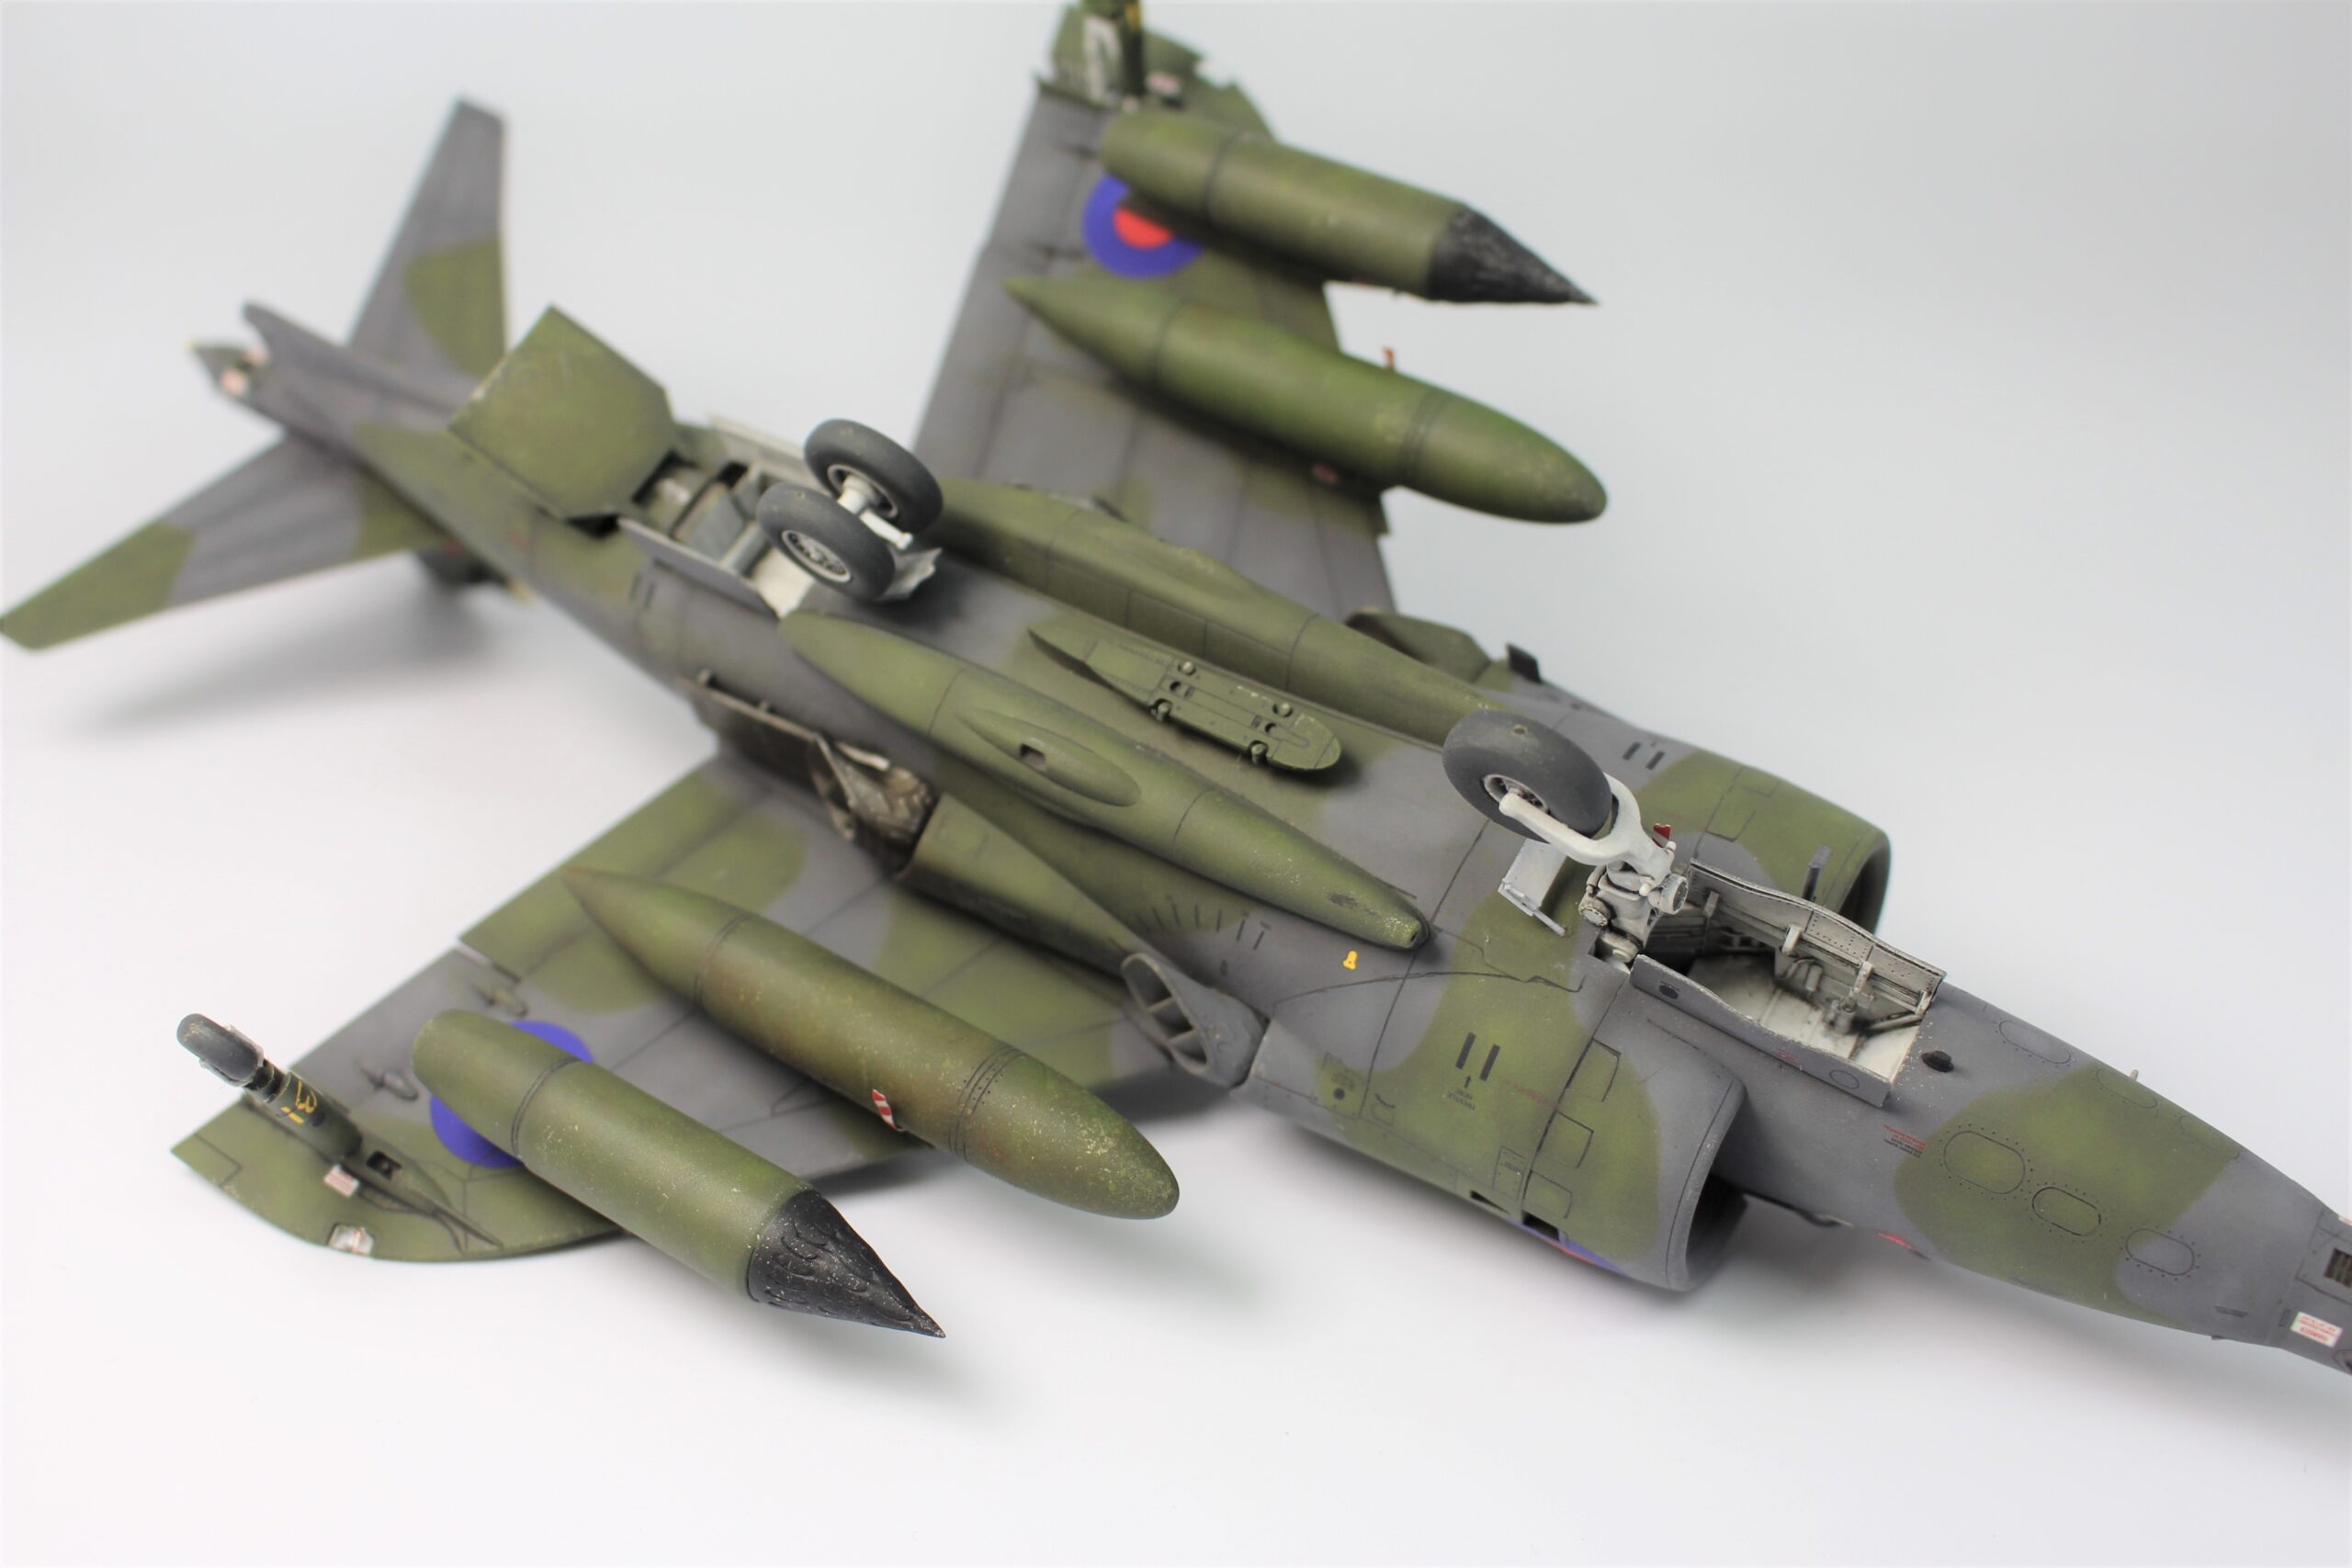
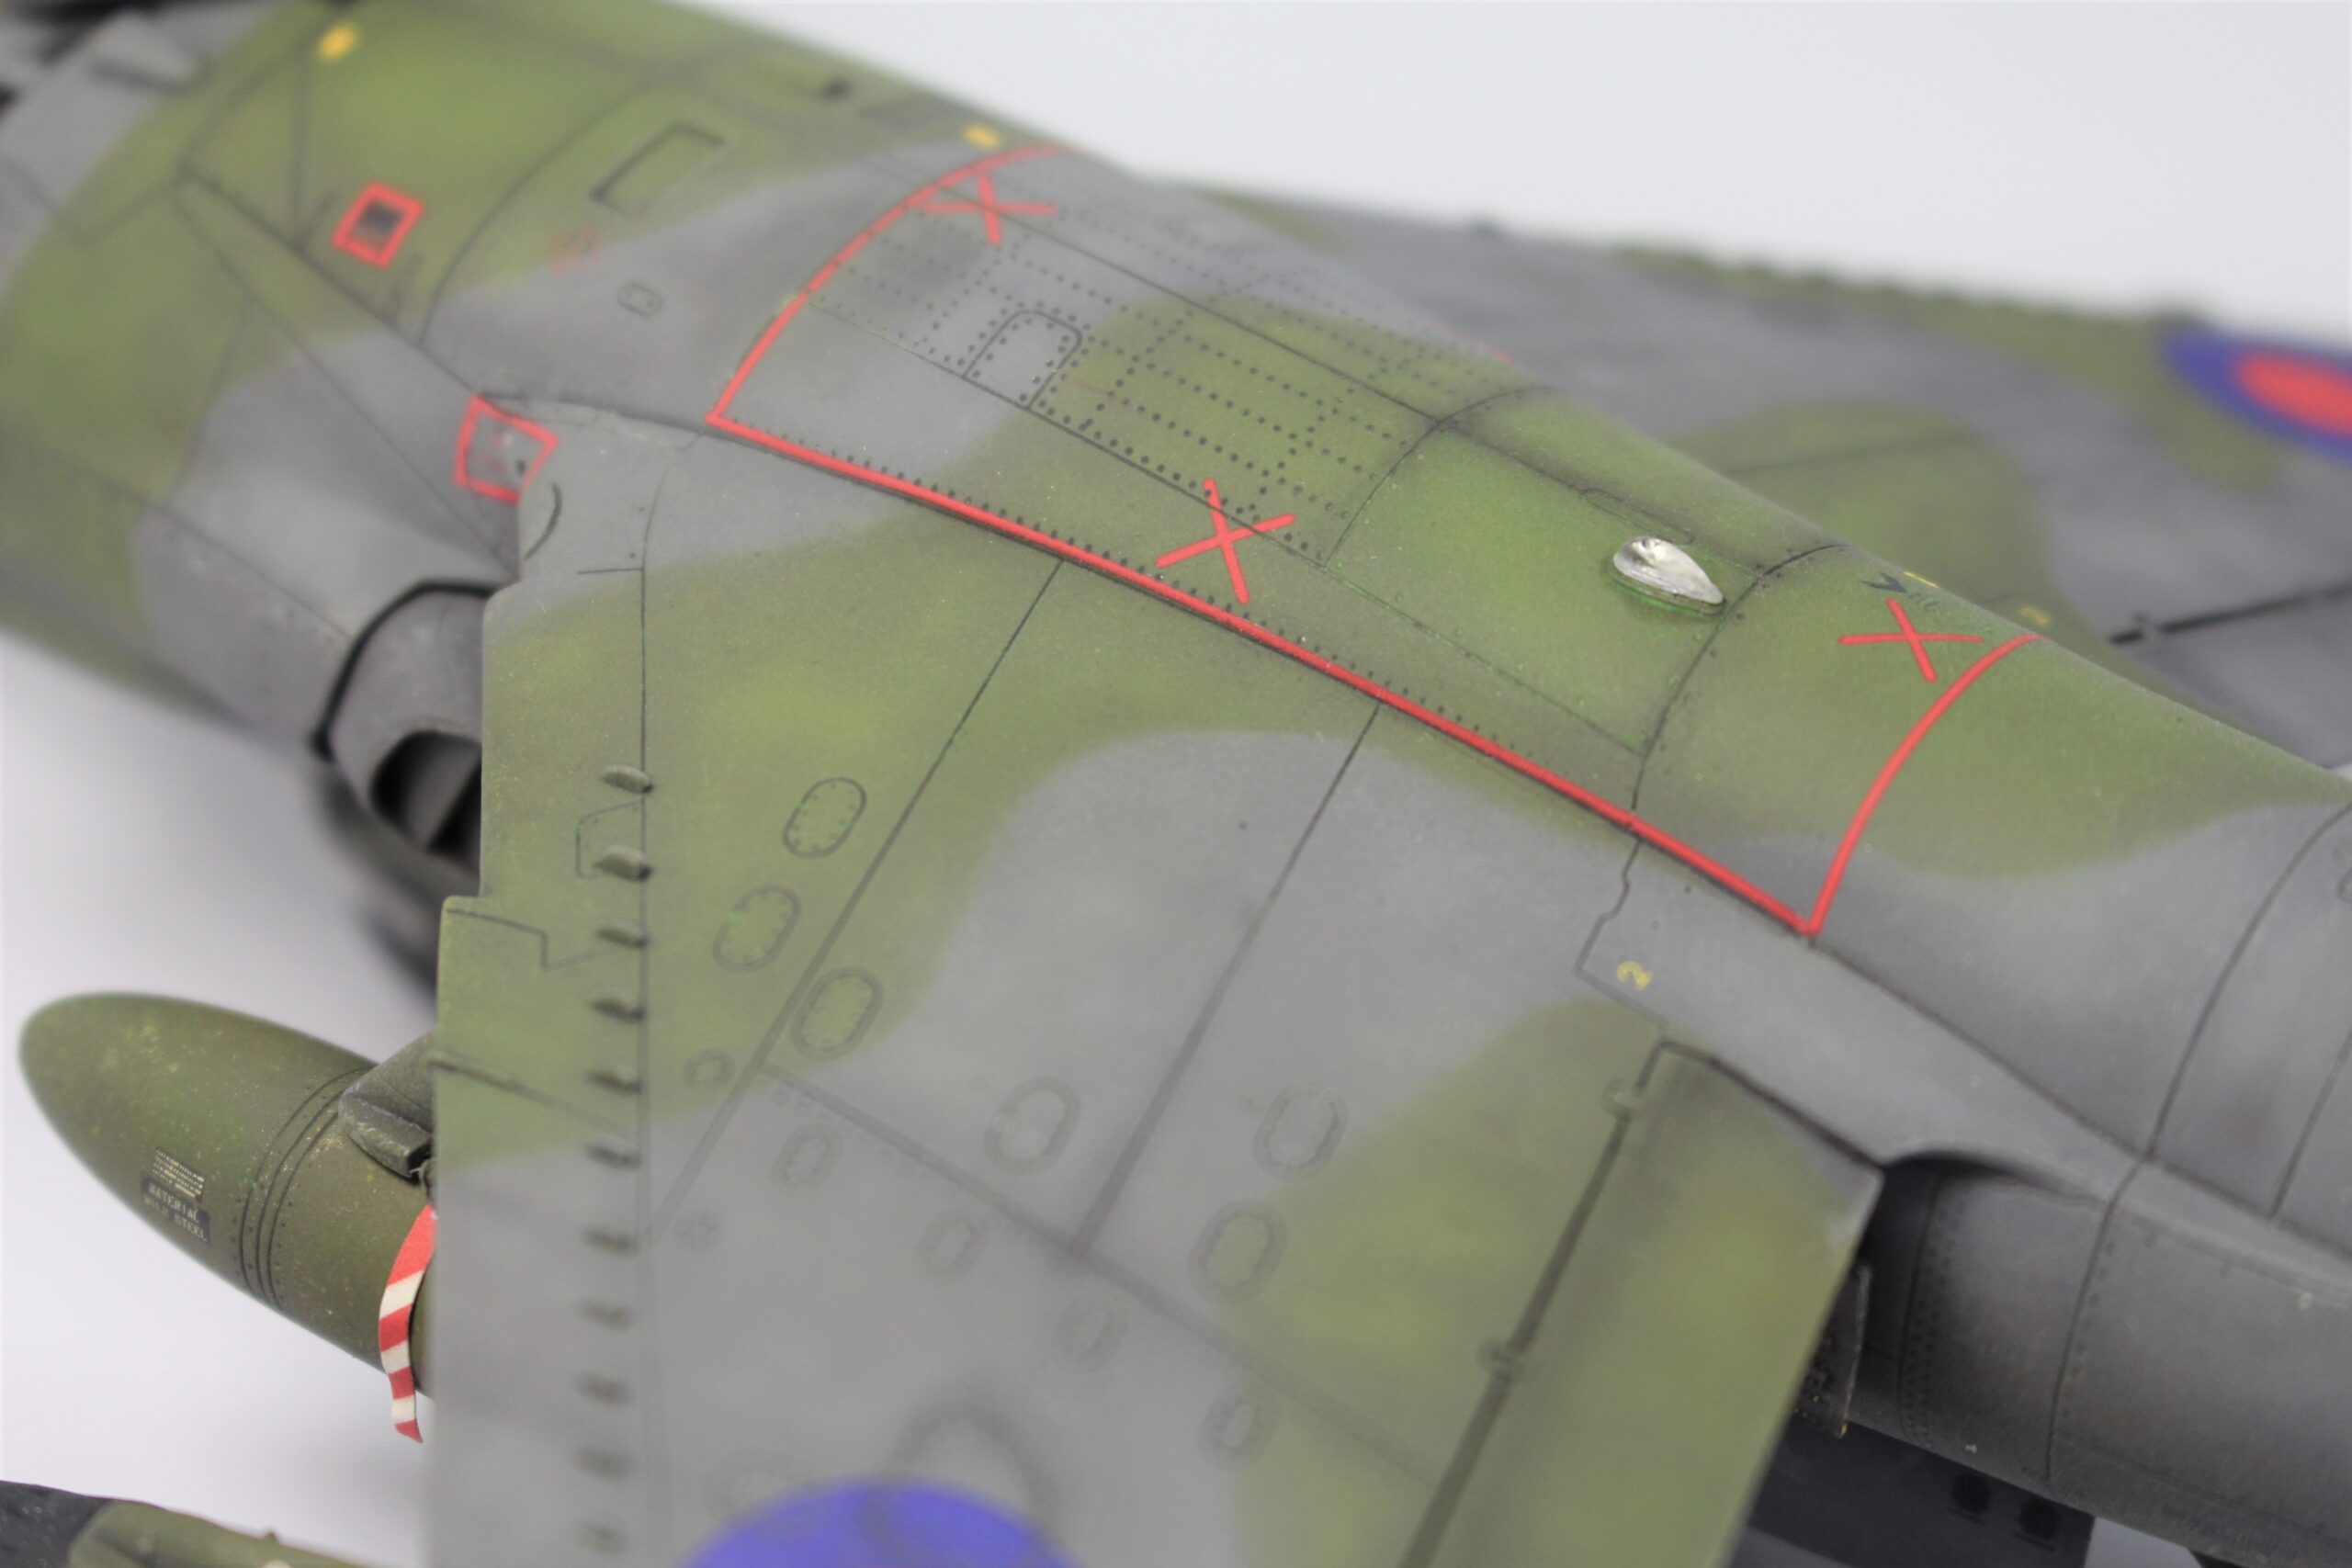
Harrier GR.1/GR.3 Gallery